Introduction
Knowing how to tie a shirt is essential if you want to perfect your look. Whether you need to dress up for a formal event, want to add a stylish twist to a casual outfit, or simply want to breathe new life into an old shirt, this guide can help. In this article, we’ll cover everything you need to know to tie a shirt, from step-by-step instructions to different styles and fashion trends.
Step-by-Step Guide
The first step to tying a shirt is selecting the right one. Choose a shirt that fits you well and is made out of a fabric that can be easily manipulated, like cotton. Once you have the right shirt, follow these simple steps:
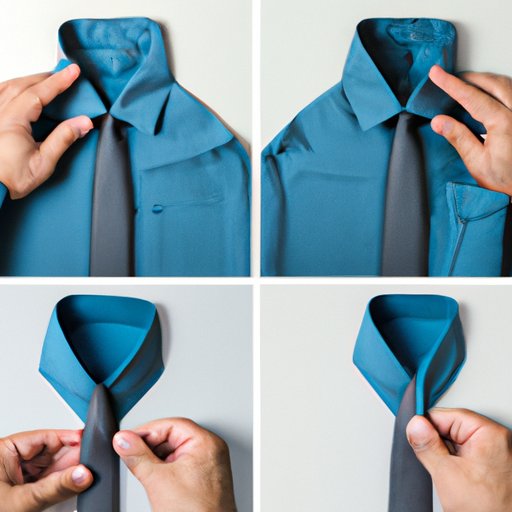
- Start with the shirt unbuttoned and spread out on a flat surface.
- Using your fingers, pinch the fabric in the center of the shirt, just under the collar.
- Tie a knot with the pinched fabric and pull the knot tight.
- Grab the two loose ends of the knot and tie them again. This will help secure the knot.
- Adjust the knot to your liking, making sure it’s centered and tight enough to stay in place, but not too tight that it feels uncomfortable.
- Button up your shirt, starting at the bottom and working your way up.
Remember to create a knot that’s proportional to your body type. If you’re tall and thin, you can opt for smaller-size knots, while those with broader builds would look great with a larger one.
Different Styles
Tying a shirt has various styles and designs. Below we discuss the most common ones:
Front Knot
One of the easiest and most common ways to tie a shirt is to knot it at the front. To achieve this style, follow the instructions above, but instead of tying the knot under the collar, tie it at the bottom of the shirt, right at the waistline. This style is casual and can be paired with high-waisted jeans or skirts.
Crochet Tie
If you’d like a more bohemian look for your shirt, try a crochet tie. Here’s how to achieve it:
- Undo each button; bring the left and right panels to the center of your chest.
- Take the top corners of the left and right sides and tie them together in the center of your chest using a square knot.
- Bring the left tail around the back of your body to your right hip; tie it to your right tail in a square knot to secure it in place.
Fish Tail Knot
The fish-tail knot is perfect for creating a fitted look. Start by knotting the shirt in the center, tuck the knot inside the shirt, just above your belly button, tie it off like a traditional fish-tail braid.
Occasion-Based
Shirts can be tied in various ways to accord with the appropriate dress code for any event. For instance:
Formal Occasions
If you need a more classy look for a formal occasion, try the French tuck style. Follow the step-by-step guide, then tuck in the front part of the shirt into your pants, leaving the back untucked. This style is suitable for weddings, work meetings, and dinner parties.
Casual Occasions
For casual events, try any of the front knot or fish-tail knot described above. These are relaxed and informal styles that look great paired with shorts or jeans.
Fashion Trends
Shirts can make a fashion statement if styled correctly. Below are some trending shirt-tying techniques:
Shoulder Knot
The shoulder knot is a trendy way to style your shirt. Simply tie a knot with your shirt sideways over one shoulder and adjust the rest of the shirt to fit. This style is a perfect fit for a GNO or summer beach party.
Front Twist
A timeless way to tie your shirt is by doing a front twist. Grab a small section of fabric in the center-front of the shirt and twist it. Tuck the sides of the shirt underneath the twisted patch and leave the ends untucked.
DIY/Crafty
Got an old shirt that needs a makeover? Try turning it into a stylish and trendy accessory using any of the styles described above. You can also try making unique patterns on the shirt by tying it in different ways before dying. The possibilities are endless when you’re working on a DIY project.
Conclusion
Tying a shirt is not just about creating a stylish look, but it’s also a problem-solving technique to make an outfit look more put together. With the guide above, you’re now more knowledgeable on the different ways to tie a shirt. So whether you need a chic or relaxed look, we’ve got you covered. Don’t forget to experiment with different styles and make it a fun DIY project.
After all, there’s nothing more satisfying than putting together an outfit that you feel confident and comfortable in.