I. Introduction
Cerebrospinal fluid (CSF) leak is a condition that occurs when the protective fluid that surrounds the brain and spinal cord leaks through a hole or tear in the surrounding tissues. This can lead to severe headaches, dizziness, and other complications. While it is always recommended to seek medical attention if you suspect you have a CSF leak, there are also steps you can take to test for this condition at home.
In this tutorial, we will walk you through the process of testing for CSF leaks at home. We will also discuss the common symptoms of CSF leaks, treatment options, and precautions to take when conducting DIY tests.
II. The Ultimate Guide to Testing for CSF Leaks at Home: A Step-by-Step Tutorial
If you suspect you may have a CSF leak, there are certain symptoms to look out for. These include:
- Headaches that worsen when standing up
- Drainage of clear fluid from the nose or ear
- Ringing in the ears
- Visual disturbances
- Nausea and vomiting
Before you begin testing for CSF leaks at home, there are some things to keep in mind. First, make sure to wash your hands thoroughly with soap and water to prevent infection. Second, gather all the necessary materials for the test, including a sterile container for collecting the fluid sample and any testing materials you plan to use.
Here’s a step-by-step guide to testing for CSF leak at home:
1. Collecting the Fluid Sample
The first step in testing for CSF leaks at home is to collect a fluid sample. You can do this using a sterile container, which you can purchase at your local pharmacy.
To collect the fluid sample, tilt your head to the side and use a tissue to wipe away any excess fluid from your nose or ear. Then, take the sterile container and carefully place it under your nose or ear to collect any fluid that drains out.
It’s important to note that a CSF leak may not always produce a visible fluid. In some cases, the leakage may be so small that it only produces a few drops of fluid or no fluid at all. If you are unsure whether you have collected a sufficient sample, consult with a healthcare professional.
2. Conducting the Fluid Tests
Once you have collected the fluid sample, you can conduct several tests to determine whether it is cerebrospinal fluid. Some of the most common tests include:
- Glucose testing: This involves using glucose testing strips to check whether the fluid contains glucose. Because glucose is not normally found in CSF, a positive result indicates a cerebrospinal fluid leak.
- Halo test: This test involves placing the fluid on a piece of filter paper and allowing it to dry. If a halo forms around the fluid, it is likely cerebrospinal fluid.
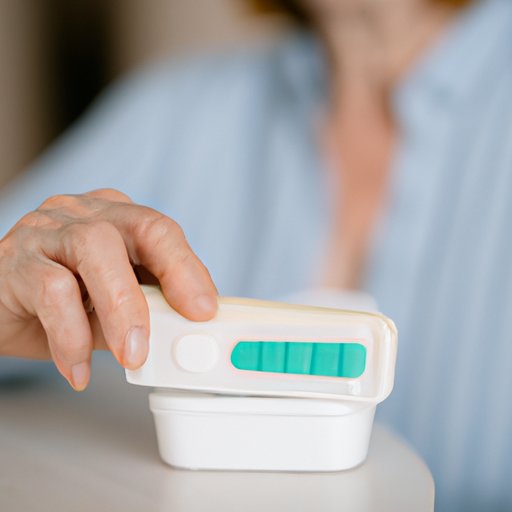
- Dipstick urinalysis: This test involves dipping a dipstick into the fluid and comparing the results to a chart. Abnormal results may indicate a CSF leak.
3. Reading the Results
Once you have conducted the tests, it’s time to interpret the results. If any of the tests indicate the presence of cerebrospinal fluid, you may have a CSF leak and should seek medical attention immediately.
D. Safety Measures to Undertake
When testing for CSF leaks at home, it is important to take safety precautions to avoid infection or other complications. Make sure to wash your hands thoroughly before and after conducting the tests. Use only sterile materials and equipment, and avoid reusing or sharing these items with others.
III. 5 Signs You May Have a CSF Leak and What to Do About It
While the most common symptoms of CSF leak have been mentioned, there are still other signs that you should watch out for. Here is a list of 5 other signs that you may have a CSF leak:
- Neck stiffness
- Light sensitivity
- Changes in taste or smell
- Difficulty sleeping
- Cognitive and gait disturbances
If any of these symptoms are present, it is important to conduct a self-assessment test to determine whether you have a CSF leak.
A. Common Symptoms of CSF Leak
As mentioned, the most common symptoms of a CSF leak include headaches that worsen when standing up, drainage of clear fluid from the nose or ear, ringing in the ears, visual disturbances, nausea, and vomiting. If you experience any of these symptoms, you may want to perform a self-assessment test or consult with a healthcare professional.
B. Self-Assessment Tests for CSF Leak
There are several testing methods you can use to self-assess whether you have a CSF leak, but these do not fully substitute a doctor’s diagnosis. Here are some tests you can try:
- Fluid collection test: Similar to the test conducted in step one, tilt your head to the side and place a sterile container under your nose or ear. If you notice more than a teaspoon of fluid collected, a CSF leak is likely present.
- Lie-down test: Lie down flat for 20-30 minutes and then stand up quickly. If you experience a headache that worsens when standing up, it’s a possible sign of a CSF leak.
- Pressure change test: When descending in an elevator or driving down a steep mountain hill, do you feel an abrupt headache? It’s a possible indication that there’s a CSF leak.
C. What to Do If the Tests Indicate You Have a CSF Leak
If you conducted a self-assessment test and suspect you have a CSF leak, seek medical attention immediately. A healthcare professional can perform additional tests to confirm the diagnosis and provide you with treatment options.
IV. DIY CSF Leak Tests: What You Need to Know
Testing for CSF leaks at home is convenient and cost-effective. But you should know the materials and instructions required to execute these tests. Here’s everything you need to know before testing at home:
A. Materials Required for a CSF Leak Test
The materials required for a CSF leak test depend on the type of test you will be conducting. Some of the most common materials include:
- Glucose testing strips
- Filter paper
- Needles and syringes
- Dipstick urinalysis kit
- Sterile container for collecting the fluid sample
B. Instructions for Using the Materials
The instructions for conducting a CSF leak test may vary depending on the test method you choose but the following are some of the common steps:
1. Glucose Testing Strips
- Collect the fluid sample as described above
- Place the fluid sample on a sterile surface
- Take a glucose testing strip and dip it into the fluid for a few seconds
- Record the results as per the instructions in the strip packet
2. Halo Test
- Place a filter paper on a sterile surface
- Collect the fluid sample with a sterile needle and syringe
- Place a drop of the fluid in the center of the filter paper
- Allow the filter paper to dry
- Look for a halo that forms around the fluid spot
3. Dipstick Urinalysis
- Fill the container with the fluid sample as directed on the dipstick package
- Dip the testing dipstick into the container
- Compare the color of the reaction area on the strip with the chart provided in the dipstick package
- Record the results according to the instructions provided in the package
C. Precautions to Take During Self-Testing
When conducting DIY tests, make sure to use sterile materials, and avoid sharing or reusing these materials. It’s also important to follow the instructions provided with the testing material to accurately interpret the results. If you experience any complications while conducting the test, seek medical attention immediately.
V. The Benefits of Testing for CSF Leaks at Home vs. Going to the Doctor
While it’s always recommended to seek medical attention if you suspect you have a CSF leak, there are some advantages to conducting the tests at home. Here’s what you need to know:
A. Advantages of Home Test
- Convenience: You can test for CSF leaks at home, without having to schedule an appointment or visit a healthcare provider.
- Cost-effective: Conducting the tests at home can help save money, as you don’t have to pay for doctor’s appointments or hospital visits.
- Quick Results: DIY testing can provide quick results, which can help you determine whether you need to seek medical attention.
B. Benefits of Visiting a Doctor
- Professional Diagnosis: Doctors can conduct more extensive tests to determine the cause of the CSF leak and provide appropriate treatment, which DIY tests may not provide.
- Access to Treatment Options: Healthcare professionals can prescribe the necessary treatment plan to combat the CSF leaks.
C. Potential Cost Savings of Testing at Home
Conducting the test at home can help with cost savings on health spending by avoiding unnecessary visits to the hospital. Even so, doctors can confirm diagnosis and provide comprehensive care.
D. Risks of Self-Testing
While testing at home is convenient and cost-effective, it is not without risks. Mishandling of gadgets and unsafe environments may cause more harm than help. Furthermore, inadequate testing material usage or interpretation can lead to false negatives or positives, respectively.
VI. What to Do If You Suspect You Have a CSF Leak: A Practical Guide
If you suspect you have a CSF leak, here are some tips to follow:
1. When to Test at Home
You should start testing at home if you experience any symptoms of a CSF leak such as headaches, vertigo, visual disturbances, nose or ear drainage, etc. Besides, after seeking a doctor’s diagnosis and treatment plan, it’s essential to confirm CSF leak treatment effectiveness through a follow-up test at home.
2. When to Seek Medical Attention
If you conduct a self-assessment test and suspect you have a CSF leak, seek medical attention immediately. A healthcare professional will provide you with the necessary treatment and management plan to control this condition.
B. Treatment Options for CSF Leaks
If you have been diagnosed with a CSF leak, there are several treatment options available. These include:
1. Non-Surgical Treatment Options
Non-surgical treatment options include rest, pain relief medications, and caffeine, to name a few.
2. Surgical Treatment Options
Surgical options, such as epidural blood patch, CSF patch grafting, or endoscopic CSF leak repair, will be offered if non-surgical options do not work.
VII. Conclusion
To identify whether a person is suffering from a CSF leakage, there are numerous home testing procedures that can be followed. These procedures are time-saving, affordable, and provide less discomfort to patients compared to traditional in-hospital testing. However, as aforementioned, it is advised to seek medical attention as soon as symptoms of CSF leakage are experienced for appropriate care and diagnosis.
In conclusion, knowing the symptoms is the first step to test for CSF leaks at home. If you test positive, you need to contact a healthcare professional immediately, who will conduct further tests for appropriate diagnosis and treatment. Early detection is vital in treating CSF leaks, and that’s why testing at home can be a quick and convenient way to take advantage of the benefits that come with early diagnosis.
Above all, safety and hygiene should be prioritized when conducting DIY tests. Always remember to follow the steps and precautions we’ve mentioned and take any necessary steps to prevent infections.