Introduction
Do you love indulging in chocolate desserts or making your homemade chocolates? One crucial step in making delicious chocolate treats is tempering chocolate. This process involves heating and cooling chocolate to create a smooth, shiny, and stable finished product with a satisfying snap when bitten. In this article, we will explore why tempering chocolate is essential, the science behind the process, a step-by-step guide, expert tips, and tricks, creative ways to use tempered chocolate, health benefits of dark chocolate, the history of chocolate tempering, and more. Let’s dive right in!
The Importance of Tempering
Tempering is the process of heating and cooling chocolate to specific temperatures and then holding it at a consistent temperature to stabilize the cocoa butter crystals in the chocolate. Cocoa butter, which comprises approximately 50% of chocolate, is a fat that can solidify into different crystal forms depending on the temperature it is melted and cooled at. The ideal temperature for tempering chocolate can vary depending on the type of chocolate, but it generally ranges between 86°F to 91°F (30°C to 32°C) for dark chocolate and 84°F to 87°F (29°C to 31°C) for milk and white chocolates.
Properly tempered chocolate has a shiny appearance, a satisfying snap when broken, and does not melt easily when touched. It also gives a good taste and texture to chocolate-based desserts. If chocolate is not tempered or not tempered correctly, the cocoa butter in the chocolate can crystallize unevenly, resulting in a dull, uneven or streaky texture when hardened, a coarse-grained texture on the surface, and a fat bloom or sugar bloom, where fats or sugars in chocolate rise to the surface and cause whitish discoloration. Moreover, poorly tempered chocolate may melt at a lower temperature, resulting in a sluggish or melted texture even at room temperature.
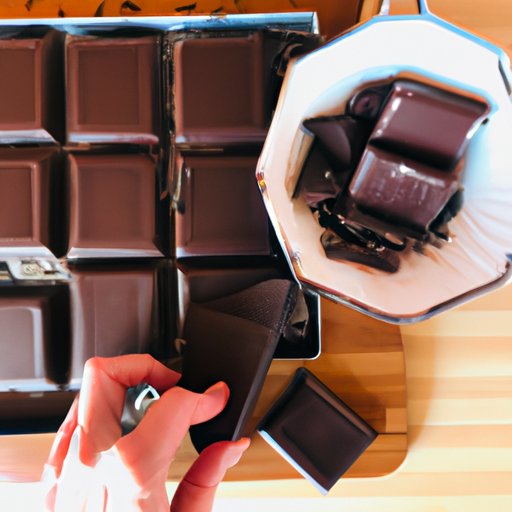
Step-by-Step Guide
Tempering chocolate may seem daunting, but with the right tools and techniques, it’s simple and straightforward. Here’s our step-by-step guide to tempering chocolate:
Equipment Needed
- A double boiler or a heatproof bowl and a saucepan
- A candy or digital thermometer
- A spatula or a wooden spoon
- A baking sheet
- A parchment paper or a silicone mat
- A metal scraper or a bench scraper (optional)
Melting the chocolate
- Chop the chocolate into small, even pieces, or use chocolate chips;
- Add about three-quarters of the chocolate to a clean, dry, and heat-proof bowl or the top insert of the double boiler;
- Fill a saucepan or the base of the double boiler with two inches of water and bring to a simmer;
- Place the bowl with the chocolate on top of the saucepan, making sure it does not touch the water;
- Stir the chocolate occasionally and occasionally use a thermometer to monitor the temperature;
- Once the chocolate has melted and reached 115°F to 118°F (46°C to 48°C) for dark chocolate or 105°F to 113°F (40°C to 45°C) for milk and white chocolate, remove it from the heat source.
Seeding the chocolate
- Add the remaining unmelted chocolate (the seed chocolate) to the melted chocolate, and stir until the seed chocolate has melted;
- Continue stirring until the temperature of the chocolate is between 80°F to 82°F (27°C to 28°C) for dark chocolate, and 78°F to 80°F (26°C to 27°C) for milk and white chocolate.;
- If some pieces of seed chocolate have not melted, remove them with a spatula or a slotted spoon.
Cooling down the chocolate
- Once the chocolate has reached its desired temperature, reheat the chocolate by placing it back on the double boiler or on top of the saucepan with simmering water for a few seconds, and stir the chocolate to make it smooth;
- Test a small amount of chocolate on a piece of parchment paper to ensure it is tempered correctly;
- If the chocolate sets quickly and has a shiny, smooth surface, it’s tempered and ready to use;
- If the chocolate is streaky or dull, reheat the chocolate and stir until smooth again, then continue with the cooling stage until it reaches the desired tempered temperature.
Helpful Tips for Troubleshooting
Here are some tips to help you troubleshoot common problems that can occur when tempering chocolate:
- Avoid using a damp or wet bowl or utensils as it may cause the chocolate to seize;
- Be patient and take your time when melting and tempering chocolate;
- Never heat chocolate above its melting temperature as it may burn;
- If the chocolate seems too thick or stiff, reheat it and stir until it reaches the desired temperature. If the chocolate still does not thin out, try adding a few drops of vegetable oil;
- If the chocolate becomes too hot, remove it from the heat source and use a cold wet towel to cool down the bowl gradually, stirring continuously;
- Don’t try to temper more chocolate than you can handle at once take small batches of chopped chocolate (no more than 3 pounds at a time);
- Make sure to use a thermometer to measure the chocolate temperature accurately;
- Avoid using a microwave to melt chocolate unless you are experienced in the process.
Expert Tips and Tricks
Are you looking to refine your chocolate tempering skills and take it to the next level? Here are some expert tips from seasoned chocolatiers:
- Always use good-quality chocolate as it affects the flavor and texture of the finished product;
- Use a digital thermometer that can give an accurate reading rather than a dial thermometer;
- Increase or decrease the seed chocolate amount depending on the thickness of the chocolate and adjust accordingly;
- Stir the chocolate regularly for even melting and tempering;
- Never let water or steam come into contact with the chocolate as it can cause the chocolate to seize and become grainy;
- To get a glossy and smooth finish, avoid cooling or setting the chocolate in a cold or damp environment. Keep the chocolate at 60°F to 70°F (15°C to 21°C) room temperature, with a relative humidity level of less than 50% in the workspace;
- Use a good-quality metal scraper or bench scraper to spread the chocolate into even layers for molded chocolates, or for pouring onto a cake, cookie, or tart;
- Store leftover tempered chocolate in an airtight container in a cool, dry place until the next use.
Getting Creative with Tempered Chocolate
Tempered chocolate is a versatile and delicious ingredient in many desserts and candies, here are some creative ways in which you can use tempered chocolate:
- Making moulded chocolates. After tempering plain or flavoured chocolate, try pouring it into moulds to make chocolates in different shapes and sizes;
- Dipping fruits, nuts, cookies, or other sweets into tempered chocolate;
- Drizzling or piping the chocolate into decorative patterns on cakes, cupcakes, cookies, or other baked goods;
- Covering cakes, truffles, or ice cream bars in a layer of tempered chocolate to add a glossy finish;
- Making chocolate decorations, such as leaves or flowers, using molds and food paints;
- Creating chocolate sculpture and showpieces;
- Making chocolate bars with add-ins, such as nuts, dried fruit, or cereal.
Health Benefits of Dark Chocolate
Research has shown that dark chocolate, especially the one with a high cocoa content (70% or higher), has many health benefits due to the compounds found in cocoa. Some of these benefits include:
- Reducing the risk of cardiovascular disease by lowering blood pressure and improving blood flow to the heart and brain;
- Improving brain function and cognitive performance due to flavanols and theobromine compounds;
- Reducing inflammation and insulin resistance;
- Providing high levels of antioxidants that help the body fight free radicals and prevent cellular damage;
- Increasing endorphin levels in the brain, which can boost one’s mood and reduce stress.
The History of Chocolate Tempering
The history of chocolate tempering dates back over 4000 years, to ancient civilizations such as the Mayans and Aztecs in Central America. They were believed to have used cocoa beans to create medicinal and ceremonial drinks, and they valued cocoa beans so highly that they used them as currency. However, they did not temper chocolate in the way that we do today. Instead, they roasted and ground cocoa beans and then mixed them with water or other liquids, such as spices and chilies, to create a frothy drink.
The chocolate tempering process as we know it today was developed by European chocolatiers in the late 18th century. They noted that cocoa butter had different melting points depending on how the chocolate was heated and cooled. They discovered that by heating and cooling chocolate to specific temperatures, they could create a smooth, shiny, stable finished product, which appealed to their customers’ tastes and significantly boosted the chocolate industry’s growth. Later, machinery was created to help melt and temper chocolate, making it easier and more efficient to make chocolate products.
Conclusion
Tempted to try your hand at tempering chocolate? With the right tools, techniques, and expert tips, you can master the art of chocolate tempering and create polished, delicious chocolates that will impress your taste buds and wow your friends and family. Be patient, follow the steps, and don’t be afraid to experiment with different flavorings, molds, and decorations.