I. Introduction
Orchids are one of the most popular houseplants around the world. Not only do they have beautiful, vibrant colors and fragrant smells, but they are also incredibly easy to care for. Repotting an orchid, although not a frequent task, is important for keeping your orchid growing healthy and strong. In this article, we will guide you step-by-step on how to repot your orchid like a pro and discuss some helpful tips to keep your orchid thriving after repotting.
II. Step-by-Step Guide: How to Repot Your Orchid Like a Pro
Before you start your orchid-repotting journey, gather all the proper equipment you’ll need:
- Orchid potting mix
- Pot
- Pruning shears
- A new stake (if necessary)
- A bucket of warm water
- A worktable or flat surface
Now you’re ready to begin the repotting process:
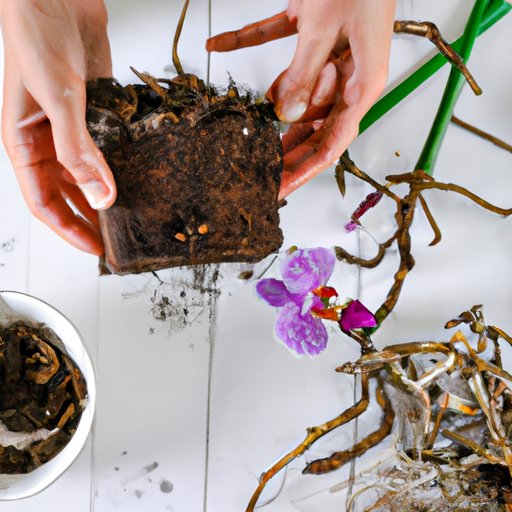
- Remove the Orchid from the Pot: Turn the pot upside down, and gently wiggle the orchid from the pot. If the orchid doesn’t budge, don’t force it. Run a knife around the edges, as close to the pot as possible, to loosen the plant.
- Clean the Roots: Next, rinse the root system of your plant gently with warm water while removing any residual potting media. Prune any damaged, dead, or rotting roots.
- Prepare the Orchid Pot: Fill the new pot with fresh potting media, leaving approximately an inch of space from the rim.
- Replant Your Orchid: Place the orchid into the new pot, filling any gaps with more potting media as needed. Make sure to center the orchid and avoid any roots from overlapping the edge of the pot.
- Re-Stake If Necessary: Re-stake the orchid if necessary, tying the stem to a stick and then stick the firm end of the stick into the potting media.
- Water the Orchid: After repotting is complete, water the orchid well, and let it drain for around 1 hour before returning it to a sunny window.
Note: Repotting should only be done when the orchid is not blooming. Don’t attempt to repot if your orchid is in bloom; wait until the flowers fall off.
III. 7 Tips to Ensure Your Orchid Thrives After Repotting
Repotting isn’t just about the physical task. It’s also about ensuring your orchid thrives after the repotting process. Here are seven tips that will keep your orchid healthy and happy:
- Provide Proper Water: After repotting, the orchid might not need as much water as it did in its old pot. The new potting media will retain more water and might not dry out as quickly. Use the “finger test” to determine when to water the orchid.
- Don’t Over-fertilize: Over-fertilizing can be harmful to an orchid. Wait a few weeks before resuming your regular feeding schedule.
- Keep the Orchid in the Same Spot: Repotting is a significant change for your orchid, so try to keep it in the same location afterward rather than moving it around.
- Provide Adequate Humidity: Orchids need humidity to thrive. Provide a humidity tray and mist the leaves occasionally, but never let water sit in the orchid itself as it can promote the growth of damaging fungi.
- Avoid Direct Sunlight: Orchids need sunlight but not direct sunlight. After repotting, give your orchid some shade, so it does not become stressed or damaged. Be sure to allow for adequate air exchange.
- Be Patient: Orchids need some time to overcome repotting stress, so be patient and allow the orchid time to recover. Post-repotting should not entail any additional stressors like temperature changes, repotting, or moving to another location.
- Monitor for Pests: Newly repotted orchids are under stress, making them more susceptible to pest attacks. Monitor your orchid closely for any signs of pests, and treat as soon as possible.
IV. Orchid Repotting 101: Everything You Need to Know
Why does an orchid need to be repotted, and how do you know when it’s time? Here are some answers:
- Why Orhids Need to be Repotted: Orchids need to be repotted because they outgrow their pots. When the pot is full of roots, there is no room left for new growth. By repotting, you also add fresh potting media to provide vital nutrients to the orchid while removing waste products.
- Signs You Need to Repot: Clear indications that you need to repot your orchid include yellowing leaves, brown root tips, presence of pests, or if it has been two years since its last repotting.
- When to Repot: Orchids are best repotted after the growing season and before blooming occurs, typically every two years as mentioned earlier.
- What Size Orchid Pot To Use: As orchids do not root like traditional potted plants, the size of the pot is less critical than the material used to pot them. In general choose pots—preferably clear, plastic ones—that are slightly larger than the current container.
V. The Best Soil Mix for Repotting Your Orchid
Proper soil media is a crucial factor that can impact your orchid’s health. Below are the different types of soil mixes used for orchids, their pros, and cons:
- Peat Moss Mixes: Peat-based mixes absorb a lot of water, reducing the need for frequent watering. However, high water retention that rarely penetrates to roots that when you water an orchid can lead to root rot or pests.
- Bark Mixes: Bark mixes provide great drainage for orchids. They are perfect for orchids that need good air circulation and dry conditions, allowing plant parents easy monitoring of moisture levels.
- Coir Mixes: Coir is an eco-friendly alternative that can be used as an alternative to peat moss. It retains water well, leading to good root hydration. However, a coir mix can be challenging to water thoroughly since it is dense and can retain water in some areas, remaining too dry in others.
The best soil mix for repotting an orchid is dependent on the specific variety of orchid. Consider what type of orchid you have before choosing what potting mix to use.
VI. DIY Orchid Repotting: Save Money and Keep Your Plant Healthy
Orchids are a budget-friendly plant compared to other home decor options. Repotting, on the other hand, can be costly. You can save money by repotting your orchid on your own. You’ll also have the assurance of using the best possible equipment and potting mix for your specific orchid. Here are some tips for doing it yourself:
- Follow the Step-by-Step Guide above.
- Remember always to use clean and sterilized equipment like pruning shears and knives.
- Wash your hands before and after repotting to avoid transmitting diseases or pests.
VII. Common Mistakes to Avoid When Repotting Your Orchid
Although orchids are not difficult to repot, some common mistakes can harm the plant. Below are some of the common mistakes people make when repotting their orchids, and how to avoid them:
- Choosing the Wrong Size Pot: A pot that is too large can be bad for your orchid, permitting excess moisture to accumulate for too long, leading to root rot. However, a pot that is too small can suffocate the orchid’s root system. Choose the size carefully.
- Not Providing a Safe Anchor: Orchids require a firm and stable anchor, often a cork or piece of wood. Ensure that whatever you select is stable enough to hold the weight of the orchid and not tip over.
- Repotting While in Bloom: As we mentioned earlier, do not repot your orchid while it’s still blooming. It will compromise its blooms and significantly increase the stress levels of the orchid.
- Not Removing Damaged Roots: When you repot an orchid, make sure to get rid of all dead or damaged roots to help them thrive in the future.
- Not Properly COVID-Cleaning hands: Orchids are sensitive to infectious diseases and pests that can spread through your hands, tools, and pots. Always be sure to clean your equipment, workspace, and hands before and after repotting your orchid.
VIII. Conclusion
Repotting an orchid is not a difficult task if you follow the right steps and have the proper equipment. After repotting, you can care for your orchid to ensure that it thrives and blooms well by employing simple tips. Not only does repotting an orchid provide a refreshing environment for your plant, but it’s also an excellent opportunity for you to better connect with your houseplant, earn confidence, and feel satisfied with your efforts. Keep this guide handy the next time you opt to repot your orchid and enjoy the benefits of a healthy plant.
Find below some additional resources to explore the world of orchid care: