Introduction
When the winter season rolls around, nothing is quite as satisfying as having some homemade decorations to add a little extra cheer to your home. Paper snowflakes are a simple and eye-catching way to add some winter vibes to any room, but the process of making them can be intimidating for a beginner. In this article, we’ll guide you through the process of making a paper snowflake step-by-step, with plenty of tips and tricks to ensure your snowflakes turn out perfectly. We’ll also cover some creative variations, discuss the best materials to use, and offer ideas for displaying your finished snowflakes. Let’s get started!
Step-by-Step Guide
The foundation of making a paper snowflake is in the folds. You’ll need to first take a square sheet of paper and fold it in half to form a triangle. Then, fold the triangle in half again, creating a smaller triangle. From here, you’ll need to fold the triangle in thirds, creating an accordion-like shape.
Once you have the folds in place, it’s time to start cutting. You’ll want to start cutting at one end of the folded triangle, working your way across in a pattern. There’s no set pattern that you have to follow for a snowflake, but the most common design involves making triangular cuts of varying sizes along both sides of the folded paper.
The trickiest part of making a paper snowflake is getting the cuts just right. It’s important to keep your scissors at an angle as you make your cuts, and to use smaller scissors for more intricate designs. You can use a pencil to draw out the cuts ahead of time if you’re worried about getting the design just right.
One common mistake to watch out for is accidentally cutting through the folded edges of the paper. You’ll want to be sure to keep the edges of the paper intact, as they’re what hold the snowflake together once you unfold it. It may take a little practice to get the hang of cutting a perfect snowflake, but with patience and attention to detail, anyone can do it!
Video Tutorial
If you’re a visual learner, a video tutorial might be the best way to get the hang of making a paper snowflake. There are many great tutorials available online, but one of our favorites is a step-by-step guide by YouTuber The Crafty Mom. The video is just under six minutes long and offers clear instructions along with a few useful tricks.
One thing to note about video tutorials is that they move at a consistent pace, so you may need to pause and rewind the video to keep up with each step. However, seeing the process in action can be extremely helpful for beginners.
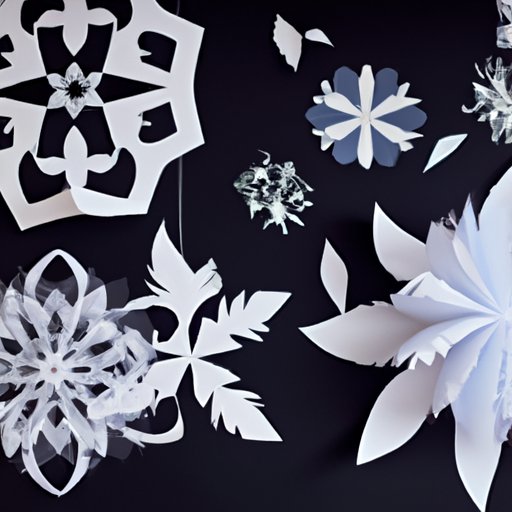
Creative Variations
Once you’ve got the basic technique down, you can start getting creative with your snowflakes. There are countless designs to try, and experimenting with different shapes can be a fun way to personalize your decorations.
Some ideas for variations include adding more or fewer cuts to the paper, making circular or hexagonal shapes instead of triangular ones, or even layering multiple snowflakes on top of one another to create a 3D effect. With each variation, you’ll need to adjust your folding and cutting technique slightly to achieve the desired effect.
If you’re not sure where to start with your designs, a quick Google search for “paper snowflake templates” can give you some great jumping-off points.
Perfect Materials
While it’s possible to make a paper snowflake with just about any type of paper, some materials will give you better results than others. For one, you’ll want to choose a paper that’s thin enough to fold easily but thick enough to hold its shape once you’ve cut it. Standard printer paper can work well, but you may also want to consider using origami paper or tissue paper for a more delicate effect.
Another essential tool for making paper snowflakes is a good pair of scissors. You’ll want a pair that’s sharp enough to cut cleanly without tearing the paper, but small enough to navigate tight spaces. We recommend using scissors with pointed tips that are specifically designed for crafting.
You can find these materials at most craft stores, or order them online. Just be sure to choose high-quality materials, as they’ll make a big difference in the final product.
Display Ideas
Once you’ve made a few beautiful paper snowflakes, it’s time to figure out how to display them. One option is to simply tape them to your windows or wall, which can create a lovely effect when light shines through the delicate paper.
If you want to get more creative, you can try stringing the snowflakes together to make a garland or mobile. Another idea is to attach them to a wreath, or to use them as table decorations by gluing them to a piece of cardboard or popsicle stick and standing them up in a vase or jar.
No matter how you choose to display your snowflakes, be sure to take pride in the fact that you’ve created something beautiful with your own two hands.
Conclusion
Learning how to make a paper snowflake is a fun and rewarding way to get into the winter spirit. With this step-by-step guide, you’ll have all the information you need to start crafting your own beautiful snowflakes in no time.