Introduction
Are you struggling with drawing braids? Do you find yourself unsure of how to begin or how to make your braids look realistic? Look no further, as this article is here to help you learn how to draw braids with ease and confidence. In this article, we’ll cover a step-by-step guide, tutorial video, tips for creating realistic-looking braids, a variety of braid structures, and even see how braids can be used in artistic context. So pick up your pencils, and let’s get started!
Step-by-Step Guide on Drawing Braids
When it comes to drawing braids, there are a few crucial steps to follow that make the process much simpler.
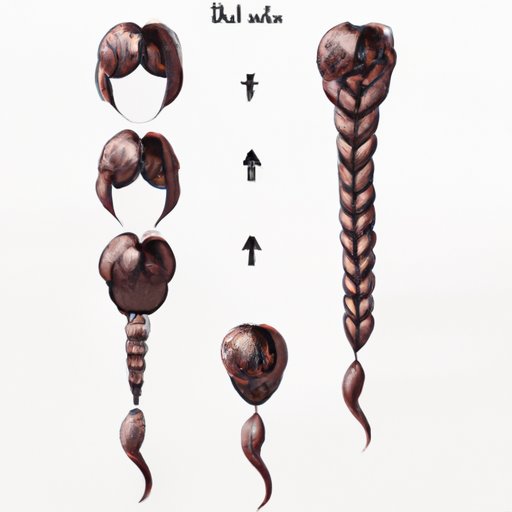
First, start by drawing an outline of the braid’s structure lightly. Be sure to draw the strands of hair close together but not touching. Draw a line or arc indicating the direction of the braid and repeat the pattern down the length of the braid.
Next, map out the braid’s structure by adding volume and depth to each strand. Start with the strand that is closest to the viewer and work your way towards the strand that sits furthest back. Use shading techniques to help add depth and texture to the hair.
Lastly, add texture to the braid by using a variety of line thicknesses and creating variations in each strand. Depending on the type of braid, some strands may be thicker or thinner than others while some may be folded or twisted around each other.
It’s important to remember that practice makes perfect, so keep trying and experimenting until you find what works for you!
Tutorial Video on Drawing Braids
For those who prefer more visual instructions, we’ve got you covered. In this video tutorial, you’ll see how to draw braids step by step. Whether you’re a beginner or a pro, you’ll find useful tips and tricks to make the process easier.
Tips for Making Braids Look Realistic
When depicting braids, it’s critical to add depth and texture to make them seem more realistic. Here are some helpful tips that can take your braid drawings to the next level.
Use shading to add volume and texture to the hair. Reiterating what we said earlier, add depth to strands of hair based on the braid’s structure and which holds the most weight or tension. A braid’s volume is heavier near the base of the braid, and its strands taper, becoming finer as they reach the end.
With each strand, create slight variations and detail (like imperfect locks or flyaways) to give the hair depth and complexity, making it more realistic.
Different Types of Braids to Draw
Now that you’ve got a better idea of how to draw braids, it’s time to experiment with different types of braids! Showcase your talent by creating French braids, fishtail braids, or Dutch braids – to name a few. Each type of braid has its unique structure and will require different technique and skill sets to achieve it.
Braids in Context
Braids can also be incorporated into various artistic pieces, including paintings, sculptures, illustrations, or other artwork.
For example, many artists leverage braids to add dimension and complexity to portraits in their illustrations or paintings. Artists like Jose Roosevelt and Tin Salamunic have both used braids in their artwork in unique and exciting ways.
Be inspired by the many ways braids can be incorporated into different artwork and use them in your next masterpiece.
Conclusion
By following this step-by-step guide, tips, and exploring various types of braids, you’ll be much closer to adding lifelike braids to your art. Remember to keep practicing and experimenting with lines, shapes, and thicknesses to create the perfect braid.