I. Introduction
Learning to draw can be an exciting and rewarding experience, especially when it comes to creating an image of one of the most majestic and fascinating creatures of the sea – the shark. This article will provide a variety of approaches to drawing a shark, including step-by-step tutorial, infographic, video, shortcut, anatomy, tools, and style-specific approaches. Before we delve into these approaches, let’s look at the definition of the problem, purpose of the article, and the importance of learning how to draw a shark.
A. Definition of the problem
Most people want to learn how to draw but are unsure where to start or how to go about it. The thought of starting with a blank piece of paper, and conjuring their vision into reality can be intimidating.
B. Purpose of the article
The purpose of this article is to provide detailed instructions to guide both beginners and experts on different approaches to draw a shark. This article will also look at tips and tricks for getting the details right and avoiding common mistakes.
C. Importance of learning how to draw a shark
Learning how to draw a shark is a fun and informative activity that can help with improving your artistic skills, building your confidence, and expanding your knowledge of marine life. It’s also an excellent way to relieve stress and express creativity. Moreover, it has practical applications if you’re involved in graphic design, animation, or any job that requires drawing skills. Lastly, it can be a fulfilling hobby that opens up opportunities for like-minded individuals to connect and share their passion for art and marine life.
II. Step-by-Step Tutorial Approach
If you’re a beginner and prefer a structured and straightforward approach, we recommend starting with the step-by-step tutorial. This method walks you through the drawing process, starting with basic shapes, refining proportions, and gradually adding details.
A. Basic shapes
To start drawing a shark, we recommend that you begin with basic shapes. Begin by drawing an oval shape for the body and add a small triangle for the tail fin. Draw a line alongside the body of the shark for the dorsal line and add a triangle in front of the oval for the head. Add a small triangular fin on the belly.
B. Proportion of key features
The next step is to refine the proportions of the key features. Start with the head, drawing triangular pectoral fins, the gill slits, and the mouth. The jaws of sharks differ among species so consider the species when drawing the shark. Gradually add the dorsal fin, the anal fin and the caudal fin. In final touches get rid of the basic geometric lines and refine the contours of the shark.
C. Adding details in stages
Once the proportions are in place, the next stage is to add details. Start by adding the signature shark snout and refine the jawline. Add a hint of texture to the skin by drawing some linear lines along the back and pectoral fins. Then, add small details like the eye and the gills. The teeth of sharks are different among species, but you can draw triangular shapes closely arranged.
D. Tips for shading and texture
For shading and texture, start by adding shadows underneath the shark, fin areas, gills and the mouth. Then add some detail to the skin by shading parallel lines to give it a scaly texture. The tail can be shaded with diagonal lines to give texture and suggest movement.
E. Common mistakes to avoid
Some common mistakes to avoid while drawing a shark are not paying attention to the proportionality of the head and the body, copying too many details from reference pictures, or adding too many lines on the skin, which can hinder the overall look.
III. Infographic Approach
If you prefer visual aids for learning and want to get all the information in one quick glance, you can use an infographic approach. This approach breaks down the drawing process into key steps, with tips and tricks for getting the details right.
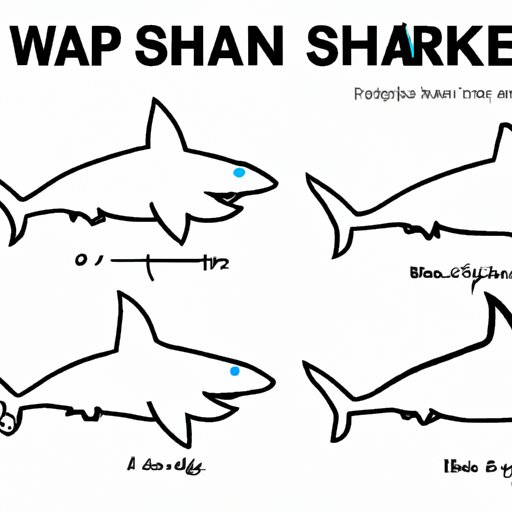
A. Key steps to drawing a shark
The key steps for drawing a shark include familiarizing yourself with the basic shapes, refining the proportions, adding details, and shading. By following these steps in sequence, you can create a unique and realistic-looking shark drawing.
B. Tips and tricks for getting the details right
To perfect the details of the shark, make sure to note the unique features of the species you’re drawing, such as the shape of the teeth or the markings of the skin. Use reference pictures to help solidify these details and pay attention to the placement of the fins and scales to make the shark look more authentic.
C. Comparison of different shark species
Sharks come in different sizes and shapes, and this can be daunting when selecting which species to draw. An infographic can help show the unique features of different shark species, such as the Great White Shark, Hammerhead Shark, and Leopard Shark.
D. Benefits of using an infographic for learning
An infographic presents all the key information in a visually appealing and easy-to-follow format. It can provide inspiration, ideas, and a clear path to follow while still retaining the freedom to make personalized creative choices. Infographics also work great for people with limited time as you can understand the visual representation in a matter of seconds.
IV. Video Tutorial Approach
If you’re an audio-visual learner, prefer demonstrations from a professional, and want to learn at your pace, a video tutorial approach is the perfect option.
A. Benefits of a visual and auditory learning experience
Video tutorials provide a comprehensive learning experience by enabling the viewer to witness the drawing process while following along at their own pace. It helps in understanding the techniques and shortcuts. It also allows for a better understanding of the flow of the drawing.
B. Step-by-step demonstration of drawing a shark
A video tutorial will take you through the process of drawing a shark step-by-step, from the establishment of basic shapes to the shading of the final details.
C. Demonstration of common techniques and tools
Professional artists will also demonstrate common techniques and tools they use while drawing. These tips can be useful later on when drawing other species as well.
D. FAQ section to answer common questions
In some cases, there may be some challenges that arise while following along with the tutorial. A video tutorial typically includes a ‘frequently asked questions’ section where an artist will answer common questions, helping to troubleshoot any problems and provide additional guidance.
V. Shortcuts Approach
Sometimes, one may want faster results or to mimick the style of their favourite creator. Shortcuts provide ways to get quick results, and modern drawing softwares like Adobe Illustrator and Procreate make it easier to apply these techniques for digital drawings.
A. Overview of shortcuts and methods for quick results
Shortcuts include using tracing, stencils or references, simplifying and skipping complex details to create a cartoonish style, or using ready-made brushes and textures for texturing the skin. The shortcuts and methods that an artist selects will depend on personal preferences and the style of the drawing.
B. Tips for simplifying complex details
If you’re looking to simplify complex details, focus on the overall shape rather than small details, creating a caricature rather than a realistic representation. Use fewer lines and focus on texture and shading to give the impression of details, allowing the viewer’s imagination to fill in the gaps.
C. Appropriate for beginners and those with tight schedules
Shortcuts are fitting for those with limited time to draw and for beginners who want to build their confidence quickly. They allow the artist to produce a satisfying outcome without being too overwhelmed.
D. Warnings about potential drawbacks of shortcuts
One must be careful to balance shortcuts to avoid compromising the quality of the drawing. Overuse of short-cuts can betray the purpose of learning to draw. One must understand the shortcuts used and know to draw realistic depictions in the future.
VI. Anatomy Approach
To produce highly realistic and detailed drawings, mastering the anatomy of the shark is crucial. Knowing the anatomy affects all the other approaches.
A. Overview of shark anatomy and key features
Sharks have several unique features, such as their pointed snouts, triangular teeth, and gill slits. Understanding how these features are structured increases the accuracy of the drawing.
B. How anatomy influences the final drawing
Knowing the structure and placement of fins and scales enhances the details in the drawing and gives the final product more dimensionality and texture. Studying the anatomy in detail is essential as it eliminates common mistakes that arise in tailoring artists’ drawings.
C. Tips for adding dimensionality and texture
When adding dimensionality and texture, pay attention to the placement of the scales and the formation of the gills. Shading can help to add depth and texture to the shark’s skin and scales. The placement and size of teeth should be emphasized in drawing the shark’s jawline.
D. Use of scientific sources for accuracy
For best results, consider using scientific sources to check the accuracy of the drawing. Such sources will teach you about the specific species and help you to understand how the shark moves, its anatomy, color, and biology.
VII. Tools and Materials Approach
Using the right tools and materials will help to enhance the drawing experience and make it more effective.
A. Overview of necessary materials
The necessary materials for drawing a shark include pencils, paper, erasers, and inking pens for outlines. Shade markers can also be used for shading specific details.
B. Different types of pencils, paper, and pens
For pencils, use H, HB, and B variety to achieve different tones, such as the darker B and lighter H. For paper, a nice quality paper in A3 or A4 can give the most visually desirable results. Rotring or ballpoint pens used for inking give the drawing its signature look.
C. Discussion of optional tools and their benefits
Optional tools include shading tools like texture brushes, markers, and salt sprinkles that provide the texture and shading. They are great for digital work. A lightbox helps to trace the basic shapes more accurately.
D. Common mistakes to avoid with supplies
Mistakes may occur when selecting supplies as some products may not be compatible with others or may not fit the paper type. Always use quality supplies and research the ink compatibility for better insights.
VIII. Style-Specific Approach
If you have a preferred drawing style, such as realistic, cartoonish or abstract, and want to explore that while drawing a shark, try the style-specific approach.
A. Overview of different styles and their benefits
There are different styles of drawing, including realistic, sketchy, cartoonish, and abstract. The style that you select should be based on personal preference and the desired outcome. Realistic style helps in highly intricate details, while cartoonish style allows for simplification of details to create a more fun and lively outcome.
B. Tips for selecting a style to match personal preferences
When selecting a style, pay attention to the different elements that define that style, such as shading, texture, and color. Choose a style that aligns with your abilities, preferences, and the mood of the piece.
C. Demonstration of different styles and their outcomes
When exploring different styles, it’s essential to experiment and try various approaches. Demonstration helps you to understand how different techniques and tools can help in achieving the preferred aesthetic.
D. Encouragement for experimentation
Experimenting with different styles and approaches should be encouraged, as it helps in identifying a unique style, mastering different techniques, and in creating a signature look. Use the exploration of different styles as a tool to refine your style and grow your artistic skills.
IX. Conclusion
In conclusion, learning how to draw a shark is an exciting and rewarding experience that can lead to a perfect depiction of the magnificent creature. In this article, we highlighted the approaches of step-by-step tutorial, infographic, video, shortcut, anatomy, tools, and style-specific to drawing a shark. Utilize these methods in accordance with personal preferences and styles to achieve the perfect outcome and unleash the artistry.