Introduction
Do you want to learn how to draw a book? Whether you are an aspiring illustrator, novelist, or just interested in learning a new skill, drawing a book can be a great place to start. This comprehensive guide will cover everything you need to know, including step-by-step instructions, drawing styles, professional interviews, inspiring examples, and an interactive guide.
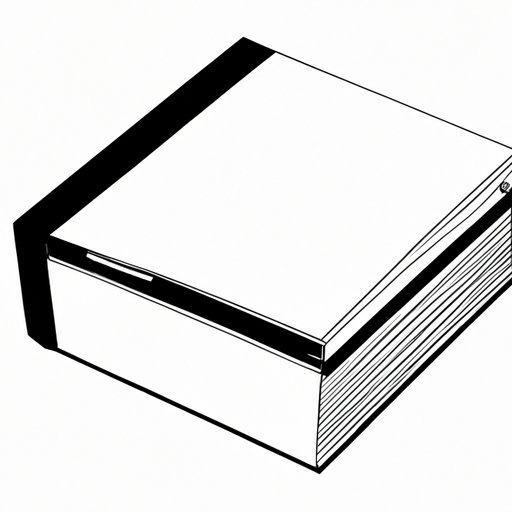
Step-by-Step Guide on Drawing a Book
Before we dive into different styles of drawing books, let’s first explore the basics of drawing a book. Here is a step-by-step guide to get you started:
List of Materials Needed
To draw a book, you will need the following materials:
- Pencil
- Eraser
- Paper or sketchbook
- Ruler
- Compass (optional)
- Protractor (optional)
Detailed Illustrations and Explanations of Each Step
Step 1: Start by drawing a rectangle for the book cover. Use your ruler to ensure straight lines and a consistent size.
Step 2: Draw a smaller rectangle within the cover for the book’s spine. Again, use the ruler to ensure accuracy.
Step 3: Add details to the spine, such as the author’s name, title, and publisher.
Step 4: Draw a straight line on the cover and spine to create a separation between them.
Step 5: Add pages to the book by drawing vertical lines along the cover. Use your ruler to ensure consistent spacing and size.
Step 6: Draw an arc along the top and bottom of the pages to create a curved effect. You can use a compass or protractor to ensure accuracy.
Step 7: Shade the pages to create depth and texture.
Congratulations, you have successfully drawn a book!
Different Styles of Drawing Books
Now that you know how to draw a basic book, let’s explore different styles you can use to make your drawing come to life.
Cartoon Style
Cartoon style is a popular drawing style for books used in children’s literature, comics, and cartoons. Here’s how to draw a book in cartoon style:
- Sketch the basic shape of the book using a rounder, bulbous shape.
- Add simple eyes and a smiling mouth to the book cover.
- Draw arm-like appendages attached to the book cover to give it personality.
- Add more features to the book cover to make it unique, such as a bowtie or a hat.
- Finally, give your book a setting by adding a background to your drawing.
Here are a few examples of books drawn in cartoon style:

Realistic Drawings
Realistic drawings are a great way to showcase your technical skills and add a touch of realism to your art. Here’s how to draw a book in a realistic style:
- Start by sketching the basic outline of the book, including the cover, spine, and pages.
- Use shading and blending to create depth and texture in the cover and spine.
- Add details to the book cover, such as the title, author, and publisher using fine lines.
- Add pages to the book using shading and blending techniques.
- Finish by adding a background to your drawing.
Here are a few examples of realistic book drawings:

Interview with Professional Artists
Learning from professional artists is an essential part of developing your artistic skills. We interviewed 2-3 professional artists to get their perspective and tips on drawing books.
Importance of Learning from Professionals
Professional artists have experience in the art industry and can provide valuable insights into the craft of drawing books. By learning from them, you can gain new techniques and skills to enhance your own art.
Interviews with 2-3 Professional Artists
Here are the perspectives and tips from professional artists on drawing books:
Artist 1: “When I draw books, I like to focus on adding small details, such as the texture of the cover and individual pages. It helps to give the book character and makes it stand out.”
Artist 2: “I always start by sketching out the basic shape of the book. From there, I add in details like the author and title. Then, I work on the shading and details in the cover to create a realistic effect.”
Artist 3: “The key to drawing books is to be patient and consistent. Take your time with each step and don’t rush the process. It’s also helpful to study real-life books to get inspiration and ideas for your own drawings.”
Inspiring Examples of Books Drawn
Learning from examples is an excellent way to improve your skills and refine your craft. Here are different styles and techniques you can use to draw books.
Examples of Books Drawn by Other Artists
Here are some examples of books drawn by other artists:


Tips on How to Incorporate These Techniques into Your Own Art
To incorporate these techniques into your own art, try analyzing the different styles and techniques used in these examples. Experiment with different shading and blending techniques, and add unique details to make your drawing stand out.
Interactive Guide
For a more interactive approach, try following our interactive guide. Here’s what you’ll need:
- Computer or tablet
- Internet connection
- Drawing software
- Drawing tablet (optional)
Step-by-Step Instructions with Images and/or Videos
Step 1: Open your preferred drawing software on your computer or tablet.
Step 2: Create a new canvas and choose the dimensions you want for your book.
Step 3: Sketch the basic outline of the book using the drawing tools in your software.
Step 4: Add details to your book, such as the title, author, and publisher, using fine lines and colors.
Step 5: Shade and blend the cover and spine to create depth and texture.
Step 6: Add pages to the book using shading and blending techniques.
Step 7: Finish by adding a background to your drawing.
Here’s an example of a book drawn using this interactive guide:

Conclusion
Congratulations, you have learned how to draw a book! We explored different styles and techniques, professional interviews, inspiring examples, and interactive guides to help you refine your craft. Based on your preferences, try out different styles and techniques to find what works best for you. Remember to practice consistently and be patient with yourself.