The Ultimate Guide to Brining Your Thanksgiving Turkey
Thanksgiving is a time for gratitude, family, and of course, food. And the centerpiece of most Thanksgiving dinners is a delicious turkey. But cooking the perfect turkey can be a daunting task, especially if you want it to be moist and flavorful. That’s where brining comes in. Brining is a process of soaking the turkey in a salt and water solution before cooking. It’s a simple technique, but it can make all the difference in the final result. In this article, we’ll guide you through the brining process so you can serve up a delicious, succulent turkey this Thanksgiving.
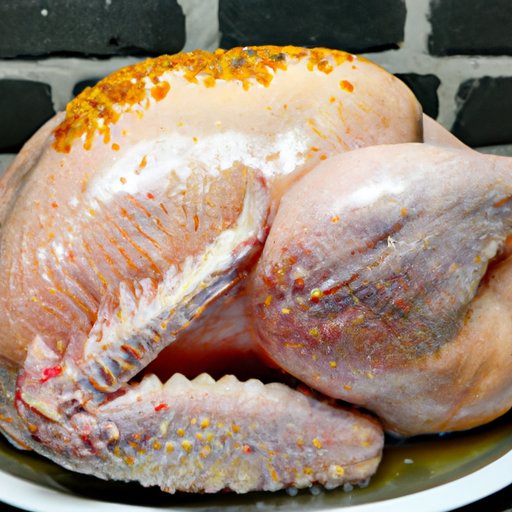
Step-by-Step: How to Brine a Turkey for the Most Tender, Flavorful Meat
The first step in brining a turkey is to make sure you have enough time. You’ll want to start the brining process a day or two before you plan to cook the turkey. Here’s what you’ll need:
- A turkey (size depends on how many people you are serving)
- A large container (big enough to hold the turkey and the brine)
- Kosher salt
- Brown sugar
- Spices (optional)
- Water
Once you have your ingredients, follow these steps:
- Make the brine. In a large pot, combine 1 cup of kosher salt, 1 cup of brown sugar, and any spices you want to use (such as peppercorns, bay leaves, or thyme). Add 1 gallon of water and heat the mixture until the salt and sugar have dissolved. Let the brine cool to room temperature.
- Pour the brine into your container and add enough cold water to cover the turkey completely.
- Add the turkey to the container, breast side down. Make sure the turkey is completely submerged in the brine.
- Cover the container and refrigerate for 12 to 24 hours, depending on the size of the turkey. A good rule of thumb is to brine the turkey for 1 hour per pound.
- After the brining is complete, remove the turkey from the brine and pat it dry with paper towels. Discard the brine.
- Cook the turkey according to your preferred method. You’ll be amazed at the difference the brining makes!
Pro tip: If you’re worried about the turkey taking up too much space in your fridge, you can use a large cooler instead. Just make sure to clean it thoroughly before and after using it for brining.
Brining 101: Everything You Need to Know About Brining Your Holiday Turkey
You might be wondering, why bother with brining at all? The answer lies in the science of the process. When you soak a turkey in a brine solution, the salt causes the proteins in the meat to unwind and then reabsorb water. This not only keeps the meat moist, but it also allows it to absorb extra flavor from the brine.
There are a few other things to know about brining:
- Brine can be wet or dry. Wet brining involves soaking the turkey in a liquid solution, while dry brining involves rubbing the turkey with a dry mixture of salt and other seasonings.
- Wet brining tends to produce a juicier turkey, while dry brining results in a crispier skin.
- You’ll need to adjust the cooking time and temperature based on whether you brine the turkey or not. Brined turkeys tend to cook faster, so make sure to keep an eye on the internal temperature.
- You can be creative with your brine flavors. Try adding citrus, herbs, or spices to give your turkey a unique twist.
One thing to keep in mind is that brining does add some extra prep time to the turkey-cooking process. But the results are well worth it.
10 Brine Recipes to Elevate Your Turkey Game This Thanksgiving
If you’re looking to take your brining skills to the next level, you might want to experiment with some different flavor combinations. Here are ten brine recipes to get you started:
- Classic brine: Combine 1 cup kosher salt, 1 cup brown sugar, 1 sliced onion, 6 garlic cloves, 2 bay leaves, 1 tablespoon black peppercorns, and 1 gallon water.
- Citrus brine: Combine 1 cup kosher salt, 1 cup brown sugar, 3 oranges (sliced), 2 lemons (sliced), 2 bay leaves, and 1 gallon water.
- Beer brine: Combine 1 cup kosher salt, 1 cup brown sugar, 4 bottles of beer, 1 tablespoon black peppercorns, and 1 gallon of water.
- Honey-bourbon brine: Combine 1 cup kosher salt, ½ cup honey, 1 cup bourbon, 2 bay leaves, and 1 gallon of water.
- Apple cider brine: Combine 1 cup kosher salt, 1 cup brown sugar, 4 cups apple cider, 2 bay leaves, and 1 gallon of water.
- Cajun brine: Combine 1 cup kosher salt, 1 cup brown sugar, 3 tablespoons Cajun seasoning, and 1 gallon of water.
- Miso brine: Combine 1 cup kosher salt, ½ cup brown sugar, 2 tablespoons white miso paste, 2 sliced scallions, and 1 gallon of water.
- Pickle juice brine: Combine 1 cup kosher salt and 1 gallon of pickle juice (from a jar of pickles). You can also add spices such as garlic or dill for extra flavor.
- Rosemary-garlic brine: Combine 1 cup kosher salt, 1 cup brown sugar, 6 garlic cloves (smashed), 2 sprigs fresh rosemary, and 1 gallon of water.
- Maple-chipotle brine: Combine 1 cup kosher salt, ½ cup maple syrup, 1 tablespoon chipotle powder, and 1 gallon of water.
These are just a few of the endless possibilities for brine flavors. Don’t be afraid to get creative!
The Pros and Cons of Wet vs. Dry Brining Your Turkey
We mentioned earlier that there are two main types of brining: wet and dry. Here’s a breakdown of the pros and cons of each:
Wet brining:
- Pros:
- Makes the meat very moist and juicy
- Allows for a lot of creativity in terms of flavorings
- Cons:
- Can be messy and take up a lot of space in the fridge
- The skin doesn’t get as crispy
Dry brining:
- Pros:
- Results in a crispy, flavorful skin
- Takes up less space in the fridge
- Cons:
- Doesn’t add as much moisture to the meat
- Can be harder to get the seasoning evenly distributed
Ultimately, the choice between wet and dry brining comes down to personal preference. If you prioritize moist meat over crispy skin, go for a wet brine. If crispy skin is a must, try a dry brine.
Expert Tips for Perfecting Your Turkey Brine Every Time
To wrap up our guide to brining, here are some additional tips to help you get the most out of the process:
- Make sure the turkey is completely submerged in the brine. If you have to, weigh it down with a plate.
- Don’t use a brine that’s too strong. The general rule is 1 cup kosher salt per gallon of water, but you can adjust according to your taste.
- Don’t over-brine! If you leave the turkey in the brine for too long, it can become too salty and result in a tough texture.
- Consider adding aromatics such as herbs, garlic, or citrus to the brine for extra flavor.
- If you’re short on time, you can try a quick brine. This involves using a more concentrated brine solution and brining the turkey for just a few hours.
With these tips and tricks, you’re well on your way to a delicious, moist turkey that will be the talk of the Thanksgiving table.
Conclusion: Brine for Better Turkey
Brining can seem intimidating, but in reality, it’s a simple process that can make a huge difference in the flavor and texture of your turkey. By following our step-by-step guide, experimenting with different flavors, and using expert tips, you’re sure to impress your guests this Thanksgiving.