I. Introduction
Seahorses are some of the most remarkable creatures in the sea, tiny but full of intricate details and unique shapes. Drawing the delicate curves and textures of a seahorse can seem daunting, but with the right guidance and practice, anyone can learn how to create beautiful and lifelike drawings. This article offers a step-by-step tutorial and tips for drawing seahorses, using different art mediums and digital tools, understanding their anatomy, and adding a personal touch to your work. Whether you’re a beginner or an experienced artist, you’ll find helpful information and inspiration in this guide.
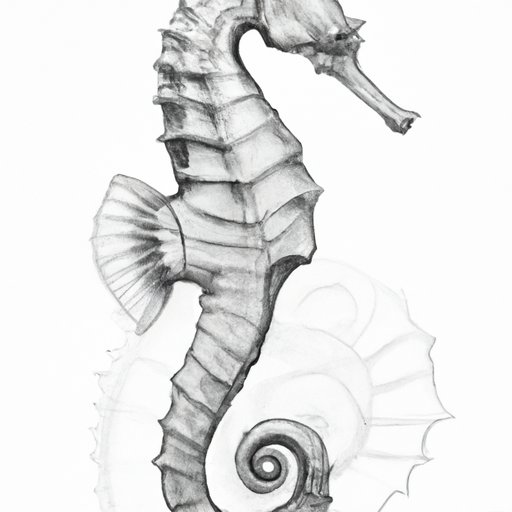
II. Step-by-Step Tutorial
First, let’s start with a step-by-step tutorial to draw a seahorse using traditional pencil and paper techniques. Follow these steps:
- Start with a curved line to represent the seahorse’s back. Make it lighter than the actual drawing as it’s just a guideline.
- Add a circular shape at one end of the curve for the seahorse’s head.
- Add a tube-like shape that begins at the head and ends at the other end of the curved line. This will be the body.
- Draw two curved lines down the body’s length to represent the seahorse’s belly.
- Add a curved tube shape to represent the seahorse’s tail. Draw a few small spines around the top and bottom of the tail to make it look more realistic.
- Draw an eye at the base of the head. This should be a small circle with a dot in the center.
- Add the fins. Draw two fan-shaped fins on the sides of the neck, a fan-shaped fin on the top of the seahorse’s body, and a small fin on the end of the tail.
- Erase the guiding lines and darken the final outlines.
- Shade the seahorse using appropriate pressure to represent the seahorse’s texture and surface appearance.
To make things easier, you can find a seahorse image to follow or refer to. You can also use a grid to make sure your proportions are correct. Take your time and practice until you feel confident in your ability to create a realistic seahorse.
III. Digital Drawing Tips
Digital drawing tools provide an excellent way to create seahorse art that is easily edited, transferred, and shared. Here are some tips for using various digital art software:
- Choose a software that you are comfortable with. Adobe Illustrator, Photoshop, SketchBook, and Procreate are amongst the most commonly used drawing tools.
- Use a digital pen or tablet. There are many excellent digital-pen options available in the market.
- Start by creating outlines, using various layer groups to organize your drawing. Use a different color to distinguish between each layer group.
- Use different digital brushes to create texture that resembles strands of hair on the seahorse’s body.
- Play with lighting and shading. Use gradients, layer effects, and color fills to create the illusion of volume and depth.
- Export your image as a high-resolution file and share it with the world!
While digital drawing takes some getting used to, it can be an excellent medium for creating breathtaking seahorse art. In addition to the tips above, consider watching online tutorials or taking an online course to improve your digital drawing skills.
IV. Using Different Art Mediums
Traditional art mediums provide a unique and tactile experience when it comes to seahorse drawing. Here are some popular art mediums and how they can be used to create seahorse drawings:
- Pencil: Pencils come in various grades and are perfect for sketching initial outlines and adding shading details.
- Ink: Use ink for creating bold, dark outlines and intricate patterns. There are several types of ink pens, such as brush pens and fountain pens.
- Watercolor: Watercolors produce soft gradients and pastel colors that mimic the natural hues of seahorses.
- Acrylics: Use acrylics to create textured layers or to add bold colors.
- Oil: Oil paints take longer to dry, but they provide a beautiful, soft texture that can be blended and layered.
Each of these mediums provides a unique experience and requires different techniques. Experiment with different mediums to find the one that feels most natural and comfortable to you. Use different paper and canvases to discover which medium works well with the texture.
V. Understanding the Anatomy of a Seahorse
One of the most challenging aspects of seahorse drawing is getting the anatomy right. Fortunately, with a little practice and patience, anyone can master the art of seahorse anatomy. Here are the basic steps to draw a seahorse accurately:
- Start by understanding the basic shape of the seahorse’s body. Seahorses have a long, curved neck that connects to a slender, tube-shaped body. They also have a distinctive curved tail.
- Draw the head at the top of the curve, making sure it is proportional to the rest of the body.
- Add two fins on the neck and four fins on the body. Make sure each fin is the correct size and shape.
- Draw the eyes, which are located near the top of the head. Seahorses also have small snouts, so make sure to draw a small triangle or elongated oval in the proper position.
- Draw the tail by following the curve of the seahorse’s body. Make sure it’s proportional to the rest of the body.
The secret to drawing seahorses accurately is to take your time and focus on each detail. Use reference material if needed and don’t get discouraged if your first attempts aren’t perfect. Practice makes perfect.
VI. Adding Personal Touches to a Drawing
Once you’ve grasped the basic anatomy of a seahorse, it’s time to add personal touches to make your drawing unique. Here are some fun ideas:
- Experiment with patterns. Doodling various patterns around the body of the seahorse can add a fun and quirky touch to your art.
- Try different colors. Use pastels or bright colors to give your seahorse a unique look.
- Add elements of marine life. Adding seashells or seaweed around the drawing can make your seahorse look more life-like.
- Use different mediums. Add some ink designs or watercolor washes to create unique textures and depth to your drawing. Use contrasts to add visual interest.
Let your creativity run wild and don’t be afraid to experiment. Drawing seahorses provides ample opportunity for creative experimentation. It’s your art and unique expression.
VII. Comparison of Different Levels of Skill
Finally, it’s crucial to recognize the different levels of skill that artists can achieve in seahorse drawing. Here is a comparison of basic, intermediate, and advanced skill levels:
- Basic: The simplest drawings have proportional shapes, distinct features, and basic shading. Keep experimenting with different techniques, gain knowledge, and continue to practice more.
- Intermediate: Drawings are more realistic and detailed. This skill level requires the use of different mediums or blending them for color accuracy.
- Advanced: At the advanced level, art features intricate details, realistic textures, and lifelike expressions. This level requires a lot of patience, technique, and expertise with various art mediums.
Irrespective of your skill level, always continue to push yourself to improve your drawing. Take inspiration from the work of other artists or watch tutorials to help you develop new techniques.
VIII. Conclusion
There’s no doubt that drawing seahorses is an enjoyable, creative activity. However, it requires practice and patience to master. Whether you choose to draw with traditional art mediums or digital tools, understanding the anatomy of seahorses and experimenting with personal touches helps in creating unique and impressive artwork. Keep practicing and exploring all the mediums; you will unravel various avenues, including your unique style for this sea creature!
We hope that this guide will help you develop your seahorse drawing skills further. Be creative, keep practicing, and always push your limits to improve your artwork.
The beauty of seahorses is limitless. Let the seahorses’ charm be inspiring and guiding your artwork.