I. Introduction
Installing a car battery is a common part of vehicle maintenance but can also be a daunting task. However, it’s critical to take this task seriously as incorrect installation can lead to malfunctions in the vehicle’s electrical system and even accidents. In this guide, we will provide a step-by-step guide, safety tips and precautions, and a thorough explanation of the importance of connecting the terminals in the right order.
II. Step-by-Step Guide for Installing a Car Battery
Before you get started, gather the necessary tools and materials, including gloves, goggles, a wrench or pliers, and a new battery. Once you’ve got your supplies ready, follow these steps:
- Turn off your car ignition, and put on your safety equipment.
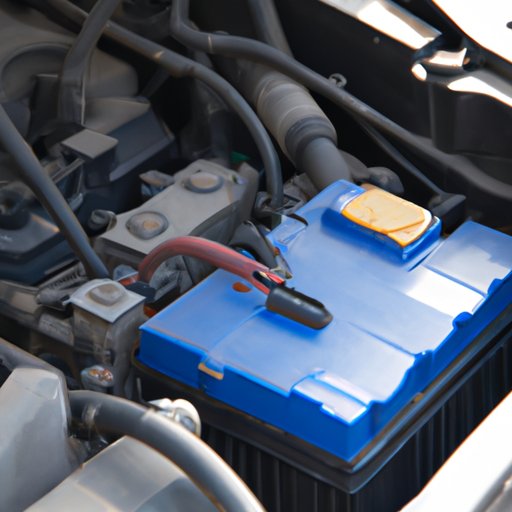
- Locate the battery in your vehicle’s engine compartment. It’s usually a rectangular box with two terminals labeled “+,” for positive, and “-“, for negative.
- Detach the negative cable first. Loosen the nut or bolt with a wrench or pliers, gently wiggle the cable off the terminal, and move it aside, preventing it from making any metal contact. The negative terminal is usually identified by black insulation or a minus sign (-).
- Remove the positive cable in the same way as the negative one. The positive terminal is usually identified by red insulation or a plus sign (+).
- Remove any brackets holding the battery in place, loosen the fixings, and gently lift the battery out of its tray.
- Clean the battery tray using baking soda, water, and a brush to prevent any corrosion build-up. Rinse with water and let it dry.
- Place the new battery in the tray, making sure it’s the right size and orientation. If necessary, use voltage stickers to confirm that it matches your vehicle’s requirements.
- Reattach any brackets or fixings that held the old battery, and secure the new battery in place.
- Connect the positive cable first, making sure to align the positive terminal with the corresponding cable. Tighten the nut with a wrench or pliers until it’s not loose, but not too tight.
- Connect the negative cable last in the same way as the positive one, making sure to align the negative terminal with the corresponding cable. Tighten the nut with a wrench or pliers until it’s not loose, but not too tight.
- Double-check that all the connections are tight, and there’s no movement of the battery within the tray.
- Turn the ignition key and test your vehicle’s electronic components to ensure they are working properly.
III. Why It’s Crucial to Connect Battery Terminals in the Correct Order
Connecting the battery terminals in the wrong order, that is, positive cable to negative and negative cable to positive, has severe and negative consequences. Reversing these connections may cause an electrical overload, resulting in various electrical malfunctions and even engine damage.
Furthermore, an incorrect connection can cause sparks, leading to a potential fire or explosion. Therefore, connecting the positive cable first and the negative cable last significantly minimizes the risk of issues.
Moreover, automobile manufacturers emphasize this particular order in their manuals as it helps ensure the long-term health of the battery, electronic system, and the vehicle as a whole.
IV. Dos and Don’ts of Installing a Car Battery
Here are some critical dos and don’ts to remember when installing a car battery:
Dos
- Do invest in the right safety equipment, including gloves, goggles, and non-conductive tools.
- Do consult your vehicle’s manual to ensure you’re buying the right battery for your car.
- Do a thorough cleaning of the battery tray to ensure it’s free of debris and corrosion.
- Do ensure that the positive and negative terminals of the battery do not make contact with each other or any other metal in the engine compartment.
- Do inspect the battery cables before connecting them, and replace any corroded or damaged ones.
Don’ts
- Don’t work with a battery near an open flame or smoking area.
- Don’t touch the battery terminals with your bare hands.
- Don’t forget to label your cables and terminals to avoid confusion during reinstallation.
- Don’t use too much force while tightening the nuts on the cable clamps to avoid damaging them or the battery terminals.
- Don’t dispose of your old battery in the trash. Instead, take it to an authorized recycling facility.
V. Safety-Focused Installation Guide
Installing a car battery involves several safety hazards, including electrocution and fire. Therefore, taking appropriate precautions ensures a safe installation. Here are some measures that you should consider when working on a car battery:
Eye Protection
Car batteries tend to release harmful gases that can damage your eyes. Wearing goggles or protective glasses protects your eyes from these hazardous emissions.
Non-Conductive Tools
Since batteries generate and store electrical charges, the installing equipment must be non-conductive to prevent electric shock. Ensure that your installation tools, including pliers and wrenches, are not conductive to electricity.
Clean Working Environment
Dirt, dust, and debris can harm a battery’s electrical components, resulting in suboptimal performance or premature failure. Therefore, you should clean the battery tray, cables, and clamps thoroughly before installing a new battery.
Avoiding Accidents
Ensure that all parts of your body are clear of the engine compartment when connecting and disconnecting the battery. An accidental bump of the engine or slamming of the hood could send the tools flying and create risk of injury or damage.
VI. Easy-to-Follow Visual Guide
Many people are visual learners, making a highly detailed visual guide for a task like installing a car battery a very helpful tool. Visual aids help to consolidate memories and help you remember key components, processes, and overall structure.
For reference, here are the basic steps for connecting the battery terminals:
- Connect the Positive Cable First.
- Connect the Negative Cable Last.
VII. Troubleshooting Faulty Car Batteries
Car batteries typically last between 3 and 5 years, after which they need replacement. However, sometimes there may not be anything wrong with the battery, and the issue might be with the wiring, starter, or alternator. Here are some essential troubleshooting tips to help determine if your battery is faulty:
Dead Battery
If the engine does not start, headlights do not turn on or start dim, or the radio and air conditioner do not work, your car battery may be dead.
Leaking Battery
Inspect your battery periodically for signs of leakage. Oxidation, corrosion, cracking, or bloating of the battery casing are warning signs of a faulty battery.
Battery Warning Light
If the battery light on your dashboard illuminates, it may indicate that either your battery has an issue or is coming to the end of its lifespan.
Battery Testing
A battery tester may prove helpful in troubleshooting battery issues. The battery tester confirms the voltage running through the battery and validates if there is a need for replacement.
VIII. Conclusion
Safe installation and replacement of a car battery are essential for the optimal operation and life of your vehicle. This guide has provided you with a comprehensive guide to follow for proper installation and tips for troubleshooting a faulty battery. Remember only to use non-conductive tools, always label cables and terminals, and avoid unnecessary contact with the engine compartment. If you feel uncomfortable with the installation process, don’t hesitate to seek out a professional to avoid any potential safety risks.