Introduction
Gift-giving can be a meaningful and enjoyable experience, whether for birthdays, holidays, or special occasions. But to make the gift truly special, wrapping it properly is essential. Not only does wrapping make the gift look more attractive and professional, it also adds an extra layer of anticipation and surprise. However, many people find gift wrapping to be a daunting task, either because of the awkward shapes and sizes of the gifts, or the lack of creativity and inspiration in wrapping designs. Fear not, for this guide provides step-by-step instructions for different approaches to gift wrapping, from traditional wrapping paper to handmade and sustainable alternatives. You’ll learn how to choose the right materials, measure and cut the paper, fold and tape it neatly, add decorations and personalized touches, and tailor the wrapping to suit the occasion and recipient.
Step-by-step Instructions
Before you start wrapping, make sure you have all the necessary materials and tools on hand. For traditional wrapping, you’ll need wrapping paper, scissors, tape, and possibly ribbon or bows for decoration. For handmade wrapping, you may want to use burlap, twine, ribbon, or other natural materials, as well as scissors, glue, and a hole punch for making gift tags and bows. For sustainable wrapping, you can use recycled materials like newspaper, maps, or fabric scraps, and embellish them with stamps, paint, or markers. No matter which approach you choose, follow these basic steps:
1. Choose the Right Wrapping Paper and Other Materials
Consider the occasion and the recipient’s preferences when choosing the wrapping paper. For a romantic Valentine’s gift, you might choose pink or red paper with heart motifs, while for a baby shower gift, you might opt for pastel colors or baby-themed designs. If you’re wrapping a fragile or valuable item, you might want to use thicker paper or add bubble wrap or tissue paper inside. You can also use patterned or textured paper to add visual interest, or create a theme by matching the gift to the wrapping. For example, if you’re giving a book, you can use pages from an old book to wrap it. For handmade wrapping, you can use burlap, muslin, or other natural fabrics, and personalize them with stamps, stencils, or hand-painted designs. For sustainable wrapping, you can use newspaper, magazine pages, old music sheets, or any other recycled paper or fabric. You can also use natural decorations like twigs, flowers, or leaves to add a personal touch.
2. Measure and Cut the Paper to Fit the Gift
Measure the length and width of the gift, adding a few extra inches on each side to allow for folding and taping. If the gift is an irregular shape, you may need to make several cuts and folds to make the paper fit snugly. Use scissors or a paper cutter to trim the paper neatly, and make sure the edges are straight and even. For handmade wrapping, you can cut the fabric to the desired size and shape, and hem or fray the edges for a rustic look.
3. Fold and Tape the Paper Neatly
Position the gift in the center of the paper, with the longer sides parallel to the gift. Fold the paper over the gift, creasing the edges sharply. Then fold the ends of the paper, one at a time, to create neat triangular flaps. Fold the flaps down and tape them firmly to the gift. Make sure the paper is tight and taut around the gift, without any wrinkles or loose sections. For handmade wrapping, you can use a glue gun or fabric glue to affix the fabric to the gift, and fold and tuck the edges neatly.
4. Add Bows, Ribbons, or Other Decorations as Desired
This is the fun part where you can let your creativity run wild. You can add a bow or ribbon around the gift, tying it in a knot or a bow on top. You can also use stickers, labels, or personalized tags to add a message or a name to the gift. You can use natural materials like twine, leaves, or flowers to wrap around the gift, or make your own decorations by cutting out shapes from cardstock or fabric. You can use paint, markers, or stamps to create patterns or designs on the wrapping. Or you can keep it simple and elegant with minimal decorations. For personalized wrapping, you can use photos, drawings, or other images that relate to the recipient’s interests or hobbies.
Video Tutorial
If you’re a visual learner and prefer to watch someone demonstrate the wrapping process, you can also find plenty of video tutorials online. Here are some tips for choosing an effective video tutorial:
1. Look for a Clear and Detailed Explanation
The narrator or presenter should explain each step clearly and in detail, so that you can follow along easily. They should also provide tips and tricks for making the wrapping process smoother and more efficient.
2. Pay Attention to the Camera Angles and Close-ups
The video should show close-ups of the wrapping process, so that you can see each fold and cut clearly. The camera angles should be chosen carefully to provide a clear and unobstructed view of the wrapping process from different angles.
3. Check the Length and Quality of the Video
The video should be long enough to cover all the necessary steps, but not too long that it becomes tedious or repetitive. The quality of the video should be clear and sharp, with good lighting and sound.
Visual Guide
If you’re a visual learner but prefer static images to video, you can also find plenty of visual guides online. Here are some features to look for in a good visual guide:
1. List of Materials, Tools, and Steps
The guide should provide a clear and concise list of all the necessary materials and tools, as well as the steps involved in the wrapping process. The steps should be numbered or bulleted, and accompanied by clear and detailed descriptions.
2. High-quality Images or Graphics
The guide should include high-quality images or graphics that illustrate each step of the process. The images should be clear, sharp, and large enough to show the details clearly. The graphics should be well-designed and visually appealing, without being too distracting or cluttered.
3. Tips and Techniques
The guide should provide additional tips and techniques that can enhance the wrapping process. These can include shortcuts, variations, or personal anecdotes that make the guide more engaging and informative.
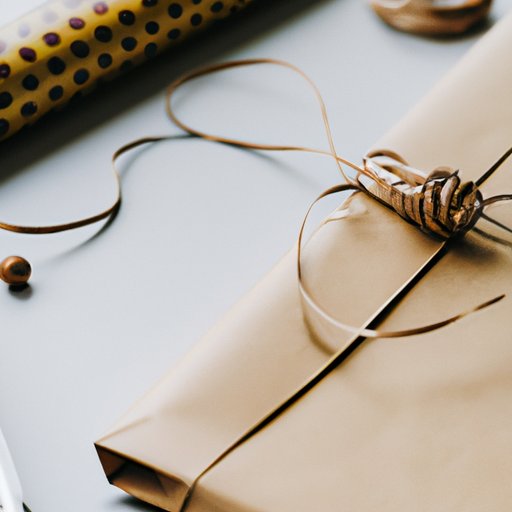
Handmade Wrapping
If you want to add a personal and unique touch to your gift wrapping, you can try making your own handmade wrapping materials. Here are some tips for creating handmade wrapping:
1. Use Natural Materials Like Burlap or Muslin
Instead of using regular wrapping paper, you can use natural fabrics like burlap, muslin, or linen, which have a rustic and organic feel. These fabrics are also more durable and eco-friendly than traditional paper wrapping. You can buy these fabrics in rolls or yards, and cut them to the desired size and shape.
2. Make Your Own Gift Tags and Bows
You can make your own gift tags and bows using twine, ribbon, or other materials. For example, you can cut out small rectangles of cardstock, and punch a hole on one end to tie onto the gift with twine. You can also make a bow by tying several loops of ribbon or twine around your fingers, and then securing them at the center with another piece of ribbon or twine. You can experiment with different colors, textures, and thicknesses to create your own unique designs.
3. Incorporate Natural Elements Like Leaves or Flowers
You can add a natural and rustic touch to your wrapping by using natural elements like leaves, pinecones, or flowers. You can use twine or ribbon to tie these elements onto the gift, or glue them onto the gift tag or bow. You can also use paper cutouts or stamps to create leaf or floral patterns on the fabric wrapping.
Sustainable Wrapping
If you’re concerned about the environmental impact of traditional wrapping paper, you can try using sustainable and recycled materials instead. Here are some tips for creating sustainable wrapping:
1. Use Recycled Materials Like Newspaper or Maps
You can use old newspapers, magazines, maps, or any other paper material that you have lying around, and turn them into unique and eco-friendly wrapping. You can choose pages that have interesting pictures or words on them, or paint over them with bright colors to make them more festive. The paper can be easily folded and taped, and you can add ribbons or bows made of twine or other natural materials.
2. Repurpose Old Fabrics or Clothes
You can also use old fabrics, clothes, or linens to wrap your gifts. These materials can be cut and hemmed to look like wrapping paper, and can be decorated with stamps, markers, or paint to create festive designs. You can also use scraps of fabric or ribbon to tie bows or knots around the gifts.
3. Add Personal Touches with Stamps or Paintings
You can use stamps, stencils, or paintings to create personalized and unique designs on your wrapping. These can include messages, names, or patterns that relate to the recipient’s interests or hobbies. You can also use colorful markers or paints to create abstract or geometric designs that look like modern art.
Personalized Wrapping
If you want to make your gift wrapping even more special and unique, you can customize it to match the recipient’s personality and preferences. Here are some ideas for personalized wrapping:
1. Use Custom Tags or Labels
You can create your own custom gift tags or labels using cardstock, stickers, or printouts. These can include the recipient’s name, a special message, or a picture that relates to the gift. You can also use personalized rubber stamps to create unique designs or patterns on the tags or labels.
2. Tailor the Wrapping to the Occasion or Theme
You can match the wrapping to the occasion or theme of the gift. For example, if you’re giving a beach-themed gift, you can use wrapping paper with seashell or wave patterns, and add decorations like starfish or driftwood. If you’re giving a Christmas gift, you can wrap it in red and green paper with holly or snowflake patterns, and add a mistletoe or a candy cane as a decoration.
3. Handwrite a Personal Note or Quote
You can add a personal touch to the wrapping by including a handwritten note or quote that expresses your love and appreciation for the recipient. You can use a colored pen or marker to write on the wrapping paper or tag, or attach a small letter or card to the gift with a ribbon or a clip.
Gift Wrapping for Different Occasions
Gift wrapping is not just about wrapping the gift in an attractive manner; it is also about conveying the appropriate message or tone for the occasion. Here are some tips for matching the wrapping to the occasion:
1. Use Colors, Patterns, and Textures to Suit the Occasion
You can choose wrapping paper, ribbons, or bows that match the colors, patterns, and textures of the occasion. For example, for Christmas, you can use red and green paper with holly or snowflake patterns, and add a gold or silver bow. For a wedding, you can use white paper with lace or floral patterns, and add a satin ribbon or a pearl embellishment.
2. Create Unique and Themed Looks
You can create a unique and cohesive look by matching the wrapping to the theme of the gift. For example, if you’re giving a sports-related gift, you can use wrapping paper with a ball or a player motif, and add a sports equipment or a team logo as a decoration. If you’re giving a gardening gift, you can wrap it in brown paper with a leaf or a flower pattern, and add a garden tool or a seed packet as a decoration.