Introduction
Winter is coming, and with it, the need to winterize your camper. Failing to properly winterize your RV can lead to costly damages and repairs. Freezing temperatures can wreak havoc on your camper’s plumbing, damaging pipes and hoses beyond repair. Protecting it from the harsh winter elements is crucial to keeping it in good condition. In this article, we’ll give you a step-by-step guide on how to winterize your camper and keep it safe from damage.
Step-by-Step Guide
Winterizing your camper can be done in a few easy steps. While the specifics of the process may vary depending on the model of your camper and the type of plumbing system you have, the general steps are as follows:
Draining Water Systems
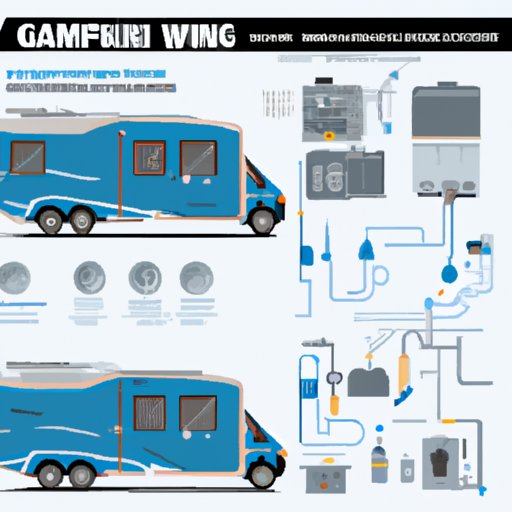
The first step in winterizing your camper is to completely drain the water system. This includes draining the fresh water tank, hot water tank, and all water lines. Start by turning off the water heater and letting it cool down. Once it has cooled, drain it completely. Next, open all faucets and let the water drain out. Don’t forget the outdoor shower and any other areas that have water faucets. After the water has drained, leave all of the faucets open. Remove the drain plugs from the water heater and the fresh water holding tank. Drain any leftover water from the drain valves and low point drains by opening them up.
Adding Antifreeze
After you have drained your water system, it’s time to add RV antifreeze to the system. RV antifreeze is a non-toxic solution that protects your plumbing system from bursting during freezing temperatures. The easiest way to get antifreeze in your plumbing lines is to use the water pump. First, make sure all of the faucets are turned off and the drains are closed. Then, pour a few cups of RV antifreeze into your fresh water holding tank. It’s important to use antifreeze specifically designed for RVs, which is pink in color, so you know you’re using the right product. Turn the water pump on and open each faucet until you see a steady stream of pink antifreeze coming out. Repeat this process until you’ve run antifreeze through all of the faucets, both hot and cold.
Protecting the Exterior
The final step in winterizing your camper is to protect the exterior from the elements. Make sure your camper is clean and dry before storing it for the winter. This reduces the risk of rust, mildew, and other moisture-related problems. Cover your camper with a protective cover or tarp to keep snow, ice, and debris off. A cover will also protect your camper from wind damage and UV rays, which can cause fading and cracking of the exterior.
Problem-Solution Approach
In addition to our step-by-step guide, it’s important to be aware of common winterization issues and their solutions. Here are a few common problems and how to solve them:
Pipes Freezing and Thawing
The most common issue with winterizing your camper is the risk of pipes freezing, which can cause them to burst and lead to costly repairs. But if your pipes do freeze, there are a few things you can do to address the issue. First, never use an open flame to thaw frozen pipes. This can cause a fire. Instead, use a hair dryer or portable heat lamp to slowly thaw out the pipes. If you’re worried about the pipes bursting, make sure to turn off the main water supply until they have fully thawed.
Preventing Pipes from Freezing
The best way to deal with a frozen pipe is to prevent it from happening in the first place. Insulating your pipes and keeping your camper’s interior temperature above freezing will help prevent freezing pipes. You can also use heat tape, which is a type of heating cable that can be wrapped around pipes to keep them warm.
Battery Maintenance in Cold Weather
Another common problem with winterizing your camper is battery maintenance. Cold weather can drain your camper’s battery much faster than normal temperatures. Make sure to disconnect the batteries and store them in a cool, dry place, like your garage, for the winter. If the batteries are removable, take them out and store them separately. This will help extend their life and ensure they’re charged and ready to go when it’s time to use your camper again.
Preventing Rodents from Entering the Camper
Rodents are always on the lookout for warm places to nest during the winter, and your camper may be a prime target. To prevent rodents from entering your camper, make sure to seal any holes or gaps in your camper’s exterior. This includes gaps around windows, vents, and doors. Also, remove all food and trash from your camper before storing it for the winter.
Rundown of Essential Gear
Before you start winterizing your camper, it’s important to have all of the necessary gear on hand. Here’s a rundown of the essential items you’ll need:
Drain Plugs
To drain your water system, you’ll need drain plugs specifically designed for your camper model. Make sure to have extras on hand in case you lose or damage one.
RV Antifreeze
RV antifreeze is essential to protecting your plumbing system from freezing temperatures. Make sure to use antifreeze specifically designed for RVs, which is pink in color, so you know you’re using the right product.
Protective Covers
A protective cover or tarp will keep snow, ice, and debris off your camper during the winter months. Make sure to choose a cover that fits properly and is designed for your camper type.
Other Items
Other items critical for the winterization process include a socket wrench, pliers, a hair dryer or portable heat lamp for thawing frozen pipes, and a flashlight for inspecting the exterior of your camper.
Best Practices
In addition to our step-by-step guide and gear rundown, there are a few best practices to keep in mind to ensure your camper stays in good condition during the winter:
Inspecting the Roof and Sealing any Cracks
Inspect the roof of your camper for any cracks or areas of damage that could lead to leaks during the winter. Seal any cracks or gaps with caulk or sealant specifically designed for your camper type.
Checking the Tires
Make sure your camper’s tires are properly inflated and free from damage. Check for any signs of dry rot, which can occur when tires age and are exposed to the elements.
Protecting the Batteries
Store your camper’s batteries in a cool, dry place where they won’t freeze or be damaged by other winter elements. Make sure to disconnect the batteries before storing them.
Performing Additional Preventative Maintenance Tasks
Performing additional preventative maintenance tasks, such as changing the oil and filters, can help ensure your camper runs smoothly when you take it out of storage in the spring.
Seasonal Checklist
Finally, we’ll give you an overview of the three stages of the winterization process:
Prepping the Camper in the Fall
In the fall before the first freeze, drain and flush your water system, add RV antifreeze, and protect the exterior with a cover or tarp. Check the tires, batteries, and perform any additional maintenance tasks.
Regularly Inspecting during the Winter
During the winter months, periodically inspect your camper for any signs of damage, such as leaks or rodent infestations. Take care not to damage it while removing snow and ice.
Getting the Camper Ready for Use Again in the Spring
In the spring, it’s time to get your camper ready to hit the road again. Remove the cover or tarp, inspect the exterior for any damage, and give it a thorough cleaning. Reconnect the batteries and perform any additional maintenance tasks before hitting the road.
Conclusion
Winterizing your camper is an important part of owning an RV. It can save you both time and money in the long run. Following our step-by-step guide, common problem solutions, essential gear rundown, best practices, and seasonal checklist will keep your camper in good condition during the winter months.