I. Introduction
If you’re struggling to play mini DV tapes on your Canon CA920 camera, you’re not alone. Many users are puzzled by the process, leading to frustration and a sense of wasted potential. But fear not! In this article, we’ll guide you through the steps necessary to use the mini DV player on your Canon CA920 camera and help you unlock its full potential.
II. Why Mini DV Tapes Are Worth Playing on Canon CA920 Camera
Before diving into the specifics of using the mini DV player, it’s important to understand why this process is worth your time and effort. Simply put, playing mini DV tapes on your Canon CA920 camera allows you to view and share footage that may not have been captured digitally. This can include cherished memories from past events or projects, or content captured on older cameras that still holds value today.
Beyond the nostalgia factor, using mini DV tapes can also provide high-quality footage that rivals or surpasses the digital quality offered by many current devices. Additionally, the process of using a mini DV player and Canon CA920 camera can set you apart as a unique filmmaker or videographer, impressing clients or viewers with your knowledge and skill.
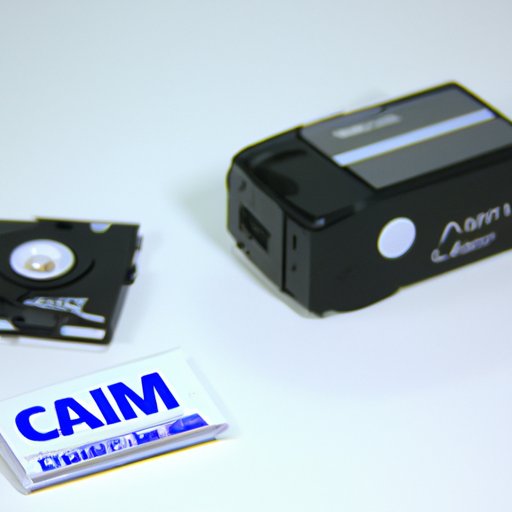
III. Step-by-Step Instructions for Playing Mini DV Tapes on Your Canon CA920 Camera
Now that you understand the significance of using mini DV tapes with your Canon CA920 camera, let’s dive into the step-by-step instructions for playing them. Follow these guidelines carefully to ensure a smooth and stress-free process:
- Connect your Canon CA920 camera to a power source, using either the included AC adapter or a compatible battery pack.
- Open the tape compartment by sliding the Open/Eject switch and pushing up on the edge of the compartment door.
- Insert the mini DV tape into the compartment, making sure it clicks into place and is held securely by the drive mechanism.
- Close the tape compartment door by pressing down until it clicks shut. The camera should automatically rewind the tape and prepare it for playback.
- Turn on the camera by pressing the On/Off button, located on the upper left corner of the camera’s back panel.
- Switch the camera to Camera Mode by pressing the Camera/Media Playback button, located on the upper right corner of the camera’s back panel.
- Press the Play/Pause button, located on the right side of the camera’s back panel. The mini DV tape should begin playing on the camera’s viewfinder or screen.
- Use the Camera Control Dial to adjust the playback volume or frame-by-frame advance, if desired.
- To stop playback, press the Stop button, located next to the Play/Pause button. You can then eject the tape by sliding the Open/Eject switch and carefully removing it from the compartment.
If you encounter any issues with playback, such as a blank screen or distorted images, try troubleshooting by checking the tape for any visible damage or dirt buildup. You may also want to try cleaning the camera’s heads using a specialized cleaning tape or by gently inserting a cotton swab dipped in rubbing alcohol into the compartment.
IV. Tips and Tricks for Mastering Mini DV Playback on Canon CA920 Camera
While the step-by-step guide should cover the basics of using the mini DV player on your Canon CA920 camera, there are additional tips and tricks that can help you get the most out of this process:
- Explore the camera’s menus and settings to fine-tune your playback experience. You may find that adjusting the brightness, contrast, or other elements can greatly enhance the quality of your footage.
- Try using the camera’s zoom function to get a closer look at specific details within your mini DV tape. This can help you catch nuances that may have been overlooked in earlier viewings.
- Don’t overlook the potential of archiving and storing your mini DV tapes properly. Consider investing in a protective case or storage device to keep your tapes safe from damage or decay over time.
V. Bringing It All Together: From Frustration to Functionality
As someone who has struggled with using the mini DV player on my Canon CA920 camera, I know firsthand how frustrating and discouraging this process can be. But by following the step-by-step guide and implementing the tips and tricks suggested above, I was able to overcome these obstacles and unlock the full potential of my equipment.
Now, I’m able to view and share my favorite mini DV footage with ease, capturing memories that would have otherwise been lost to time. I’m also able to impress clients and colleagues with my ability to handle this unique process, setting myself apart as a standout videographer and filmmaker.
VI. Additional Resources
For additional information and resources on using mini DV playback on your Canon CA920 camera, check out these helpful links:
VII. Conclusion
In conclusion, using the mini DV player on your Canon CA920 camera doesn’t have to be a daunting or impossible task. By following the step-by-step guide and incorporating the tips and tricks suggested above, you can unlock the full potential of your equipment and capture memories that will last a lifetime.