Introduction
If you’re a DIY enthusiast, home handyman or woman, or just someone who wants to hang a few picture frames on a wall, then you need a stud finder. A stud finder is an essential tool for anyone needing to locate the studs in a wall quickly. In this comprehensive guide, we will show you how to use a stud finder, including its types, common mistakes to avoid, tips, tricks, and showcase several models on the market to help you choose the best one.
A step-by-step guide on how to use a stud finder
Before we get started on how to use a stud finder, it’s essential to know that there are two main types of stud finders: magnetic and electronic. Magnetic stud finders work by detecting the metal nails or screws that are holding the drywall to the studs. Electronic stud finders, on the other hand, use sensors to detect changes in the wall’s density. Electronic stud finders are the most popular type of stud finders on the market today and can detect things like electrical wires, pipes, and ducts.
Here’s our step-by-step guide on how to use your electronic stud finder:
1. Start by selecting the right stud finder for your needs. Most stud finders come with manufacturer instructions, so be sure to read them first.
2. Calibrate your stud finder by holding it against a plain wall and pressing the calibration button. This process allows the stud finder to adjust to the wall’s density and gives it an accurate reading.
3. Move the stud finder across the wall until it beeps or indicates that a change in density has been detected.
4. Mark the spot where the stud finder indicated by using a pencil or tape. If you’re drilling, make sure the mark is level.
5. Repeat the process on another section of the wall to confirm the stud’s location.
Tips on ensuring accuracy when using a stud finder
To ensure the accuracy of your stud finder, there are some essential tips to remember:
– Always calibrate your stud finder before use.
– Move the stud finder slowly and smoothly across the wall. Sudden or jerky movements can result in inaccurate readings.
– Pay attention to the distance between the studs. Typically, the distance between two studs is 16 inches, but it can vary.
– Make sure you’re using the right setting on your stud finder. Some models have different modes for detecting wires, pipes, and AC lines.
– When marking the stud’s location, use a level to ensure accuracy.
Common mistakes to avoid when using a stud finder
Despite being an essential tool, many people still make mistakes when using a stud finder. Here are some of the most common mistakes and their consequences:
– Not calibrating the stud finder before use can result in inaccurate readings.
– Not using the stud finder in the right mode can result in false positives or negatives.
– Not using the level when marking the stud’s location can result in incorrectly positioned holes in the wall.
Offer solutions on how to avoid these mistakes.
To avoid these mistakes, follow these tips:
– Always calibrate your stud finder before use.
– Read the manufacturer’s instructions and use the appropriate settings based on your project.
– Use a level when marking the stud’s location to ensure accuracy.
Tips and tricks for using a stud finder effectively
Here are some tips and tricks for using your stud finder effectively:
– Take your time and move your stud finder slowly and smoothly across the wall to get an accurate reading.
– Get familiar with the different tones or signals produced by your stud finder and what they mean.
– Use a pencil or tape to mark the stud’s location accurately.
– If you’re not confident using your stud finder, practice on a wall where there are known studs, such as a wall with a power outlet or light switch.
Discuss common problems like false positives and offer solutions on how to overcome them.
One of the most common problems when using a stud finder is getting false positives. False positives occur when the stud finder detects something that isn’t a stud, like a pipe or electrical wire. To overcome false positives, try these solutions:
– Choose a stud finder with a wire detection feature.
– Make sure you’re using the right mode for the project you’re working on.
– Run your stud finder over the same spot several times to get a consistent reading.
The science behind stud finders
Stud finders work on the principles of magnetism and density changes. When you pass a stud finder over a wall, it senses a change in the wall’s density where a stud is present. The stud finder then sends out an audio or visual signal to indicate the stud’s location. Electronic stud finders can also detect metal objects like nails or screws in a wall and differentiate them from a stud.
Discuss the different types of sensors that stud finders can have and how they detect changes in the wall.
Electronic stud finders can have several different sensors, including electromagnetic, ultrasonic, and radar. The electromagnetic sensor detects changes in the wall’s density, while the ultrasonic sensor uses high-frequency sound waves to gauge the wall’s thickness. The radar sensor sends out radio waves and detects the reflected signals from behind the wall to determine the wall’s structure.
Explain the different signals that a stud finder might produce.
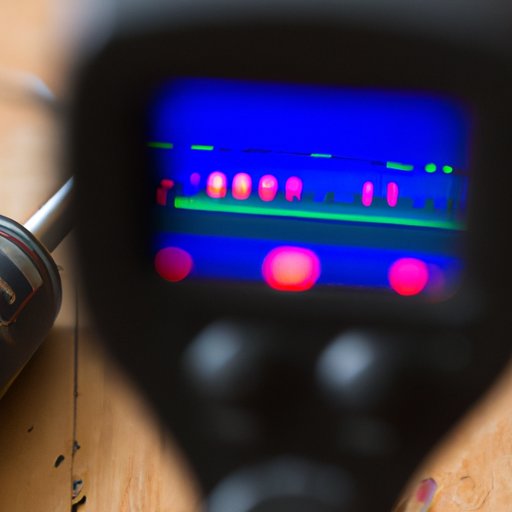
Stud finders can produce various signals, including visual flashes, audio beeps, and vibration. The signals usually indicate the stud’s location or whether wiring or other hazards are present in the wall.
Showcasing different models
There are several different types of stud finders available on the market today. Here are some of the most popular models along with their specifications, pros, and cons:
– Zircon MultiScanner i520: This model has four detection modes, is easy to use, and can detect up to several inches deep into a wall. However, it can be a bit expensive.
– Franklin Sensors ProSensor 710: This stud finder has deep scanning capabilities and can detect up to 1.5 inches deep into a wall. It also has a bright LED screen, making it easy to see the entire wall. However, it can be a bit heavy to hold for extended periods.
– CH Hanson 03040 Magnetic Stud Finder: This magnetic stud finder is quite affordable and doesn’t require batteries. However, it can only detect metal fasteners and not wooden studs.
Offer tips on how to choose the best stud finder for your needs.
When choosing a stud finder, consider these factors:
– Your budget
– The depth of scanning required for your project
– The types of materials you’ll be scanning, including metal and wood
– Additional features like wire detection, GPS mapping, and LED screens
Conclusion
Using a stud finder is essential for anyone wanting to hang pictures, shelves, or any other wall art without having to worry about damaging the wall. In this comprehensive guide, we’ve shown you how to use a stud finder, common mistakes to avoid, tips and tricks, and the science behind stud finders. We’ve also showcased some of the best stud finders in the market and offered tips on how to choose the best one for your needs.
By following the steps outlined in this guide, you’ll be able to find the studs in your walls with ease and confidence, making your home improvement projects quicker and stress-free.