I. Introduction
Learning how to use a sewing machine can be a rewarding and fun experience, but for beginners, it can also be intimidating. In this article, we will take a step-by-step approach to help you get started. We’ll cover everything from threading your machine and learning basic stitches to maintenance and troubleshooting. Additionally, we’ll give you some ideas for sewing projects and tips on how to choose the best sewing machine to fit your needs. By the end of this article, you’ll be ready to tackle your first sewing project with confidence!
II. A Step-by-Step Guide for Beginners
A. Threading the Sewing Machine
Before you can start sewing, you’ll need to set up your machine and thread it properly. Here are the steps you should follow:
1. Setting up the machine
The first thing you need to do is set up your machine. Make sure it’s plugged in and that you have the correct needle installed for the type of fabric you’ll be working with.
2. Winding the bobbin
The next step is to wind your bobbin. To do this, you’ll need to place the thread on the spool pin, bring it around the bobbin winding tension disc, and then insert the bobbin onto the bobbin winder spool.
3. Inserting the bobbin
Once your bobbin is wound, you’ll need to insert it into your machine. Open your bobbin case, and insert the bobbin so that the thread is coming off in a clockwise direction. Pull the thread through the slot and under the tension spring.
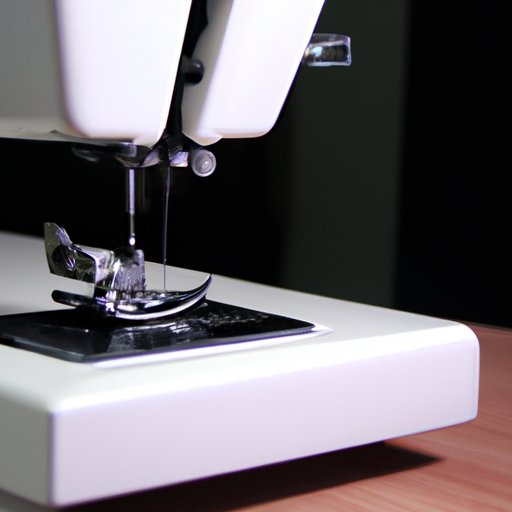
4. Threading the machine
Now that your bobbin is in place, it’s time to thread the machine. This can be done by following the thread path diagram that is usually printed on the machine somewhere near the needle. Follow the instructions carefully and make sure the thread is secure in each guide and through the needle.
B. Basic Stitches to Get Started
Once your machine is threaded, you’re ready to start sewing. Here are three basic stitches that every beginner should know:
1. Straight stitch
The straight stitch is the most basic and commonly used stitch. It’s perfect for sewing seams, hemming, and topstitching. To sew a straight stitch, set your machine to the straight stitch setting, and adjust the stitch length to your desired length. Then, place your fabric under the needle and lower the presser foot. Begin stitching, making sure to keep even pressure on the pedal so that your stitches are even and straight.
2. Zigzag stitch
The zigzag stitch is a versatile stitch that can be used to finish edges, prevent fraying, and add decorative touches to your projects. To sew a zigzag stitch, select the zigzag stitch setting and adjust the width and length to your desired settings. Then, place your fabric under the needle and lower the presser foot. Begin stitching, moving the fabric slightly to create a zigzag pattern.
3. Buttonhole stitch
The buttonhole stitch is used to create openings for buttons on garments. Most modern sewing machines have an automatic buttonhole function, but if your machine does not, you can create a buttonhole manually. To do this, mark the length of the buttonhole on your fabric and set your machine to the zigzag stitch setting. Sew a few stitches at the bottom of the buttonhole, then use a seam ripper to carefully cut open the middle of the buttonhole.
C. Basic Sewing Techniques
Now that you know the basics of threading your machine and the stitches you’ll use, it’s time to learn some basic sewing techniques. Here are a few you’ll need to know:
1. Sewing a straight line
To sew a straight line, position your fabric under the needle and lower the presser foot. Hold onto the thread tails at the back of the machine, and begin stitching. Use the edge of your presser foot as your guide to keep your stitching straight and even.
2. Turning corners
When you need to turn a corner, stop sewing with your needle in the down position, lift the presser foot, and turn your fabric. Lower the presser foot and continue sewing in the new direction.
3. Sewing a curve
Sewing a curve can be a bit tricky, but with practice, you’ll get the hang of it. Begin stitching along the curve, but instead of pushing the fabric straight into the machine, gently guide it around the curve as you sew. This will help prevent puckering and keep your stitches even.
III. Sewing Machine Maintenance
A. Why Regular Maintenance is Important
Maintaining your sewing machine is important to keep it working properly and to prevent damage. Here are a few reasons why regular maintenance is important:
- Prevent thread jams and broken needles
- Maintain proper tension
- Extend the lifespan of your machine
B. Cleaning the Machine
One of the most important aspects of sewing machine maintenance is keeping it clean. Here’s how to do it:
1. How often to clean the machine
You should aim to clean your machine after every few projects or at least every month if you use it frequently.
2. Materials needed
You’ll need a few basic materials to clean your machine, including a soft cloth, a small brush or toothbrush, and a can of compressed air.
3. Step-by-step guide to cleaning the machine
Begin by unplugging your machine. Use the brush or toothbrush to gently remove any lint or dust from the bobbin area, feed dogs, and around the needle plate. Use the compressed air to blow out any hard-to-reach areas. Wipe down the exterior of the machine with a soft cloth, and you’re done!
C. Oiling the Machine
Oiling your machine is important to keep it running smoothly. Here’s how to do it:
1. Why oiling is important
Oiling your machine helps to lubricate the moving parts and prevent friction, which can cause wear and tear on the machine.
2. When to oil the machine
You should aim to oil your machine after every 10 hours of use or at least every few months if you use it frequently.
3. Step-by-step guide to oiling the machine
Begin by unplugging your machine. Look for the oiling points on your machine, which are usually indicated by red markings on metal parts. Apply a drop or two of oil to each point, and then run your machine for a few minutes to evenly distribute the oil. Wipe away any excess oil, and you’re done!
IV. Tips for Troubleshooting Common Problems
Even with proper maintenance, sewing machines can sometimes encounter problems. Here are a few common issues you might encounter and how to fix them:
A. Tangled Bobbins
1. Causes of tangled bobbins
There are a few reasons why your bobbin might become tangled, including an improperly threaded machine, a bobbin that is wound too tightly, or a bent or damaged needle.
2. Step-by-step guide to fixing the problem
To fix a tangled bobbin, first, remove the bobbin case and take out the bobbin. Re-thread the machine, making sure the thread is properly routed and that the needle is inserted correctly. If the problem persists, try winding a new bobbin or replacing the needle.
B. Uneven Stitching
1. Causes of uneven stitching
Uneven stitching can be caused by a variety of factors, including incorrect thread tension, an improperly threaded machine, or a dull or bent needle.
2. Step-by-step guide to fixing the problem
To fix uneven stitching, start by adjusting your thread tension. If that doesn’t help, check that your machine is threaded correctly and that the needle is inserted correctly. If the problem persists, replace the needle.
C. Other Common Problems
Here are a few other common problems you might encounter and how to fix them:
1. Skipping stitches
Skipping stitches can be caused by a dull or bent needle, a damaged or dirty needle plate, or an incorrect needle size for the fabric you’re working with. Try replacing the needle, cleaning the needle plate, and using the correct needle size for your fabric.
2. Thread breaking
Thread breaking can be caused by a variety of factors, including an improperly threaded machine, incorrect thread tension, or using the wrong type of needle. Double-check your threading, adjust your thread tension, and make sure you’re using the right needle for your fabric.
3. Fabric puckering
Fabric puckering can be caused by using the wrong tension or needle size for your fabric, or by pulling your fabric as you sew. Make sure your machine is threaded correctly and that you’re using the correct tension and needle size for your fabric. Also, make sure to let your machine feed the fabric through on its own without pulling it.
V. Ideas for Sewing Projects
Now that you know the basics of how to use a sewing machine, why not put your new skills to use with a fun project? Here are a few ideas to get you started:
A. Basic Projects for Beginners
- Pillowcase
- Tote bag
- Infinity scarf
B. Intermediate Projects
- Skirt
- Dress
- Quilt
C. Advanced Projects
- Tailored blazer
- Leather purse
- Upholstery projects
VI. How to Choose the Right Sewing Machine
A. Introduction to Different Types of Sewing Machines
There are several different types of sewing machines, including mechanical, computerized, and serger machines. Mechanical machines are the most basic and affordable, while computerized machines offer more features and are better suited for advanced sewing projects. Sergers are used for finishing seams and creating professional-looking edges.
B. Features to Look for in a Sewing Machine
When choosing a sewing machine, there are a few key features to keep in mind:
1. Number of stitches
A machine with more stitch options allows you to tackle a wider variety of projects and add decorative touches to your designs.
2. Automatic needle threader
An automatic needle threader can save you time and frustration, especially if you have trouble threading the needle on your own.
3. Adjustable speed
Adjustable speed allows you to control the speed of your machine, making it easier to work with delicate or difficult fabrics.
C. Choosing the Right Sewing Machine for Your Needs
When choosing a sewing machine, it’s important to consider your budget, the type of sewing projects you want to do, and your experience level.