I. Introduction to Tie Dyeing
If you’re looking to add a little color to your life, tie dyeing might just be the perfect hobby for you. Tie dyeing has been around for centuries and has been enjoyed by many generations. It’s a fun, creative, and easy way to add some personality to your clothes and accessories. In this article, we will give you a complete guide on how to tie dye.
Definition of Tie Dyeing
Tie dyeing is a fabric dyeing technique that involves folding, twisting, and tying fabric to create patterns. The fabric is then dyed, resulting in a unique and colorful design.
Brief History of Tie Dyeing
The art of tie dyeing can be traced back to the 8th century in Japan, where it was called Shibori. It has been used in many different cultures as a way to express creativity and individuality. In the 1960s, tie dyeing became popular among the hippie movement and was used as a symbol of peace and love. Today, tie dyeing is a popular craft enjoyed by people of all ages and backgrounds.
Benefits of Tie Dyeing
The benefits of tie dyeing go beyond just having a fun hobby. Not only is it a great way to express your creativity, but it’s also a sustainable and eco-friendly way to breathe new life into old clothes. It’s a fun activity to do with friends and family and can be therapeutic as well.
II. How to Tie Dye: Step-by-Step Guide for Beginners
Now that we’ve covered the basics, let’s get started with a step-by-step guide on how to tie dye:
Selecting Materials
The first step in tie dyeing is selecting your materials. You’ll need fabric, dye, rubber bands or string, gloves, and a large mixing bowl. When it comes to fabric, cotton is the best option for tie dyeing. It absorbs the dye well and holds the color better than other fabrics. You can buy pre-made tie dye kits or purchase individual dye colors and mix them yourself.
Designing Pattern and Preparing Fabric
Before you start dying your fabric, you’ll want to decide on your pattern. Popular patterns include spirals, stripes, and splatters. Once you’ve decided on your pattern, it’s time to prepare the fabric. Start by washing it to remove any dirt or residue. Then fold, twist or bunch up the fabric in the pattern of your choice. Use rubber bands or string to secure the fabric in place.
Mixing and Applying Dye
Now it’s time to mix the dye. Follow the instructions on the dye package and remember to wear gloves to avoid staining your hands. You can mix the dye in a large mixing bowl or in plastic squirt bottles for more precise application. Apply the dye to the fabric, making sure to saturate all areas evenly. The more dye you use, the more vibrant the color will be. After applying the dye, wrap the fabric in plastic wrap and let it sit for several hours to allow the dye to set.
Washing and Drying Finished Product
After the dye has set, it’s time to rinse out the excess dye. Rinse the fabric under cold water until the water runs clear. Then wash the fabric in hot water with a small amount of detergent. Finally, dry the fabric in the dryer or outside in the sun.
Tips for Achieving Different Patterns and Styles
Here are some tips for achieving different patterns and styles:
- To achieve a spiral pattern, twist the fabric tightly and wrap rubber bands around it in a spiral pattern.
- For an ombre effect, dip the fabric in the dye and gradually lift it out of the dye to create a gradient.
- For a crumpled design, scrunch up the fabric and secure it with rubber bands.
- To create a heart design, fold the fabric in half and cut out a heart shape. Then tie the fabric as you would for a spiral pattern.
- For a bullseye design, fold the fabric in half and then in quarters. Use rubber bands to create sections and dye each section a different color.
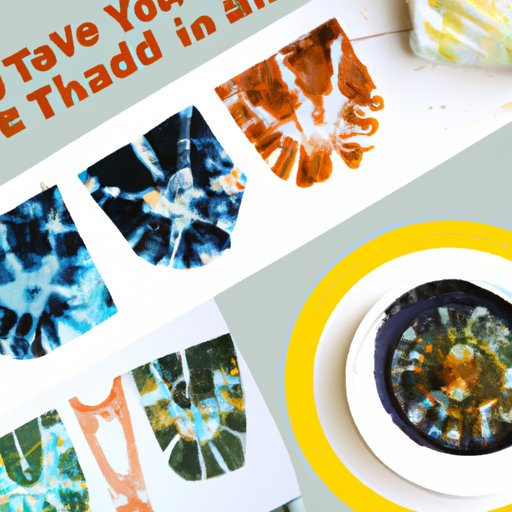
III. 10 Creative Tie Dye Designs to Try at Home
If you’re looking for some inspiration, here are ten creative tie dye designs to try at home:
Spiral Design
To achieve a spiral pattern, start by pinching the fabric in the center and twisting it tightly. Then wrap rubber bands around the twisted fabric in a spiral pattern.
Ombre Effect
To create an ombre effect, dip the fabric in the dye and gradually lift it out of the dye to create a gradient. You can use one color or multiple colors to achieve the desired effect.
Crumple Design
A crumple design is achieved by scrunching up the fabric and securing it with rubber bands. This creates a unique and random pattern.
Heart Design
To create a heart design, fold the fabric in half and cut out a heart shape. Then tie the fabric as you would for a spiral pattern. This creates a heart in the center of the fabric.
Bullseye Design
To achieve a bullseye design, fold the fabric in half and then in quarters. Use rubber bands to create sections and dye each section a different color. This creates a colorful bullseye effect.
Stripes Design
A stripes design is achieved by folding the fabric accordion-style and securing it with rubber bands. Then dye the fabric, making sure to saturate all of the areas between the rubber bands.
Swirl Design
To create a swirl pattern, start by pinching the fabric in the center and twisting it tightly. Then wrap rubber bands around the twisted fabric in a spiral pattern. Finally, twist the rubber-banded fabric into a swirl shape.
Checkerboard Design
To achieve a checkerboard design, fold the fabric in a checkerboard pattern. Then secure it with rubber bands and dye each section a different color.
Splatter Design
To achieve a splatter design, fill a spray bottle with the dye and hold it several inches away from the fabric. Spray the fabric randomly to create a splatter effect.
Batik Design
Batik is a technique that involves using wax to create patterns on fabric before dyeing it. To achieve a batik design, use a fabric pen and draw your pattern onto the fabric. Then apply wax to the areas you don’t want to be dyed. After dyeing the fabric, remove the wax to reveal the pattern.
IV. Tie Dyeing with Natural Materials: A Sustainable Approach
If you’re looking for a more sustainable approach to tie dyeing, consider using natural materials:
Overview of Environmental Impact of Traditional Dyes
Traditional fabric dyes contain toxic chemicals that can be harmful to the environment when they are washed out into the water supply. Natural dyes are a more eco-friendly alternative.
Explanation of Natural Dyeing Process
Natural dyeing involves using plant-based materials to create dyes. This can include fruits, vegetables, and flowers. The fabric is soaked in the natural dye and then washed and rinsed to set the color.
Popular Natural Dye Sources
Here are some popular natural dye sources:
- Turmeric – a yellow to orange dye
- Beets – a pink to red dye
- Black beans – a blue to purple dye
- Red cabbage – a blue to purple dye
- Onion skins – a yellow to brown dye
Tips for Sourcing Sustainable Fabrics and Minimizing Waste during the Tie Dye Process
When it comes to sourcing sustainable fabrics, look for fabrics that are made from organic cotton or other eco-friendly materials. To minimize waste during the tie dye process, use natural dyes, and try to use up all of your dye before discarding it.
V. Upcycling with Tie Dye: Transforming Old Clothes into Something New
If you have old clothes that you no longer wear, consider upcycling them with tie dye:
Selecting Suitable Garments for Tie Dyeing
Cotton is the best fabric for tie dyeing. Look for old t-shirts, dresses, or skirts that could use a new look.
Preparing Fabric for Tie Dyeing
Before tie dyeing your old clothes, wash and dry them to remove any dirt or debris. Then, follow the same steps for preparing fabric.
Step-by-Step Instructions for Creating Unique Designs and Color Schemes
The possibilities are endless when it comes to upcycling old clothes. Use the same technique for creating different patterns and color schemes. Get creative and add your style to old clothes.
Tips for Incorporating Tie Dye into Wardrobes and Fashion Trends
Tie dye has made a comeback in fashion trends. From t-shirts to dresses, and even accessories, tie dye can be incorporated into any wardrobe. Pair a tie-dyed t-shirt with jeans and sneakers for a casual look or dress it up with a skirt and heels.
VI. Tie Dyeing for Kids: A Fun and Creative Summer Activity
Tie dyeing is also a great activity for kids, especially during the summer:
Importance of Tie Dyeing as a Summer Activity for Kids
Tie dyeing is a fun way to keep kids entertained during the summer months. It’s a great way to teach them about colors and patterns while fostering their creativity.
Safety Considerations When Tie Dyeing with Children
When tie dyeing with children, make sure to wear gloves and keep the dye away from their faces and mouths. Also, be sure to use non-toxic dyes.
Kid-Friendly Designs and Suggestions
Some kid-friendly designs include hearts, stars, or smiley faces. Let them get creative and make their own designs.
Creative Ways to Incorporate Tie Dye into Other Summer Activities
Incorporate tie dye into other summer activities like camping or picnics. Tie dye a t-shirt or bandana to wear on your adventures.
VII. Conclusion
Now that you know how to tie dye and the many ways it can be used, you can get started on creating your own unique designs. Tie dyeing is not only a fun and creative activity, but it’s also a sustainable and eco-friendly way to refresh your wardrobe. Whether you’re tie dyeing with kids or creating something new from old clothes, the possibilities are endless.