I. Introduction
Are you looking for a fun and creative way to personalize your t-shirts? Look no further than tie-dyeing! In this article, we’ll explain everything you need to know about tie-dyeing t-shirts, including the materials required, step-by-step instructions, and troubleshooting tips.
II. Getting started: preparing your materials
Before you get started, make sure you have all the necessary materials for tie-dyeing, including dye, fabric, gloves, rubber bands, and squeeze bottles. Selecting the right type of dye and fabric is also crucial for the best results. Lastly, setting up your work area is important to avoid stains and messes. Here are a few tips:
- Choose a well-ventilated area that can easily be cleaned up
- Cover your workspace with plastic sheets or garbage bags
- Wear old clothes or an apron and gloves to avoid dye stains on your skin
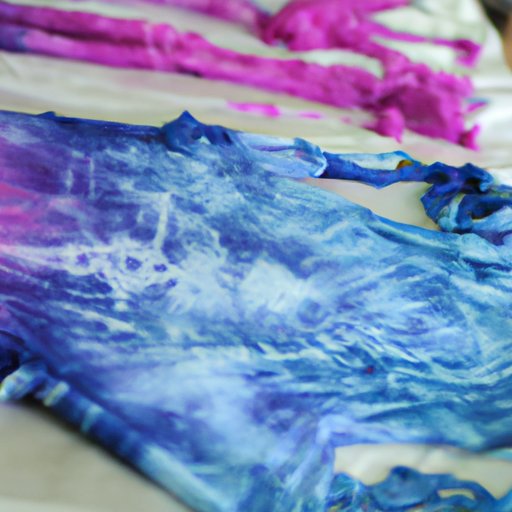
III. Step-by-step guide on how to tie-dye t-shirts
Now that you have your materials ready, it’s time to start tie-dyeing! Here is a step-by-step guide:
- Prepare your dye according to the instructions on the package
- Soak your t-shirt in water and wring it out but do not dry it fully
- Fold your t-shirt the way you want it to be dyed and secure it with rubber bands
- Squeeze the dye onto the areas you want to dye
- Wrap the t-shirt in plastic wrap or a garbage bag and let it sit for the recommended amount of time
- Rinse the t-shirt with cold water until the water runs clear and remove the rubber bands and plastic wrap
- Wash the t-shirt in the washer without other clothing with cold water
- Dry the t-shirt by itself in the dryer or hang it up to dry
It’s important to note that different dye brands may have varying instructions, so be sure to check the package for more detailed instructions. If you experience common mistakes like dye bleeding or fading, refer to the troubleshooting tips below.
IV. Best tie-dye techniques for beginners
One of the best things about tie-dyeing is the variety of techniques available to create unique patterns. Some popular techniques are:
- Spiral: Lay your t-shirt flat and pinch the center with your fingers, twisting the shirt into a spiral shape. Secure with rubber bands.
- Crumple: Grab your t-shirt and crumple it, or scrunch it up. Secure with rubber bands.
- Accordion: Fold your t-shirt in an accordion pattern and secure with rubber bands, creating a striped effect.
If you’re new to tie-dyeing, start with a simpler technique like the spiral pattern. Be sure to practice folding and tying your t-shirts before applying any dye.
V. Creating unique tie-dye designs on t-shirts
Tie-dyeing doesn’t have to be just random splatters of colors. You can create more intricate designs with a bit of creativity. Popular designs include a sunburst, a bullseye, or stripes. To create these designs, refer to online tutorials or experiment with your own designs.
VI. Tips for selecting the right type of dye for tie-dyeing t-shirts
There are a variety of different dye options available. Some of them are:
- Vibrant all-purpose dyes: good for beginners. They offer brilliant bright hues in a single bottle/mix packet
- Procion dyes: professional-grade fiber reactive dyes which bond more strongly to fabric
- Natural dyes: they give pastel hues for eco-lovers, but not very durable and can fade more easily
The type of dye you choose will depend on what type of fabric you’re using and what kind of hue you’re hoping to achieve. Be sure to follow the instructions on the package for best results.
VII. How to prepare the fabric for tie-dyeing
Before you begin the tie-dyeing process, you will need to make sure your fabric is prepped. Here are a few tips:
- Wash your fabric in warm water using mild detergent. Rinse the fabric fully and make sure it’s clean and free of any residue.
- Dry the fabric by itself in the dryer or hang it up to dry
VIII. Different ways to fold and tie t-shirts for different tie-dye patterns
The way you fold and tie your t-shirt will determine the pattern you get. Here are a few common folding and tying techniques and their resulting patterns:
- Bulls-eye: fold the shirt in half and stick a fork through the center. Wrap rubber bands around the fork and pull tight. Dye the shirt using your chosen method.
- Spiral: pinch the center of your t-shirt and twist. Use rubber bands to secure it in a spiral pattern. Dye the shirt using your chosen method.
- Stripes: fold the shirt into accordion pleats then wrap with rubber bands to create stripes. Dye the shirt using your chosen method.
IX. How to care for tie-dye t-shirts to ensure they last long
Once you’ve completed your tie-dye project, you want to make sure you take care of it so the colors don’t fade. Here are a few tips:
- Wash with like colors in cold water
- Avoid using fabric softener as it can damage the dye
- Dry the t-shirt on a low heat setting or hang it up to dry
- Store the t-shirt out of direct sunlight
- If any damage occurs, you can repair it with fabric glue or colored thread
X. Conclusion
Tie-dyeing t-shirts is a fun and creative activity for people of all ages. We hope this article has inspired you to try tie-dyeing your own t-shirts and given you the knowledge needed to get started. Remember to experiment with different techniques and patterns to create unique designs. With a bit of practice and patience, you’ll have a closet full of customized tie-dye t-shirts!
If you need additional tips and resources, there are online videos and tutorials available.