Introduction
The Windsor knot is a classic and timeless tie knot that exudes style, sophistication, and elegance. While it might seem daunting at first glance, with a little practice and patience, anyone can master this knot. In this guide, we will take you step-by-step through the process of tying a Windsor knot and offer some tips and tricks to help you perfect it.
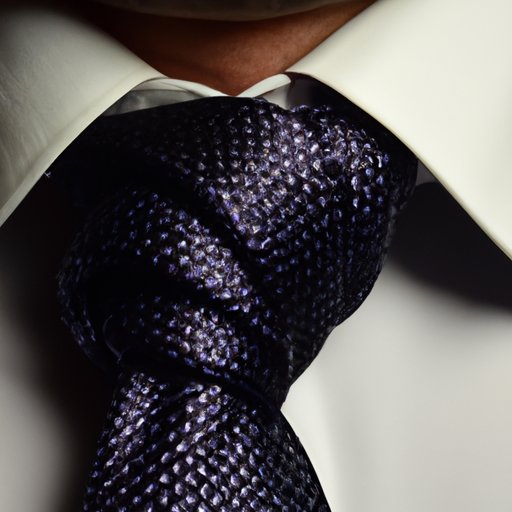
Step-by-Step Instructions with Detailed Pictures
Before we begin, it’s important to note that symmetry and balance are critical when it comes to tying a Windsor knot. The knot should be centered and even on both sides of the tie, with the wider end sitting slightly lower than the narrow end.
Here’s how to tie a Windsor knot:
- Start with the wide end of the tie on your right side, and the narrow end on your left. The wide end should be about a foot longer than the narrow end.
- Cross the wide end over the narrow end, and bring it up through the loop between your collar and the tie.
- Bring the wide end down to the left, and then across the narrow end to the right.
- Bring the wide end up and over the loop, and then down through the knot you’ve created in the front.
- Hold the knot with your finger, and bring the wide end down through the loop on the right side of the knot.
- Bring the wide end around the back of the knot to the left, and then up through the loop you’ve created in the front.
- Hold the knot with your finger again, and bring the wide end down through the knot from the front.
- Use both hands to adjust the knot and the length of the tie until it sits comfortably and looks symmetrical.
Remember, practice makes perfect! Don’t be discouraged if it takes a few attempts to master the Windsor knot – with time and patience, it will become second nature.
Video Tutorial
If you’re more of a visual learner, check out this helpful video tutorial:
As you watch the video, pay close attention to the subtle nuances of the tying process, such as how tightly to pull the knot or how to adjust the length of the tie. These details can make all the difference when it comes to achieving a perfect Windsor knot.
Frequently Made Mistakes and How to Avoid Them
While the Windsor knot is relatively straightforward to tie, there are a few common mistakes that people often make. Here are a few of the most frequent mistakes and tips on how to avoid them:
- Tying the knot too loosely or too tightly. A poorly tied knot can look sloppy and unrefined. Make sure to pull the wide end through the loop with enough tension to create a firm, symmetrical knot.
- Not adjusting the length of the tie. The knot should be centered and evenly balanced between the collar and the belt, with the wide end hanging slightly lower than the narrow end.
- Using the wrong type of tie. The Windsor knot works best with a thicker, silk tie. Thinner ties or those made of other materials may not hold their shape or drape as well.
If you find that your knot isn’t looking quite right, don’t be afraid to adjust the length or loosen the knot to start over. Remember, the beauty of the Windsor knot is in its precision and symmetry.
Simpler Alternatives to the Windsor Knot
If you’re still struggling to master the Windsor knot, don’t worry – there are simpler alternatives that can still achieve a similar look. One of these is the Four-in-Hand knot, which is a simpler and more versatile knot that can work with a wider variety of ties and collar styles.
Here’s how to tie a Four-in-Hand knot:
- Start with the wide end of the tie on your right side, and the narrow end on your left. The wide end should be about a foot longer than the narrow end.
- Cross the wide end over the narrow end, and bring it up through the loop between your collar and the tie.
- Bring the wide end down to the left, and then up and over the loop.
- Bring the wide end down through the loop on the right side of the knot.
- Use both hands to adjust the knot and the length of the tie until it sits comfortably and looks symmetrical.
While the Four-in-Hand knot may not have the same level of elegance or formality as the Windsor knot, it is a great alternative that can work for a variety of occasions and styles.
History and Context
The Windsor knot was popularized by the Duke of Windsor, who was known for his impeccable style and sophistication. The knot originated in the early 20th century as a way to create a wider, more symmetrical knot that would showcase the texture and pattern of his silk ties. Today, the Windsor knot remains a staple of men’s fashion and is a testament to the enduring legacy of classic style and elegance.
Personal Anecdotes and Tips
As someone who has worn Windsor knots for years, I can attest to the timeless appeal of this classic knot. Whether you’re attending a wedding, a job interview, or a simple night out, the Windsor knot exudes confidence and style.
One tip I would offer is to experiment with different tie fabrics and widths to find what works best for you. Thicker silk ties will hold their shape and drape more elegantly, while thinner ties can offer a more casual or relaxed look. Additionally, pay attention to the collar style of your shirt – different collars may require adjustments to the length or shape of the knot to achieve the perfect look.
Conclusion
The Windsor knot is a classic and timeless tie knot that can elevate any outfit to new heights of style and sophistication. With a little practice and patience, anyone can master this knot and make it their own. Whether you’re a seasoned pro or a new tie-wearer, remember to stay true to your personal style and experiment with different fabrics, colors, and styles until you find the perfect fit.