I. Introduction
Tying shoes is a daily task that most of us do without much thought, but it’s an essential skill that we all need to know how to do correctly. Whether you’re a child learning for the first time or an adult who needs a refresher, this comprehensive guide will provide you with a step-by-step process on how to tie your shoes the right way, common mistakes you should avoid, and the different types of knots you can use.
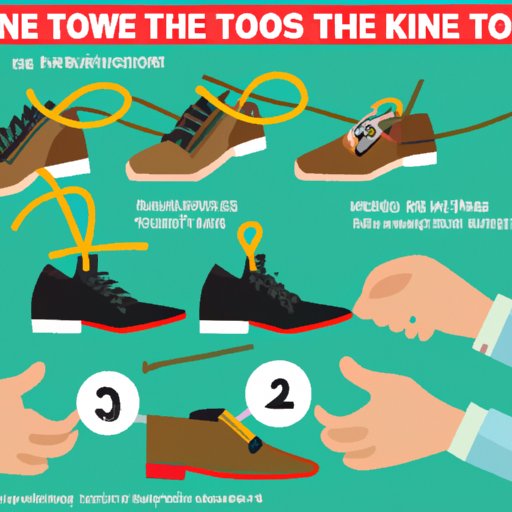
II. Step-by-Step Guide
Let’s start with the basics. Here are the steps to tie a shoe correctly:
- Start by crossing one lace over the other to form an “X”.
- Take the lace that’s underneath and bring it over the other lace, then tuck it under the “X”.
- Take the new lace that’s underneath and make a loop.
- Do the same thing with the other lace to form a second loop.
- Tie the two loops together by tucking one loop under the other and pulling tight.
Now that you know the basic steps, let’s dive deeper and break down each step to ensure you are tying your shoes correctly.
Step 1: Cross one lace over the other to form an “X.” Make sure that both laces are of the same length.
Step 2: Take the lace that’s underneath and bring it over the other lace, then tuck it under the “X”. Make sure that the two laces are not twisted and that they crossover at the base of the “X”.
Step 3: Take the new lace that’s underneath and make a loop. This loop should be a loose one, and the size of the loop depends on how tight you want the knot to be when you’re done.
Step 4: Do the same thing with the other lace. Make another loose loop.
Step 5: Cross the loops over each other and tuck one loop under the other to tie the two loops together.
Pro Tip: Make sure that the loops are even in size and tightly cinched together to prevent the knot from unravelling easily.
III. Common Mistakes to Avoid
When tying shoes, there are common mistakes that people make that can cause discomfort or lead to the laces getting untied easily. Here are some of the common mistakes and how to avoid them:
Mistake #1: Tying shoes too loosely, causing discomfort and the knot to come undone quickly.
Solution: Make sure you form tight loops and cinch them tightly together when you tie the knot.
Mistake #2: Creating overextended loops that can cause tripping hazards.
Solution: Don’t make your loops too big or too small. Loops should be proportional to the size of the shoe and foot.
Mistake #3: Crossing the laces with a twist and knotting the lace over another lace instead of under.
Solution: Pay close attention to how you are crossing the laces, and ensure that the lace that goes under stays under the “X”.
IV. Video Tutorial
For those who learn better with visual aids, here’s a video tutorial that demonstrates how to tie your shoes correctly:
V. History of Shoelaces
Shoelaces have been around for centuries, and their design has evolved over time. From leather cords to modern-day synthetic laces, shoelace technology continues to advance. The first shoelaces were made from animal hide and tied using a simple knot that’s still used today.
In the early 20th century, shoelaces started being mass-produced with advancements in textile manufacturing technology. And by the 1970s, velcro became widely available and started replacing shoelaces.
Despite the introduction of velcro and other fastening methods, shoelaces continue to be the go-to method for securing shoes.
VI. Different Types of Knots
Aside from the basic knot, there are different types of knots that you can use when tying your shoes. Here are three of the most common:
1. The Granny Knot: This knot is easy to tie but is prone to loosening. To tie the Granny Knot:
- Start with the basic knot.
- Instead of tying the loop on top of the other loop, tie it under, creating a Granny Knot.
2. The Square Knot: This knot is more secure than the basic knot and is commonly used for hiking shoes. To tie the Square Knot:
- Start with the basic knot.
- To make the second knot, create a loop with each lace and tie them together in a square knot, making the loops parallel.
3. The Surgeon’s Knot: This knot is the most secure and is commonly used by athletes. To tie the Surgeon’s Knot:
- Start with the basic knot.
- To make the second knot, create a loop with each lace and tie them in a basic knot.
- Create another basic knot with the loops.
- Tuck the loops into the knot and pull tight to secure.
It’s important to note that not all knots work for every type of shoes. For example, the Surgeon’s Knot may be too bulky for dress shoes. Generally speaking, the basic knot is suitable for most shoes.
VII. Conclusion
Learning how to tie your shoes correctly may seem like a small task, but it’s an essential one that you’ll use every day. With this comprehensive guide, you’re now equipped with a step-by-step process, common mistakes to avoid, and different types of knots to use depending on the type of shoes you have. Remember to always double-check your shoe laces before heading out to avoid any tripping hazards.