I. Introduction
Sewing is a satisfying hobby that takes time to master. However, before you can start creating your masterpiece, it’s essential to know how to thread a bobbin. Threading a bobbin is a crucial aspect of sewing that can seem intimidating, especially for beginners. However, with some simple steps, and a little practice, you can become proficient at threading a bobbin in no time.
II. Step-by-Step Instructions
Before you start, make sure you have the necessary materials. You’ll need a sewing machine, thread, and a bobbin. Once you have the materials in hand, you can follow these simple steps to thread a bobbin:
1. Preparing the machine and winding the thread onto the bobbin
Before you start winding your bobbin, it’s essential to clean the area around it. Next, place your thread on the spool pin and thread it through the thread guides. Once you’ve done that, wind the thread around the bobbin by following the instructions on the machine. Return the bobbin to its compartment, ensuring that it sits snugly.
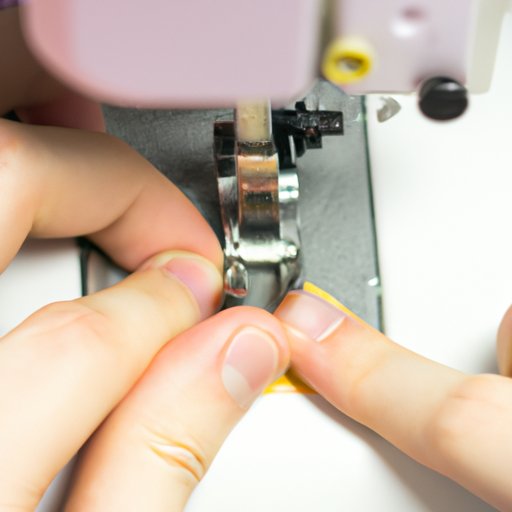
2. Threading the bobbin through the machine
The next step is to thread the bobbin through the machine. Place the bobbin in the designated compartment and thread the machine’s needle. Turn the handwheel towards you to create a loop, and then pull it towards the back. Finally, your bobbin is threaded, and you’re ready to start sewing!
3. Including clear and concise language
The process of threading a bobbin might be simple for some, but for beginners, it can be complicated. Therefore, using clear and concise language can help prevent confusion. Additionally, providing step-by-step instructions with pictures can make it easier to understand.
4. Using photos to illustrate each step
Using photos can supplement written instructions and help readers to visualize how to thread a bobbin. Photos demonstrate the process clearly, which can help readers understand the order of the steps and the placement of the thread. It can also help to show any areas that may be tricky to understand by simply reading written instructions.
III. Video Tutorial
Watching a video tutorial is an excellent way to learn how to thread a bobbin. It’s more interactive and engaging than reading instructions. Videos are beneficial for visual learners who prefer to see the process being carried out. Additionally, videos allow you to see each step, which can help you understand all the necessary processes.
Breaking down different sections of the process
Breaking down the process into smaller segments can allow you to focus on each step at a time. This can also help to avoid any confusion that might arise from trying to understand all the steps simultaneously.
Showing visuals of each step
Showing visuals of each step can make it easier for viewers to understand the process. Videos should include close-ups of the needle and bobbin while threading and sewing to ensure that viewers can follow along with ease.
Including narration or text overlay to provide explanations
Narration or text overlay can provide additional information and help avoid any confusion during the process.
IV. Infographic
Infographics are ideal for visual learners who prefer a more visual representation of processes. Infographics can provide a summary of the steps involved in threading a bobbin, including images and diagrams that illustrate each step.
Summarizing the steps involved in threading a bobbin
Breaking down the steps involved in threading a bobbin can help make the process more accessible to beginners. A summarized version of the steps can be included to help readers understand the sequence of steps and how to perform them.
Using images and diagrams to illustrate each step
Visual aids such as images and diagrams can help readers understand the threading process. Examples of images include how to wind a bobbin or how to thread a machine. Diagrams can be used to demonstrate how thread flows through the machine.
V. FAQs
Beginners usually have questions about threading, such as what to do when the thread keeps breaking, how tight the tension should be, and how much thread should be wound onto the bobbin. In this section, we’ll answer frequently asked questions about threading a bobbin.
What to do when the thread keeps breaking
The critical step in avoiding thread breakage is to ensure the thread is appropriately wound onto the bobbin. Always use a high-quality thread and ensure that the thread’s thickness is compatible with the needle. Additionally, check that the tension is correctly set and that the machine is clean.
How tight should the tension be?
Thread tension should be adjusted according to the type of fabric being used. A general rule for thread tension is to adjust to higher tension for thicker fabrics and lower for lightweight fabrics. As a beginner, you can experiment with different thread tensions to find what works best for you.
How much thread should be wound onto the bobbin?
The amount of thread you’ll need depends on the project you’re working on. If you’re working on a small project, you’ll need less thread than if you’re working on a larger project. Use a measuring tape to determine the length of the thread you’ll need and wind accordingly.
VI. Troubleshooting Guide
For beginners, threading a bobbin can result in common issues such as jammed bobbins, problems with thread tension, or issues with the bobbin case. Below are some tips to troubleshoot such issues.
Fixing jammed bobbins
Jammed bobbins can be frustrating, but they’re relatively easy to fix. Firstly, remove the bobbin from the machine and take out any tangled thread. Once you’ve done that, re-insert the bobbin into the machine, ensuring that it’s correctly wound.
Problems with thread tension
Problems with thread tension can cause unsightly stitches. Try adjusting the tension dial on your machine and re-threading the machine. Start by changing the tension to a lower or higher number and testing the stitches on a scrap fabric until the tension is correct.
Issues with the bobbin case
If your bobbin case is dirty or damaged, you may encounter issues while threading. Remove the bobbin case from the machine and clean with a soft, dry brush. If the bobbin case is damaged, you may need to replace it.
VII. Historical Perspective
The bobbin is a sewing tool that dates back to the 14th century. Over the years, bobbins have evolved and are now a crucial aspect of sewing. Bobbins are available in various types, such as self-winding bobbins, adjustable bobbins, and high-capacity bobbins.
Discussing how the bobbin has evolved over time and its various uses
The bobbin is a vital component of the sewing process, and as such, it has undergone various modifications over the years. Originally made of wood, bobbins today can be made of plastic or metal, depending on the machine used. Additionally, bobbins have different capacities and can hold varying lengths of thread.
Bobbins have multiple uses and are used in various industries, including quilting, embroidery, and sewing.
Explaining the different types of bobbins available today and how to choose the right one for your project
The different types of bobbins include metal, plastic, and pre-wound bobbins. Choose the appropriate bobbin according to your sewing machine’s manufacturer and the project you’ll be working on.
VIII. Conclusion
Threading a bobbin is a crucial aspect of sewing, and beginners must know how to do this correctly. This article has provided step-by-step instructions, a video tutorial, an infographic, and troubleshooting tips to help you master threading a bobbin. Remember, practice makes perfect, so keep practicing threading your bobbin to gain confidence and proficiency.