Introduction
The alternator is an essential component of a vehicle’s charging system. It plays a critical role in ensuring that the battery remains charged while driving and powering the car’s electrical components. Therefore, it’s essential to know how to test an alternator. This article provides a comprehensive guide on how to test an alternator effectively.
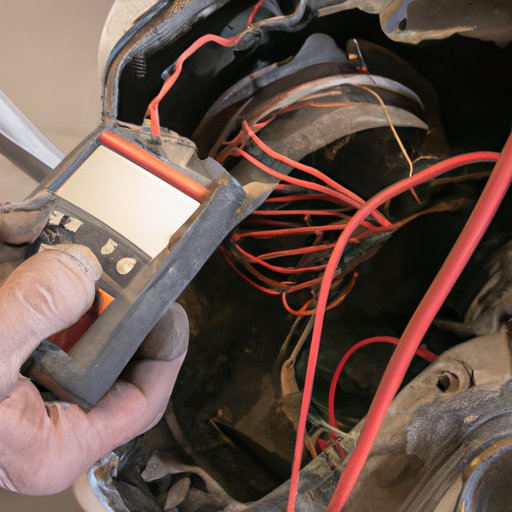
The DIY Approach: A Step-by-Step Guide to Testing Your Alternator at Home
Testing your alternator at home can help you save money and time. To get started, you’ll need a few tools, including a multimeter and a battery tester. While the process may vary depending on your vehicle model, the following are the general steps to testing an alternator at home:
Step 1: Turn off the engine and disconnect the battery cables.
Step 2: Check the alternator’s belt for any signs of damage or wear.
Step 3: Connect the multimeter to the battery terminals and set it to DC voltage.
Step 4: Start the engine and measure the voltage output of the battery. It should be around 12.5V.
Step 5: Turn on your vehicle’s headlights and air conditioning. If the voltage drops below 12V, it may indicate an issue with the alternator.
Step 6: Check the voltage output of the alternator. It should be between 13.5V to 14.5V.
Step 7: Use a battery tester to check the battery’s condition. If the battery is not good, the alternator may not be charging it correctly.
While testing your alternator at home may be easy, there are some essential things to keep in mind. Firstly, ensure that you follow all safety precautions and disconnect the battery correctly before testing. Secondly, always refer to your vehicle’s manual for specific instructions.
The Mechanic’s Perspective: 5 Common Ways to Test Your Alternator for Optimal Performance
Mechanics use different ways to test alternators for optimal performance. Here are the five most common methods used:
1. Visual inspection: A mechanic will visually inspect the alternator for any signs of damage or wear. This method allows them to check for loose connections, worn-out belts, and other potential problems.
2. Battery load test: A mechanic will perform a battery load test to check the battery’s ability to hold a charge. This test helps them determine if the battery is causing the alternator to malfunction.
3. Voltage drop test: A voltage drop test checks the voltage output of the alternator under specific electrical loads. A mechanic may use this test to identify any issues with the alternator, such as a bad diode.
4. Amperage test: An amperage test measures the amperage output of the alternator. This test helps mechanics determine if the alternator is delivering the correct amperage to charge the battery.
5. Bench test: A bench test is the most accurate way to test an alternator. In this test, a mechanic removes the alternator from the vehicle and tests it on a bench. They can perform a variety of tests, including voltage, resistance, and diode tests, to determine if the alternator is working correctly.
While each method has its advantages and disadvantages, a mechanic will typically use a combination of these tests to diagnose a faulty alternator.
Alternator Problems? Here’s How to Know: A Comprehensive Guide to Testing Your Alternator
Knowing when your alternator is malfunctioning can help you prevent further damage to your vehicle. Here are some signs to look out for:
1. Dashboard warning lights: If your vehicle’s dashboard warning lights are flickering or remain on, it may indicate an issue with the alternator.
2. Dimming headlights: If your headlights become dim or flicker while driving, it may indicate low voltage output from the alternator.
3. Squealing noise: If the alternator’s bearings are worn out, it may produce a squealing noise.
4. Battery issues: If your battery continually needs to be jump-started or dies quickly, the alternator may not be correctly charging the battery.
Once you’ve identified possible issues, you can test your alternator to determine the problem. Here are the tests you can perform:
1. Visual inspection
2. Battery load test
3. Voltage drop test
4. Amperage test
5. Bench test
Be sure to consult your vehicle manual or reach out to a mechanic if you’re uncertain about testing your alternator.
The Ultimate Alternator Test: How to Ensure You’re Getting the Most Out of Your Vehicle’s Charging System
Regularly testing your alternator can ensure that your vehicle’s charging system is working correctly. Here’s how to perform a comprehensive alternator test:
Step 1: Check the battery’s condition with a battery tester.
Step 2: Inspect the battery cables and connections.
Step 3: Check the alternator belt for any damage or wear.
Step 4: Connect the multimeter to the battery terminals and set it to DC voltage.
Step 5: Start the engine and measure the voltage output of the battery. It should be around 12.5V.
Step 6: Turn on your vehicle’s headlights and air conditioning. The voltage should remain steady between 13.5V to 14.5V.
Step 7: Turn off your vehicle and inspect the alternator for any signs of damage or wear.
Step 8: Remove the alternator from your vehicle and perform a bench test.
Once you’ve completed the test, you should have a better understanding of your alternator’s condition. If you find an issue, consult your vehicle manual or a mechanic for further guidance.
Alternator Maintenance 101: How to Properly Test and Maintain Your Alternator for a Longer, Smoother Ride
Proper maintenance can help extend the life of your alternator and prevent costly repairs. Here are some tips and tricks for maintaining your alternator:
1. Regular inspections: Perform regular inspections and checks to ensure that your alternator is working correctly.
2. Belt replacement: Replace the alternator belt if it’s worn out or damaged.
3. Battery maintenance: Maintain your battery by cleaning the terminals and replacing it when necessary.
4. Avoid overloading: Avoid overloading your vehicle with too many electrical components, as it may cause the alternator to overwork and fail.
5. Professional assistance: If you’re unsure about maintaining your alternator, seek help from a qualified mechanic.
By following these maintenance tips, you can ensure that your alternator is working correctly and prevent any issues from arising.
Conclusion
Testing your alternator is crucial to ensure that your vehicle’s charging system remains in optimal condition. By using the step-by-step guides provided in this article, you’ll be able to test your alternator effectively and identify any potential issues. Don’t hesitate to consult your vehicle manual or a mechanic if you’re uncertain about testing your alternator. With proper maintenance and testing, you can extend the life of your vehicle’s charging system and enjoy a longer, smoother ride.