Introduction
Capacitors are an essential component in many electronic devices. They store electrical energy and release it when needed to control electric current, stabilize voltage, and provide timing functions.
Over time, capacitors can degrade, wear out, or fail, resulting in malfunctioning equipment. It is essential to test capacitors regularly to ensure the proper functioning of electronic devices and prevent any damages that may arise from their failure. In the following sections, we will discuss how to test a capacitor and understand the common signs of a faulty capacitor.
Understanding Capacitors
Capacitors are electrical components that store electrical charge, energy, and voltage. They are made up of two plates and a dielectric material that separates them. The capacity of a capacitor depends on the distance between the two plates and the dielectric constant of the material used to separate the plates.
Capacitors are used in electronic devices like radios, televisions, computers, and power supplies. They play a crucial role in these devices by regulating voltage, storing energy, and correcting power factor problems. There are different types of capacitors, including ceramic, electrolytic, tantalum, and film capacitors, each with different properties, such as capacitance, voltage rating, and temperature tolerance.
How Capacitors Fail
Capacitors can fail for several reasons, including overheating, overvoltage, and aging. Capacitors that are exposed to high temperatures or voltage levels tend to break down. Over time, the electrolyte within an electrolytic capacitor may leak, resulting in failure.
It is important to determine the cause of failure before testing a capacitor. Testing a faulty capacitor without knowing the cause of failure may result in damage or inaccurate testing results.
Step-by-Step Guide to Testing a Capacitor
Here is a step-by-step guide on how to test a capacitor:
Step 1: Turn off the Power Supply
Before testing a capacitor, turn off the power supply and unplug the device from the electrical source. This is to prevent any electrical accidents or damage.
Step 2: Discharge the Capacitor
Capacitors store electrical charge even when the power supply is turned off, which is why it is important to discharge them before testing. Touch both of the capacitor’s terminals with a screwdriver to discharge it.
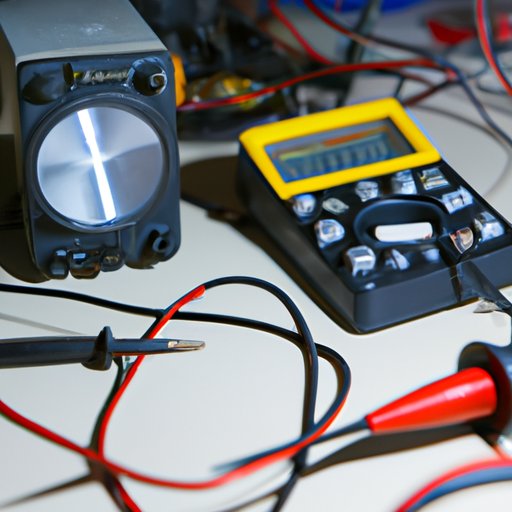
Step 3: Test with a Multimeter
A multimeter is a device that measures electrical properties like resistance, voltage, and current. To test a capacitor with a multimeter, follow these steps:
– Set the multimeter to measure capacitance
– Connect the positive and negative leads of the multimeter to the corresponding terminals of the capacitor
– The meter should display the capacitance value of the capacitor. If the reading is within 10% of the original capacitance value, the capacitor is functioning correctly. If the reading is significantly lower, the capacitor is faulty.
Step 4: Test with an Oscilloscope
An oscilloscope is a device that shows the waveform of an electrical signal. To test a capacitor with an oscilloscope, follow these steps:
– Connect the capacitor to an AC source
– Connect the oscilloscope probe to one of the terminals of the capacitor
– Set the oscilloscope to display the waveform of the capacitor
– The waveform should slowly charge and discharge. If the waveform does not charge and discharge, the capacitor is faulty.
Step 5: Analyze the Results
After testing the capacitor, analyze the results and determine whether it is working correctly or needs to be replaced. If it is faulty, replace the capacitor with a new one of the same capacitance and voltage rating.
Troubleshooting Tips
Here are some common problems associated with capacitors and ways to detect them:
– If the device is not turning on, check for any bulges or leaks in the capacitor
– If the device is producing a humming noise, check for any faulty capacitors
– If the device is not working correctly, check for any loose connections or capacitors that need to be replaced
– If the device is overheating, check for any damaged capacitors or other components causing the issue.
Videos and Images
Visual aids can be helpful in understanding the capacitor testing process. Below are some images and videos that illustrate the step-by-step process of testing a capacitor:
[Insert links to images and videos here]
Dispelling Common Misconceptions About Capacitor Testing
There are common misconceptions about capacitor testing, such as not being able to test a capacitor with a multimeter or that all capacitors need to be replaced if they fail. It is important to understand that not all capacitors need to be replaced if they fail and that a multimeter can be used to test some types of capacitors.
When testing capacitors, it is crucial to determine the cause of failure and replace the capacitor with an exact replacement. Matching the capacitance and voltage rating of the original capacitor is important to ensure proper functioning of the device.
Conclusion
Testing capacitors is an essential part of maintaining electronic devices. It helps prevent damages caused by failed components and ensures the proper functioning of devices. Understanding the different types of capacitors, the reasons for failure, and how to troubleshoot common problems can make testing capacitors more comfortable and effective.