Introduction
When it comes to your vehicle’s performance, the constant velocity (CV) joints are an integral component. The CV joint allows the drive shaft to smoothly transmit power from the engine to the wheels, but like many other parts of a car, it can break down over time. In this guide, we will show you how to diagnose a bad CV joint, understand its symptoms, and provide you with the necessary steps to get it fixed.
Symptoms of a Bad CV Joint
One of the primary indicators that your CV joint is failing is noticeable symptoms while driving. Here are some of the most common symptoms of a bad CV joint:
Vibration
If you notice that your vehicle starts to vibrate, especially during acceleration, it could be a sign of a damaged CV joint. The vibration is often felt through the steering wheel and floorboards.
Clicking Noise
If you hear a clicking or popping noise when you turn your vehicle, particularly while making a tight turn, it is likely that there is damage to the CV joint. The clicking sound usually indicates that the CV joint has deteriorated to the point where it can no longer transmit power effectively.
Difficulty Turning
If you experience difficulty turning your vehicle, specifically when turning at low speeds, it could be a sign of a bad CV joint. This symptom is usually accompanied by a clicking or popping noise.
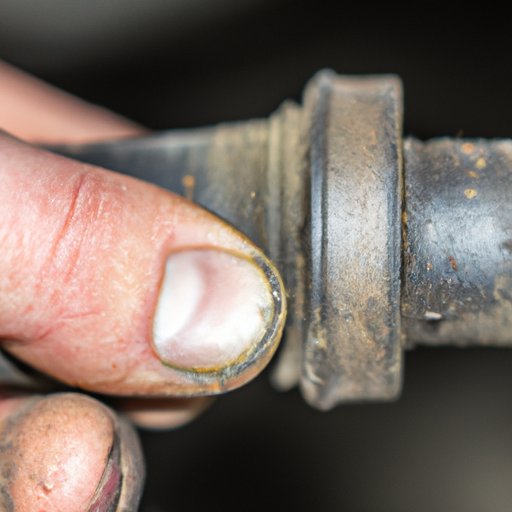
Visual Inspection of the CV Joint
The first step in diagnosing a bad CV joint is to visually inspect it. Here are some of the steps you can take:
Step-by-step Instructions
1. Park your vehicle on level ground and engage the parking brake.
2. Locate the CV joint on the drive shaft.
3. Check the CV joint boot for any tears or damage.
4. Visually inspect the CV joint for any signs of wear or damage.
5. Clean off any dirt or debris from the CV joint.
Checking for Tears in the Boot
The CV joint boot is designed to protect the CV joint from dirt and debris. Over time, these boots can become damaged and require replacement. When inspecting the boot, look for cuts, tears, and other forms of damage. It is crucial that the boot is in good condition because it will prevent dirt and debris from entering the joint.
Checking for Any Unusual Wear or Debris
When inspecting the CV joint, look for any signs of wear, such as unusual grooves or cracks on the surfaces. Check for debris as well, which can come from broken parts or rusted components.
Road Test
The next step in diagnosing a bad CV joint is to perform a road test. Here are some steps to follow:
How to Perform a Road Test
1. Drive your vehicle on a straight, flat road and listen for any clicks or pops.
2. Perform a tight turn and listen for clicking or popping noises.
3. Accelerate and decelerate gradually while listening for any vibrations or clicking sounds.
4. Pay attention to any difficulty while turning or vibrating sensations.
Understanding the Symptoms of a Bad CV Joint when Driving the Car
During the road test, note any symptoms you experience while driving the vehicle. These symptoms could include vibrations, clicking sounds, and difficulty turning the car. Understanding these symptoms will help you diagnose the problem and take the next steps in repairing the CV joint.
Process of Elimination
If you suspect that there is a problem with your CV joint but aren’t sure, it is important to eliminate any other potential culprits. Other possible issues that could present similar symptoms include a worn wheel bearing, tie rod end, or suspension issue.
Testing Other Components that Could Be Causing Similar Symptoms
To test these components, inspect them visually for any wear or damage. Also, perform a road test and pay attention to any symptoms that may arise. If the symptoms are still present even after testing other components, it is likely that the CV joint is damaged.
Other Possible Culprits: Worn Wheel Bearing, Tie Rod End, etc.
Like we mentioned earlier, worn wheel bearings, tie rod ends, and suspension issues can also cause similar symptoms. It is essential that you eliminate these potential issues before determining if the CV joint is the problem.
When to Seek Professional Help and Repair Costs
When it comes to repairing your CV joint, it is important to seek professional help. If the CV joint is damaged and needs to be replaced, the cost of repair can range from $300 to $800, depending on the make and model of your vehicle.
Tips on When to Seek Professional Help
If you are not experienced in car repair, it is best to seek help from a professional mechanic. Look for a reliable and reputable mechanic in your area to ensure that you receive quality service.
What to Expect with Repair Costs
The cost of repairing a CV joint can be costly, but it is vital to fix the issue for both safety and longevity of the vehicle. When bringing your vehicle to a mechanic, be sure to ask for a detailed estimate of the repair costs before any work is done.
Conclusion
In conclusion, the CV joint is a vital component of your vehicle, and it is important to diagnose and repair any issues before they become major problems. By understanding the common symptoms of a bad CV joint, performing a visual inspection and road test, and seeking professional help when necessary, you can keep your car running smoothly and safely on the road.