I. Introduction
When it comes to physical activities like sports, ankle injuries can be a common occurrence. Even everyday activities, such as walking or running, can result in an ankle sprain or strain. That’s where ankle taping comes in. Taping your ankle can help support and stabilize your ankle joint, as well as prevent further injury. In this article, we will provide a step-by-step guide to taping your ankle for support, offer different techniques for customizing support, share dos and don’ts, and provide tips for avoiding common mistakes.
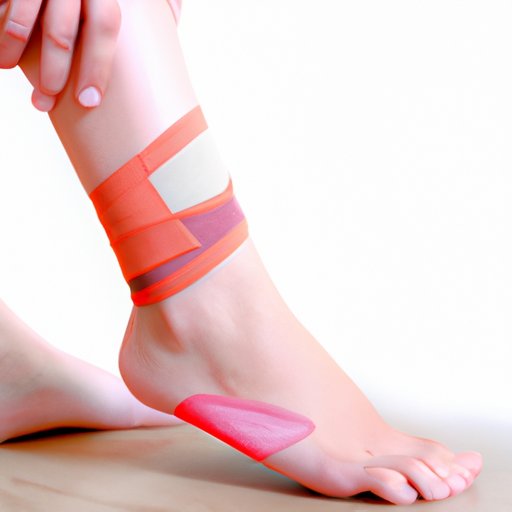
II. The Basics: A Step-by-Step Guide to Taping Your Ankle for Support
First things first, let’s review the basics of ankle taping. Here are the basic steps:
1. Prepare the skin: Clean and dry the area where the tape will be applied.
2. Apply underwrap: Apply a layer of foam or latex foam to protect the skin, prevent irritation, and add extra support.
3. Apply the tape: Starting from the base of your foot, wrap the tape around the ankle joint. Make sure to apply enough tension to the tape to get the desired level of support.
4. Secure the tape: Finish the tape job by covering the tape with adhesive spray, elastic tape, or other tape.
Some helpful tips to keep in mind:
– If you have sensitive skin or allergies, consider using hypoallergenic or latex-free tape.
– Make sure the tape isn’t too tight, as this can restrict blood flow and lead to further injury.
– Apply the tape while you’re in a seated position with your ankle in a neutral position.
III. Maximizing Stability: Proper Techniques for Ankle Taping
While the basic ankle taping technique is a good starting point, it may not be enough for some individuals. Here are some additional techniques that you can try:
– Figure-eight: This technique involves wrapping the tape in a figure-eight pattern around the ankle. It provides a higher level of support than the basic ankle tape job.
– Basketweave: This technique involves wrapping the tape around the ankle in a crosshatch pattern. It provides even more support than the figure-eight technique.
When selecting a technique, it’s essential to consider the level of support you require and the activity you plan to engage in.
IV. Get Back in the Game: How to Tape Your Ankle for Sports
Taping your ankle for sports activities requires additional considerations. Here are some specific tips for different sports:
– Basketball: Use a figure-eight technique or a high-top shoe to support the ankle during quick movements and changes of direction.
– Volleyball: Use a basketweave technique to support the ankles during jumping and landing motions.
– Running: Use the basic ankle tape job to support your ankle during long-distance running.
V. Preventing Injury: Ankle Taping Dos and Don’ts
Now that you know the basics of ankle taping, here are some dos and don’ts to keep in mind:
Do:
– Check the tape job regularly to make sure it’s still in place and providing adequate support.
– Use tape that is appropriate for your activity and type of footwear.
– Allow enough time for your ankle to heal fully before returning to sports or other activities.
Don’t:
– Tape over open cuts or wounds.
– Reuse tape after it has been worn and removed.
– Ignore signs of pain or discomfort during activity.
VI. Customizing Your Support: Different Ankle Taping Techniques for Various Activities
Everyone’s anatomy is different, and some individuals may require a more customized approach when taping their ankle. Here are some modifications you can try:
– High-arched feet: Use a figure-eight technique or tape the arch of the foot for extra support.
– Flat feet: Use a basketweave technique to support the arch of the foot.
VII. Avoiding Common Mistakes: Tips for Effective Ankle Taping
Even with the best intentions, there are still some common mistakes that people make when taping their ankle. Here’s how to avoid them:
– Don’t overtape: Too much tape can result in decreased mobility and limit blood flow to the ankle and foot.
– Don’t undertape: Too little tape will not provide adequate support and may result in further injury.
– Don’t use the wrong type of tape: Make sure to use tape that is appropriate for the activity and level of support required.
VIII. Mastering the Art of Ankle Taping: Advanced Techniques and Considerations
For those looking to take their ankle taping game to the next level, here are some advanced techniques:
– Use more than one type of tape: Combining different types of tape can provide maximum support and stability.
– Use strapping and padding: Adding extra padding or straps can help support the ankle joint even further.
IX. Conclusion
Ankle taping can be a useful tool for preventing injuries and maximizing support during physical activity. By following the step-by-step guide and other techniques discussed in this article, you can help keep your ankle joint safe and healthy. Remember to consult with a healthcare professional if you have any concerns regarding ankle injuries and always allow enough time for your ankle to heal fully before returning to sports or other activities.