I. Introduction
Acrylic nails have become increasingly popular over the years as a way to achieve longer and more durable nails. While they can add glam to any look, removing them can be quite challenging and damaging if not done correctly. Many people opt to visit a nail salon to have their acrylics removed, but not everyone has the time or money to do so. In this article, we’ll explore various methods for removing your acrylics at home, with step-by-step instructions and tips to help you safely and effectively remove them on your own.
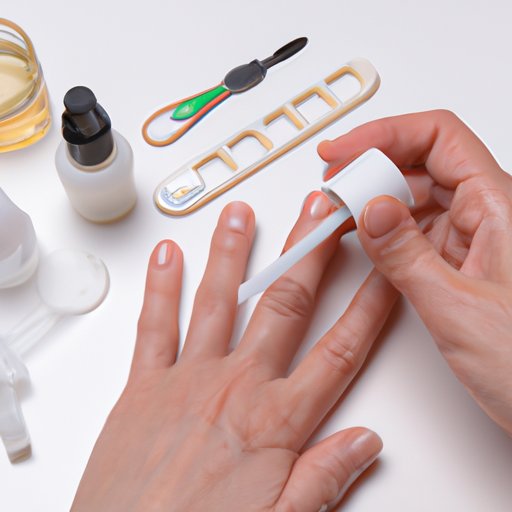
II. Use Acetone and Foil Method to Remove Acrylics at Home
The most popular and widely used method for removing acrylic nails at home is the acetone and foil method. This technique involves using acetone to dissolve the adhesive that bonds the acrylic to your natural nail. Here’s how to do it:
- Use a nail file to file the shiny top layer of the acrylic down to create a porous surface, which will help the acetone penetrate better.
- Cut small squares of aluminum foil and soak them in acetone.
- Place the soaked foil over your nails and wrap them tightly, ensuring the acetone-soaked cotton ball is in contact with the acrylic nails.
- Leave the foil wraps on for 20-30 minutes, depending on the thickness of the acrylic nails.
- Remove the foil wraps and use a cuticle pusher to gently push the dissolved acrylic off your natural nail.
Tip: Add some warmth to the process by wrapping your hands in a warm towel while the foil wraps are on. This will help the acetone penetrate and dissolve the acrylic faster and more efficiently. Also, make sure that the foil is secured tightly to your nails to make sure the acetone doesn’t evaporate before it can do its job.
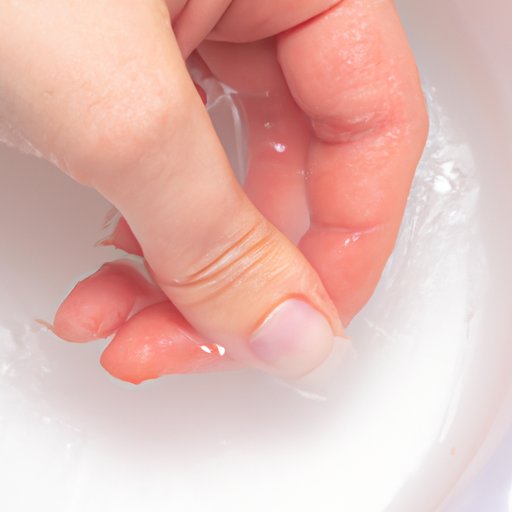
III. Soak Your Nails in Warm Soapy Water to Loosen the Acrylics
This method involves soaking your nails in warm soapy water to soften the acrylic nails and loosen the adhesive. Here are the steps:
- Fill a bowl with warm soapy water (mild dish soap is preferable) and soak your nails for 15-20 minutes.
- Use a cuticle pusher or an orange stick to gently push the acrylic off your natural nail. If the acrylic does not easily come off, repeat the soak.
Tip: Make sure that the water isn’t too hot as hot water can damage your skin and nails. Use mild soap to avoid drying out your nails and skin during the soaking process.
IV. Try Using Dental Floss to Lift Acrylics from the Nail Bed
This method involves using dental floss to gently lift the acrylic from your natural nail. Here’s how to do it:
- Take a piece of dental floss and carefully slide it between the acrylic nail and your natural nail.
- Gently saw the floss back and forth until the acrylic nail starts to come off.
- Repeat this process until the acrylic is fully removed.
Tip: Be extra careful not to damage your natural nail or cuticles while using dental floss. This method is best used for removing smaller pieces of acrylic or for lifting the acrylic from the sides of the nails.
V. Utilize a Cuticle Pusher to Separate the Acrylic from the Natural Nail
In this method, a cuticle pusher is used to gently separate the acrylic from your natural nail. Here are the steps:
- Use a nail file to file the top layer of the acrylic to create a porous surface, which will help loosen the adhesive.
- Use a cuticle pusher to gently push and pry the acrylic off your natural nail.
- If the acrylic does not easily come off, repeat step one or gently file the area where the acrylic is still attached to your nail, making sure not to file down too much to avoid damaging your natural nail.
Tip: Be gentle while using this method and avoid using excessive force, as doing so could cause serious damage to your natural nail. Be patient, and take your time to ensure you don’t cause any harm to your nails.
VI. Apply a Nail Polish Remover that Contains Acetone and Wrap Your Nails in a Towel for 15 Minutes Before Removing Acrylics
This method involves using a nail polish remover that contains acetone to dissolve the acrylic, followed by gently prying them off your natural nails. Here’s how to do it:
- Apply nail polish remover that contains acetone to a cotton ball and place it onto your nail.
- Cover your nails with aluminum foil and leave it for 15-20 minutes.
- Use a cuticle pusher to gently pry the acrylic off your natural nail.
Tip: Do not use this method for removing acrylics if you have any cuts or open wounds on your fingers, as it can cause burns and irritation. Also, make sure to avoid inhaling the fumes that come from the nail polish remover.
VII. Use a Buffer to Gently Thin Out the Top Layer of the Acrylic before Removing It with an Acrylic Remover
This method involves using a buffer to thin out the top layer of the acrylic, making it easier to remove. Here are the steps:
- Use a buffer to file down the top layer of the acrylic until you have a slightly porous surface.
- Apply an acrylic remover to your nails and let it soak in for the designated amount of time.
- Use a cuticle pusher to gently push and pry the acrylic off your natural nail.
Tip: This method should be used with extreme caution, especially if you’re not an expert in using buffers. Using too much force or leaving the acrylic remover on for too long can cause serious damage to your natural nails.
VIII. Apply Petroleum Jelly to the Cuticles Before Soaking Your Nails in Acetone to Protect Your Skin
In this method, petroleum jelly is used as a barrier to protect the skin around your nails from the harsh acetone. Here are the steps:
- Apply petroleum jelly around the skin and cuticles on your nails.
- Pour acetone into a bowl and place your nails in it for no more than 10 minutes.
- Use a cuticle pusher to gently push and pry the acrylic off your natural nail.
Tip: To avoid any acetone from getting into the jelly, it’s best to apply the jelly thickly around the cuticles and slightly below the nails on the skin surface. This will create a protective shield between your skin and the acetone.
IX. Conclusion
Now that you have a variety of methods at your disposal, you can safely and effectively remove your acrylics at home with confidence. Remember to take your time and be patient while removing your acrylics to avoid any damage to your natural nails. When in doubt, always seek professional help. We hope our comprehensive guide has been helpful in guiding you through the process of removing your acrylics at home.
Final tip: After removing your acrylics, make sure to take good care of your nails by keeping them moisturized and nourished.