I. Introduction
Acrylic nails are a popular way to have long, beautiful nails without having to wait for them to grow naturally. However, sometimes you might want to remove them on your own, whether it’s because they’re starting to lift or because you simply want to try a new nail style. Whatever your reason, this article will guide you through the process of safely removing acrylic nails.
A. Explanation of Acrylic Nails
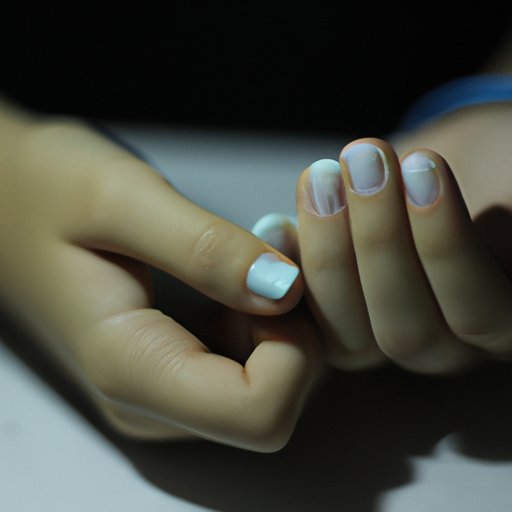
Acrylic nails are composed of a liquid and powder mixture that is applied to the natural nails before hardening. They can be decorated with designs or colors and can last up to two weeks or more before needing a refill or removal.
B. Why You Might Want to Remove Them on Your Own
There are many reasons why you might want to remove your acrylic nails on your own instead of going to a salon. Some of these reasons include saving money, convenience, the inability to go to a salon, or simply a desire to learn how to do it yourself.
C. Overview of the Article
This article will be divided into several parts, starting with a step-by-step guide to removing acrylic nails at home. We will then discuss different removal techniques, tips for a pain-free process, and how to avoid damaging your natural nails. Expert advice and common myths debunked will also be addressed. Finally, we will provide a recap of all the main points and offer some final tips for a successful and safe removal process.
II. “5 Easy Steps to Remove Acrylic Nails at Home”
If you’re ready to take off your acrylic nails, here’s a simple step-by-step guide for you to follow:
A. Materials Needed
- Acetone
- Nail file
- Orange stick or cuticle pusher
- Small bowl
- Warm water
- Moisturizer or cuticle oil
B. Step-by-Step Guide to Remove Acrylic Nails
- Using your nail file, gently file the top layer of your acrylic nails. This will help to break the seal and allow the acetone to penetrate the acrylic nails more easily.
- In a small bowl, pour enough acetone to fully submerge your nails. Soak your nails in the acetone for about 15-20 minutes.
- Remove your hands from the bowl and use an orange stick or cuticle pusher to gently push the acrylic nails off of your natural nails. If they do not easily come off, soak your nails again for a few more minutes until the acrylic nails soften.
- After all the acrylic nails have been removed, use a nail file to shape and smooth your natural nails. Avoid filing too aggressively or deeply as this can damage your natural nails.
- Finish by applying moisturizer or cuticle oil to your nails to hydrate them and prevent them from becoming dry and brittle.
C. Tips for a Successful Removal Process
- Use 100% pure acetone for the best results.
- Be patient and don’t rush the process. Soaking your nails for too little time or trying to force the acrylic nails off can cause damage to your natural nails.
- Don’t use metal tools to remove the acrylic nails as they can damage your natural nails. Instead, use an orange stick or cuticle pusher made of plastic, wood, or rubber.
- If you experience any pain or discomfort during the removal process, stop and seek professional help.
III. “Say Goodbye to Acrylic Nails: A Guide to Safe and Easy Removal Techniques”
While the previous section provided a simple way to remove acrylic nails, there are other techniques to consider. Let’s take a closer look at each one:
A. Explanation of Different Removal Techniques
- Soaking: soaking your nails in acetone to dissolve the acrylic nails.
- Wrapping: wrapping your nails in acetone-soaked cotton balls or pads and aluminum foil to speed up the soaking process.
- Filing: filing the acrylic nails down and then removing them with an orange stick or cuticle pusher.
- Electric file: using an electric file to buff and grind the acrylic nails off of your natural nails.
B. Comparison of Pros and Cons of Each Technique
Each technique has its advantages and disadvantages:
| Technique | Pros | Cons |
|---|---|---|
| Soaking | – Easy and affordable – No specialized equipment needed |
– Time-consuming – Requires patience – Can be messy |
| Wrapping | – Faster than soaking alone – Keeps acetone in contact with nails |
– Can be uncomfortable or restrictive – Risk of burning from the foil heating up |
| Filing | – Can be done without acetone – Controlled and precise |
– Can take longer time – Requires some arm strength |
| Electric file | – Quick and efficient – Useful for experienced nail artists |
– Requires special equipment – Can be intimidating or difficult to use for beginners |
C. Recommended Technique and Why It’s the Best
While each technique has its benefits, soaking is the safest and most recommended way to remove acrylic nails at home. It’s affordable, doesn’t require any special equipment, and avoids the risk of damaging your natural nails. With some patience and practice, soaking your nails can become a pain-free and easy process.
IV. “The DIY Approach: Removing Acrylic Nails Without Damaging Your Natural Nails”
It’s essential to remove your acrylic nails carefully to prevent causing damage to your natural nails. Here are some tips to keep in mind:
A. Explanation of How to Prevent Damage to Natural Nails
- Take a break between acrylic nail applications to give your nails a chance to breathe and recover.
- Don’t peel or force the acrylic nails off your natural nails as this can cause them to break or tear.
- Don’t use metal tools to remove the acrylic nails as they can scratch or damage your natural nails.
- Moisturize your nails regularly to keep them healthy and avoid dryness and breakage.
B. Tips for a Pain-Free Removal Process
- Soak your nails in warm water for a few minutes before beginning the removal process to help soften the acrylic nails.
- Be gentle and patient when filing or pushing off the acrylic nails.
- Take breaks as needed if you experience any discomfort or pain.
- Incorporate cuticle oil or moisturizer into your nail care routine to avoid dryness and promote healthy nail growth.
C. Tools That Are Safe to Use
- An orange stick or cuticle pusher made of plastic, wood, or rubber is safe and effective for removing acrylic nails.
- A nail file with a fine grit is less likely to damage your natural nails than a coarse file.
- Moisturizer or cuticle oil can help hydrate and strengthen your nails after removal.
V. “Unpacking the Myths: How to Remove Acrylic Nails Properly”
There are many myths surrounding the removal of acrylic nails that can lead to mistakes and damage to your natural nails. Here are some common myths and the truth behind them:
A. Explanation of Common Myths Debunked
- Myth: You can simply peel off your acrylic nails.
- Truth: Peeling off your acrylic nails can damage your natural nails, causing breakage or tearing.
- Myth: Using hot water can help remove acrylic nails.
- Truth: Hot water can weaken your natural nails and increase the risk of damage.
- Myth: Cutting off your acrylic nails is a quick and easy way to remove them.
- Truth: Cutting off your acrylic nails can cause breakage or tearing of your natural nails.
B. Tips for Avoiding Mistakes During the Removal Process
- Avoid peeling or forcing the acrylic nails off your natural nails.
- Don’t use hot water or any other heat source to remove your acrylic nails.
- Be gentle when pushing or filing off the acrylic nails to avoid damaging your natural nails.
- Moisturize and care for your natural nails regularly to promote healthy nail growth.
C. Why It’s Important to Remove Acrylic Nails Properly
Removing acrylic nails properly is essential to avoid damaging your natural nails and causing pain or discomfort. Don’t rush the process or try to take shortcuts as this can lead to unwanted consequences. Take the time to follow the steps and expert tips to ensure a pain-free and safe removal process.
VI. “Tips from the Pros: How to Safely Remove Acrylic Nails without Professional Help”
If you’re still uncertain about removing your acrylic nails at home, here are some tips from the pros to guide you:
A. Expert Advice on Safe Acrylic Nail Removal
- Take your time and don’t rush the process.
- Use 100% pure acetone for the best results.
- File the top layer of the acrylic nails before soaking to help the acetone penetrate the nails.
- Be gentle when pushing or filing off the acrylic nails to avoid damaging your natural nails.
B. Tools and Products Recommended by Professionals
- 100% pure acetone
- Orange stick or cuticle pusher
- Nail file with a fine grit
- Moisturizer or cuticle oil
- Aluminum foil (for wrapping technique)
C. Common Mistakes to Avoid During the Removal Process
- Don’t use hot water or any other heat source to remove your acrylic nails.
- Don’t peel or force the acrylic nails off your natural nails.
- Don’t use metal tools to remove the acrylic nails as they can scratch or damage your natural nails.
- Avoid filing too aggressively or deeply as this can damage your natural nails.
VII. Conclusion
A. Recap of the Main Points
Acrylic nails can be easily removed at home by following the steps and tips in this article. Soaking in acetone is the most recommended and safest technique to use. Taking breaks, using safe tools, and moisturizing regularly are all important factors to keep in mind to avoid damaging your natural nails.
B. Final Tips for a Successful and Safe Removal Process
- Be patient and take your time.
- Use 100% pure acetone for the best results.
- Be gentle when pushing or filing the acrylic nails off.
- Moisturize and care for your natural nails regularly.
C. Encouragement to Take Action and Remove Your Acrylic Nails on Your Own
Don’t be afraid to try removing your acrylic nails at home! With the proper tools, techniques, and preparation, you can safely and successfully remove your acrylic nails on your own. Follow the tips and advice provided by professionals to ensure a pain-free and easy process.