Introduction
Staining wood can be an intimidating task, especially for beginners. Getting the right color, ensuring an even finish, and making sure the wood is protected can be a challenge. However, staining wood is a simple and satisfying DIY project that can help you transform your furniture, cabinets, and other wooden items.
In this article, we’ll provide step-by-step instructions, tips, and techniques for staining your wood like a pro. We’ll discuss everything from preparation to finishing techniques, different types of wood stains, and common mistakes to avoid. Whether you’re a beginner or an expert, you’ll find helpful information to achieve a professional-level finish for your wood projects.
Step-by-Step Guide to Staining Wood: Tips and Techniques for a Professional Finish
A. Preparation and Tools needed
Before starting your wood staining project, you need to prepare the wood and gather the necessary tools and materials. Make sure your workspace is well-ventilated, and you have the right tools on hand, such as:
- Sandpaper (120 grit and 220 grit)
- Clean Cloth
- Dropcloth or newspaper
- Painter’s tape
- Stir stick
- Wood Conditioner
- Brush or roller
- Stain
- Sealant
B. Choosing the right stain for your wood
The type of wood stain you choose is crucial to the success of your project. Choose a water-based or oil-based stain depending on your preference. Water-based stains offer easy cleanup and dry quickly, whereas oil-based stains require more cleanup but offer deeper penetration into the wood.
You can also choose between a clear, semi-transparent, or solid color stain. Clear stains are ideal for showcasing the wood grain without changing the color, while semi-transparent stains add a hint of color and protection. Solid color stains provide the most protection but cover the wood grain.
C. Step-by-step instructions on wood staining
1. Sanding and cleaning the wood
The most important step in preparing your wood for staining is sanding. Start with 120 grit sandpaper to remove any existing finish, and then switch to 220 grit sandpaper for a smooth finish. After sanding, use a clean cloth to wipe away all the dust and debris.
If you want a smoother finish, you can apply wood conditioner before staining. The conditioner can help the wood absorb the stain more evenly, and prevent blotches and streaks. Follow the manufacturer’s instructions for applying the conditioner.
2. Staining the wood
Once the wood is ready, open your chosen wood stain and mix well. Stirring will minimize bubbles and ensure the color mixes thoroughly. Using a clean brush or roller, apply the stain. Follow the grain of the wood to ensure even application.
You can then use a cloth to wipe away any excess stain to prevent drips and blotches. Check the stain manufacturer’s instructions for drying time between coats. Apply as many coats as needed.
3. Applying a sealant coat
After the stain has dried, it’s time to apply a sealant coat. The sealant will protect the wood from damage and enhance its longevity. Choose a high-quality sealant and follow the manufacturer’s instructions when applying.
4. Finishing the project
Let the sealant dry completely before handling your finished project. Then, you can add decorative elements like knobs and handles, or just enjoy your newly-stained wood in its original state.
Beginner’s Guide to Staining Wood: Everything You Need to Know
A. Explaining the basics of wood staining
If you’re new to wood staining, it’s important to understand the basics. Wood staining is a process of adding color and protection to the wood surface. The goal is to give the wood an attractive finish that enhances its aesthetic appeal and protects it from damage.
B. Different types of wood stains
There are several types of wood stains, including water-based, oil-based, gel stains, and more. Each stain has its unique characteristics, so it’s essential to choose the right one for your project.
Water-based stains offer a more environmentally-friendly option that is easy to clean up with water. Oil-based stains, on the other hand, are more durable and provide a rich color to the wood. Gel stains are thicker, and they offer a more controlled application and a better option for vertical surfaces.
C. Tools and materials required
To complete your wood staining project, you’ll need several tools and materials, including sandpaper, brush or roller, stain, sealant, and wood conditioner. You can also use painter’s tape to mask off areas you don’t want to be stained.
D. Step-by-step instructions for beginners
For a beginner, it’s best to choose a small project and follow the previous guide’s steps. Working in a clean, well-ventilated area is essential. Make sure to follow the manufacturer’s instructions on combining, applying, and drying times to prevent any problems.
E. Tips and tricks for a professional finish
- Wipe off excess stain after applying it
- Use a clean brush or cloth to ensure an even and thorough application
- Apply stain with the grain of the wood for a more natural look
- Use wood conditioner to minimize blotches and streaking
DIY Wood Staining: Techniques and Tricks for a Perfect Finish
A. Different types of wood staining techniques
There are several tempting wood staining techniques to explore, including brushing, wiping, and spraying on stains. Each of these techniques has its advantages and disadvantages.
With brushing, you have more control over the stain’s movement, making it an ideal technique for detailed work. In contrast, wiping is ideal for larger surfaces as it spreads the stain evenly across the surface. Spraying is suitable for hard-to-reach areas, and it allows a quick and consistent application of the stain.
B. Tips for brushing, wiping, and spraying on stains
- Brush lightly with a natural bristle brush
- Clean the brush after every coat to avoid brush marks
- Apply stain uniformly with a cloth when wiping
- Use a spray gun with appropriate nozzles
- Maintain a constant distance from the wood surface
C. Specialty staining techniques such as colorwashing, antiquing, and distressing
These techniques involve adding decorative touches to the wood surface by making them look older, faded, or rustic. Techniques such as color washing require applying a translucent stain and wiping it away quickly to give a weathered effect. Antiquing involves applying multiple layers of different stains for a subtle but distinct appearance. Distressing involves denting, scraping, and sanding techniques to give a timeworn and rustic appearance.
D. Tricks for achieving an even finish
- Apply a thin and even layer of the stain
- Minimize blotches by applying a wood conditioner beforehand
- Apply multiple coats for added depth
- Wipe away excess stain to avoid drips
E. How to deal with common challenges such as blotches and drips
If you get blotches or drips while staining, don’t panic. It is relatively easy to fix them. If blotches occur, sand the affected area lightly, and then reapply the stain on the cleaned spot. If drips occur, use fine sandpaper to remove the excess and then reapply the stain once the area has dried.
Choosing the Right Wood Stain: A Comprehensive Guide
A. Different types of stains and their characteristics
Choosing the right type of stain depends on your project’s setting, wood species, and personal style preferences. Oil-based stains provide deeper penetration and more exceptional durability than water-based ones. Water-based stains are more eco-friendly and dry faster than their oil-based counterparts.
B. Factors to consider when choosing a stain
- The wood’s natural characteristics and grain patterns
- The setting in which the finished project will be placed
- The durability of the stain
- The amount of UV protection provided
- The color fastness and coverage
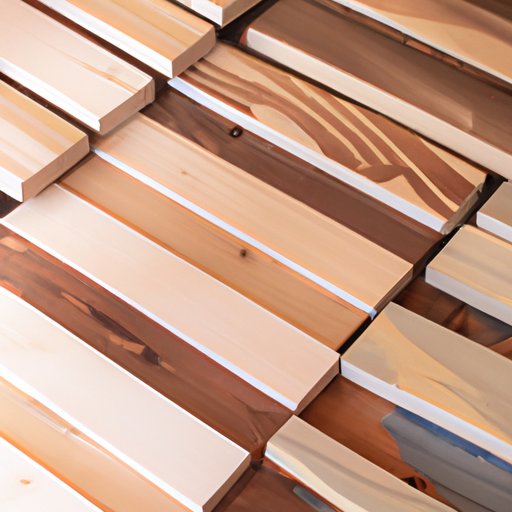
C. Different colors and finishes available
Wood stains come in a variety of colors and finishes, including clear, transparent, semi-transparent, solid color, and more. Clear and transparent finishes allow the wood grain’s natural patterns to show through, while solid-color finishes provide optimal coverage but obscure the wood grain.
D. How to match the stain to the wood species
Some wood species respond well to certain stains, while others do not. For instance, pine, redwood, and cedar readily absorb stains, while hardwoods like mahogany and maple tend to resist stains. Be sure to consult with the stain manufacturer to determine which stain works best for your wood species.
E. Overview of popular wood stain brands and their advantages
Popular wood stain brands include Minwax, Varathane, Zinsser, and Gel Stain. Each of these brands has its unique advantages, so it’s essential to choose the brand that best suits your project’s needs. Minwax provides limitless color options and is known for its easy application and quick-drying features. Varathane is known for its deep penetration into the wood and durability. Zinsser is known for its water-based stains that are easy to use and eco-friendly.
Quick and Easy Wood Staining: Tips for Weekend DIYers
A. How to choose projects that are easy to stain
Small projects like picture frames, tabletops, and shelves are easy for DIYers to knock out in a day. Larger projects like cabinets and dressers may take longer than a weekend but can be split up into bite-size chunks to make staining achievable.
B. Tips for a quick and efficient stain job
- Choose quick-drying stains
- Use a wood conditioner to minimize blotches and reduce the drying time
- Stain small portions at a time to avoid drips and streaks
- Clean your tools as needed to maintain quality
C. How to balance speed with quality
Working too quickly can cause mistakes, while taking too much time can be frustrating. To balance speed with quality, identify the workflow for your project. Each stage of the project should have a time frame. For instance, working on multiple pieces at once can reduce the overall project time.
D. Steps to take to ensure the project is done in a weekend
- Create a detailed timeline
- Organize your space and make sure you have all tools and materials handy
- Prep your wood by sanding, cleaning, and applying a conditioner
- Apply the stain one section at a time
- Apply the sealant coat once the stain has dried completely
Expert Advice on Staining Wood: Common Mistakes and How to Avoid Them
A. Overview of common staining mistakes and their causes
Common mistakes while staining wood include blotching, streaking, unevenness, drips, oversaturation, etc. These mistakes mostly happen due to lack of preparation, poor application techniques, or not following the manufacturers’ instructions.