I. Introduction
Have you heard about spatchcocking your chicken, but don’t know where to begin? No worries! Spatchcocking involves removing the backbone of the chicken and flattening it out before cooking. It is a fantastic technique for juicy and evenly cooked chicken that impresses your dinner guests. In this guide, we will explore the step-by-step process of spatchcocking a chicken, the essential tools and equipment required, safety guidelines, unique recipes, comparison with traditional roasting methods, frequently asked questions, and much more.
II. Step-by-Step Spatchcocking Process
A. Tools and Equipment Required
You don’t need much to spatchcock a chicken, but you’ll want to have the right tools on hand:
- Pair of sharp kitchen shears or a sharp knife
- Cutting board
- Bowl for chicken parts
- Paper towels
- Baking sheet or roasting pan
- Grill or oven
B. Preparing the Chicken
Remove the chicken from its packaging and pat it dry with paper towels. Place it with the breast side down on a cutting board.
1. Trimming the fat and backbone
First, trim the excess fat by cutting it away with shears or a knife. Turn the chicken so that it faces you, and then use the shears or knife to cut along both sides of the backbone, removing it completely.
2. Flipping the chicken
Turn the chicken over and press it down so that it flattens out. You should hear a satisfying crack as the breastbone breaks. This helps the chicken to cook evenly and cuts down on cooking time.
C. Spatchcocking the Chicken
1. Cutting through the breastbone
Starting from the neck, cut through the cartilage and breastbone down the center of the chicken, making sure not to cut all the way through the chicken. This allows for the chicken to lie flat while cooking.
2. Removing the wing
Remove the wingtips by cutting through the joint and discarding them or saving them for later use.
3. Removing the thigh bone
Turn the chicken around and locate the thighbones. Use the shears or knife to cut around the bones, removing them from the chicken entirely.
D. Seasoning the Chicken
Apply salt and pepper to both sides of the chicken, or use your favorite seasonings. Marinade chicken for 30-60 minutes before cooking.
E. Preparing the Grill or Oven
Preheat your grill to medium-low heat or oven to 425 degrees Fahrenheit and place the spatchcocked chicken on a baking sheet or roasting pan.
F. Cooking the Chicken
1. Grilling Time and Temperature
Cook the chicken over medium-low heat for about 45 minutes or until an internal temperature of 165 degrees Fahrenheit is reached.
2. Safety Guidelines
Remember to use different utensils for raw and cooked chicken to avoid cross-contamination. Also, be cautious while handling hot utensils and always use heat-resistant gloves.
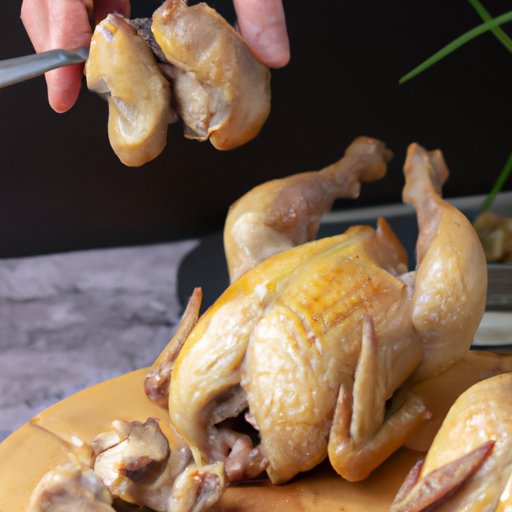
G. Serving the Chicken
Let the chicken rest for a few minutes before carving it up. You can serve it with your favorite sides, and it should be some juicy and flavorful chicken!
III. Video Tutorial on Spatchcocking a Chicken
A. Video Demonstration of Spatchcocking Process
Check out this video tutorial that provides a visual aid in confirming the process of spatchcocking a chicken:
B. Visual Aid to Follow Along the Process
It can be helpful to have a visual aid to follow along with the spatchcocking process. You can find a step-by-step guide along with photos for your assistance.
C. Providing Tips and Tricks on the Go
The video also provides some tips and tricks to make the process go smoothly, like using chicken parts for a tasty broth.
IV. Tools and Equipment necessary to spatchcock a chicken
A. List of Tools
Aside from the tools already mentioned, You may want to have some additional tools:
- Meat thermometer
- Basting brush for marinating during cooking
- Skewers to support uneven parts of chicken
B. Detailed explanation on how to use each tool effectively
A meat thermometer will come in handy to check the internal temperature of the chicken, ensuring it is fully cooked and safe to eat. A basting brush makes it easy to apply marinade to your chicken. Skewers can be placed through the meat to support odd positions, allowing it to cook evenly.
C. Avoiding the common mistakes while using Tools
It’s crucial to use a sharp pair of kitchen shears or a knife when spatchcocking your chicken, as dull ones may damage the meat. When using your tools, be careful to avoid cuts and burns, especially while working with hot utensils.
V. Unique Spatchcocked Chicken Recipe
A. Introduction to the Recipe
If you’re looking to add something new to your recipe list, this spatchcocked chicken with herb butter is easy and absolutely finger-licking delicious!
B. List of Ingredients
- 1 whole chicken (about 3-4 pounds)
- 4 tbsp butter, cut into pieces
- 3 garlic cloves, minced
- 2 tbsp finely chopped fresh rosemary leaves
- 2 tbsp finely chopped fresh thyme leaves
- Salt and black pepper, to taste
C. Step-by-Step Recipe Method
- Preheat oven to 425 degrees Fahrenheit
- Pat dry the chicken with paper towels
- Prepare the herb butter by mixing the butter, minced garlic, rosemary, thyme, salt, and pepper.
- Gently loosen the skin over the chicken’s breasts and spread half of the herb butter inside the skin
- Rub the remaining herb butter on top of the chicken
- Roast the chicken for about 45-50 minutes
- Check that the internal temperature of the chicken has reached 165 degrees Fahrenheit, using the meat thermometer
- Let the chicken rest for 5 minutes before carving and serving
D. Cooking Time and Temperature
The cooking time for this recipe is around 45-50 minutes, depending on the size of the chicken, at 425 degrees Fahrenheit.
E. Plating the Dish
Once the spatchcocked chicken is cooked, serve it on a platter with your favorite sides, and top them with the extra seasoning and herb butter. Best served hot!
VI. Comparison between traditional roasting and spatchcocking methods
A. Explain traditional roasting methods in brief
Traditional roasting involves cooking a whole chicken that hasn’t been spatchcocked. The chicken is usually trussed and placed on a roasting rack and cooked at a high temperature.
B. Comparison between Spatchcocking and Traditional Roasting
1. Time and Temperature
Spatchcocked chickens usually cook faster than traditional roasted chickens due to the even heat distribution. This method requires cooking at a relatively lower temperature, whereas roasting requires a higher temperature.
2. Moisture Retention
Spatchcocking the chicken ensures that it remains juicy and moist while cooking, while roasting can sometimes lead to dry or overcooked meat.
3. Flavor Enhancement
Spatchcocking allows the chicken to cook evenly and creating a delicious and flavorful meal in minimal time. It also creates a crispy skin that enhances the flavor of the meat, whereas roasting may not offer the same crispy skin and flavor.
C. Pros and Cons of Each
Traditional roasting may offer convenience as it requires almost no fuss when it comes to its preparation. At the same time, Spatchcocking gives evenly cooked, crispy, and juicy meat that’s scrumptious and flavorful. It is best suited for recipes where fast-cooking is essential.
VII. Frequently asked questions regarding Spatchcock chicken
A. Addressing most common concerns and questions
- Q. Is spatchcocking difficult?
- Q. Can you spatchcock chicken in advance?
- Q. Do I need to flatten out the chicken completely?
- Q. How long do you cook a Spatchcock chicken in a smoker?
- Q. How do you store leftover spatchcock chicken?
A. The process of spatchcocking may seem intimidating, but it is not complicated with the correct steps and right tools.
A. Yes, you can spatchcock the chicken in advance and refrigerate it in marinade or seasoning. If possible, it is best to spatchcock the chicken before cooking to prevent the chicken from drying out.
A. It is not necessary to flatten the chicken out entirely, but it ensures quick and even cooking. However, if you cannot get it to lay perfectly flat, don’t worry, it will still cook.
A. Approximately 4-5 hours, depending on the size.
A. Refrigerate the leftover chicken in an airtight container for up to three days.
B. Providing Safety Guidelines
Follow these safety guidelines to ensure that you and your family stay safe during and after the cooking process:
- Use a meat thermometer to check the chicken’s internal temperature to ensure that it’s safe to eat.
- Prevent cross-contamination between raw and cooked chicken by using different utensils.
- Keep your work area clean and sanitize after contact with raw meat.
C. Tips for Beginners
- Have all tools and equipment on hand before starting the process.
- Pat dry the chicken with paper towels to avoid slippery and messy handling.
- Be sure to place a piece of paper to soak up the chicken’s juices and keep it from sticking to your cutting board.
VIII. Conclusion
A. Recap of the Article
In this article, we have walked you through the steps of spatchcocking a chicken, the tools and equipment required, the most common concerns and questions regarding spatchcock chicken, safety guidelines, tips for beginners, and much more.
B. Encouraging the readers to try out Spatchcocking
With this guide, we hope that you’ll venture into the kitchen with the confidence to try spatchcocking. Remember that practice makes perfect, so keep at it, and you’ll soon be an expert at spatchcocking chicken!
C. Providing useful resources and references
For more information, check out additional guides and recipe ideas from reputable cooking websites. Don’t be afraid to experiment with your favorite recipes and tweak with your seasonings to find what works for you.