Beginner’s Guide
If you’re new to screen recording on a MacBook, don’t worry, it’s easy to get started. First, you’ll need to launch the QuickTime Player app, which comes pre-installed on your MacBook. Once you have the app open, follow these simple steps:
Step 1: Setting Up the Screen Recording Feature
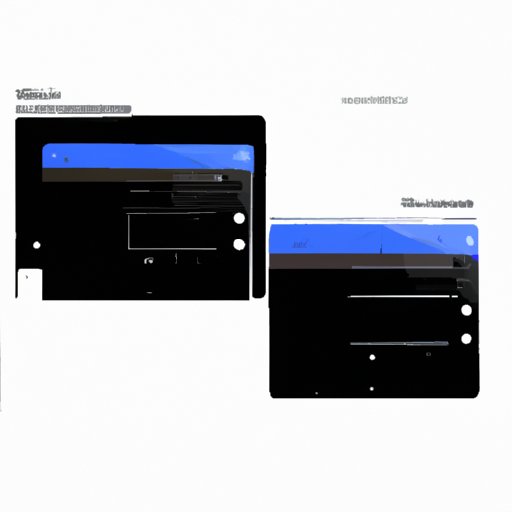
From the QuickTime Player menu, select “File” and then “New Screen Recording.” A new “Screen Recording” window will appear, giving you several options to customize your recording. You can choose to record audio, adjust the recording quality, and more.
Step 2: Choosing the Recording Area and Adjusting Settings
Next, choose the area of your screen that you want to record. You can select the entire screen or just a portion, depending on your needs. You can also adjust the recording quality by selecting a specific resolution and frame rate.
Step 3: Recording the Screen and Saving the Video
Once you’ve chosen your recording area and adjusted your settings, click the “Record” button to start recording your screen. To stop the recording, simply click the “Stop” button in the menu bar. When you’re finished recording, the video will automatically be saved to your “Movies” folder.
Step 4: Tips for Improving Video Quality
If you want to improve the quality of your screen recording, there are several tips you can follow. First, make sure that the area you’re recording is well-lit and free from glare or reflection. You can also adjust the recording quality settings for a higher resolution and frame rate. Finally, consider using an external microphone to capture high-quality audio.
Feature-Focused Article
If you want to take your screen recording to the next level, there are several advanced features you can use. Here are some of the most useful features:
Record System Audio and Microphone
If you want to record audio from your system, such as music or sound effects, or an external microphone, you can easily do so in the QuickTime Player app. Simply select “New Screen Recording” from the “File” menu, choose your recording area, and click the arrow next to the “Record” button. From there, select “Internal Microphone” or “External Microphone” to record audio along with your video.
Adjust Resolution and Frame Rate
If you want to adjust the quality of your screen recording, you can customize the resolution and frame rate in the “Screen Recording” window. Higher resolutions and frame rates will result in higher-quality video, but may take up more space on your hard drive.
Use Hotkeys and Timers for More Efficient Recording
If you’re recording a long video or need to edit your recording later, you may want to use hotkeys or timers to make the process more efficient. For example, you can use the “Control” + “Command” + “R” key combination to start and stop recording, or set a timer to stop recording automatically after a certain amount of time.
Integrate Screen Recording with Other Apps and Tools
You can also integrate screen recording with other apps and tools on your MacBook. For example, you can use screen recording as part of a video editing workflow, or share your video directly to social media platforms like Twitter or Facebook.
Comparison Article
There are several different screen recording apps available for MacBook users, each with its own unique features and pricing. Here’s a comparison of some of the most popular apps:
QuickTime Player
QuickTime Player is a free app that comes pre-installed on all MacBooks. It allows users to record their screen, as well as audio from their system or an external microphone. However, it doesn’t have some of the more advanced features found in other screen recording apps.
ScreenFlow
ScreenFlow is a popular screen recording app that offers a range of advanced features, including live video recording, multi-channel audio recording, and editing tools. However, it is also one of the more expensive options on the market.
Camtasia
Camtasia is another popular screen recording app that offers a range of advanced features, such as video editing tools and a library of pre-made assets. However, it is also relatively expensive and may not be necessary for all users.
Recommendations based on Specific Needs and Preferences
When choosing a screen recording app, it’s important to consider your specific needs and preferences. For basic screen recording, QuickTime Player may be sufficient, while more advanced users may prefer ScreenFlow or Camtasia. It’s also important to consider pricing and any additional features that may be included.
User Reviews and Feedback
Before making a decision, it’s always a good idea to read user reviews and feedback for each app. This can give you a better idea of how the app performs in real-world situations, as well as any common issues or concerns.
Case Studies
Screen recording can be a useful tool for a wide range of professionals, students, and businesses. Here are some examples of how people have used screen recording to achieve their goals:
Professionals
Professionals in fields like design, programming, and marketing often use screen recording to share their work with clients or colleagues. Screen recording can be particularly useful for demonstrating software, providing feedback on designs, or troubleshooting technical issues.
Students
Students can also benefit from using screen recording for a variety of purposes. For example, screen recording can be useful for creating video tutorials, recording lectures, or showcasing class projects.
Businesses
Businesses can use screen recording to train employees, provide customer support, or create marketing materials. Screen recording can be particularly useful for creating product demos, providing step-by-step tutorials, or showcasing new features.
Tips and Best Practices
Regardless of how you’re using screen recording, there are several tips and best practices you can follow to get the most out of the tool. These include choosing the right recording area, using the appropriate resolution and frame rate, and using a high-quality microphone for audio recording.
Implications for Other Readers or Potential Users
If you’re interested in using screen recording for your own work or projects, consider the different use cases and benefits outlined in this section. Even if you’re not in a profession or field that typically uses screen recording, it’s still worth exploring the tool and experimenting with different recording techniques.
Troubleshooting Guide
Like any software tool, screen recording can sometimes encounter issues or challenges. Here’s a troubleshooting guide to some common issues and how to fix them:
Fixing Issues with Sound, Video, or Recording Settings
If you’re experiencing issues with sound, video, or recording settings, try adjusting the settings in the “Screen Recording” window. You may also want to check your MacBook’s sound settings or update your device’s software.
Troubleshooting Third-Party Apps or Integration Challenges
If you’re using a third-party screen recording app or trying to integrate screen recording with another app or tool, you may encounter additional challenges. Try following the app’s troubleshooting guide or consulting with technical support for further assistance.
Escalating to Advanced Solutions or Seeking Technical Support
If you’ve tried all of the basic troubleshooting tips and are still experiencing issues, you may need to escalate to more advanced solutions or seek technical support from your app or device’s manufacturer.
Tips for Avoiding Future Issues and Improving Overall Performance
Finally, there are several tips you can follow to avoid future issues and improve your overall screen recording performance. These include keeping your device up-to-date with the latest software updates, using a high-quality microphone, and increasing your available storage space.