Introduction
Have you ever needed to scan a document or photo, only to realize you don’t have a scanner at home? Or you have a scanner, but it’s too much of a hassle to use? That’s where an iPhone comes in handy. With the built-in camera, you can easily scan documents, photos, and even business cards. In this article, we’ll guide you through the entire scanning process and provide helpful tips and tools to make your scanning experience easy and stress-free.
The Complete Guide to Scanning Documents with Your iPhone
Step-by-step instructions on scanning documents using the built-in Notes or Files apps
To scan a document using the Notes or Files app, follow these simple steps:
- Open the Notes or Files app and create a new note or folder
- Tap the camera icon within the app and select “Scan Documents”
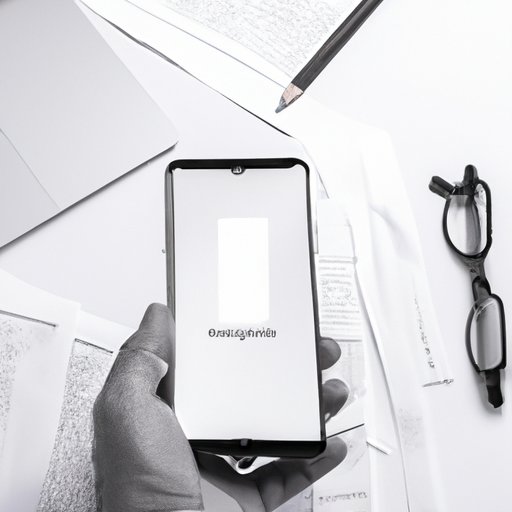
- Position your iPhone camera over the document and wait for the yellow box to appear
- Tap the shutter button to take a photo of the document
- If needed, drag the corners of the scanned document to adjust the edges
- Select “Keep Scan” and continue to scan additional pages if needed
- Once you have scanned all pages, tap “Save” to save the document to your Notes or Files app
Tips on how to get the best possible scan
Some tips to consider when scanning documents include ensuring that the document is well-lit, laying flat on a surface, and adjusting the edges to remove any unwanted background. You can also use the built-in “Scan Documents” feature to automatically adjust the lighting and apply filters for better readability.
Troubleshooting common issues
If you are experiencing issues with your document scanning, one common issue is blurry scans. Ensure that your document is properly lit and flat on a surface. Another common issue is missing sections of the document. Check to make sure all edges of the document are within the shot. Finally, if the scanning app freezes or crashes, try restarting your iPhone and make sure you have the latest software updates.
Making It Digital: A Beginner’s Guide to Scanning Photographs with Your iPhone
Explanation of how to use an iPhone camera to digitize old photos
To digitize an old photo with your iPhone, follow these simple steps:
- Position the photo on a flat surface in a well-lit area
- Open the camera app and select “Photo”
- Place the iPhone camera parallel to the photo and take the photo
- If needed, you can use the editing tools to adjust the image settings, such as contrast or brightness
- Once you are satisfied with the photo, save it to your Camera Roll
Tips for achieving the best possible results
When it comes to digitizing old photos, it’s important to consider lighting and positioning. Use natural light, if possible, and position your camera parallel to the photo to avoid distortion. You can also use photo editing tools to enhance the image quality.
Suggestions for organizing and storing digitized photos
To keep your digitized photos organized and easily accessible, consider using the Photos app or a cloud-based storage service like Google Photos or iCloud. You can also sort photos by date or location and create albums to group together similar photos.
From Paper to Digital: How to Scan Documents and Save Yourself Time and Stress
Benefits of using an iPhone to scan and store important documents
Using an iPhone to scan and store important documents offers many benefits, such as not needing a physical scanner, having digital copies that can be easily accessed from anywhere, and the ability to organize and categorize documents for easy retrieval.
Best practices for keeping documents organized
To keep your documents organized, consider creating folders within your Notes or Files apps to group similar documents together. You can also add tags or labels to documents to make searching for them easier. Another tip is to regularly clear out outdated documents to keep your storage space free.
Explanation of how to use apps like Notes, Files, and third-party scanning apps
In addition to the built-in Notes and Files apps, there are many third-party scanning apps available on the App Store, like CamScanner or Scanner Pro. These apps offer additional features such as OCR (optical character recognition) and the ability to sync with cloud storage services like Google Drive or Dropbox.
Say Goodbye to Physical Business Cards: How to Scan and Store Contacts with Your iPhone
Explanation of how to use the iPhone camera to scan business cards
To scan a business card with your iPhone camera, follow these simple steps:
- Open the Contacts app and tap the “+” button to add a new contact
- Select “Add Photo” and select “Scan a Document”
- Position the business card within the shot and wait for the yellow box to appear
- Tap the shutter button to take a photo of the business card
- Double-check the information on the card and make any necessary adjustments
- Tap “Done” to save the contact information to your Contacts app
Tips for organizing and storing contact information
To keep your contact information organized, consider creating groups or tags within your Contacts app to group similar contacts together. You can also use third-party apps like LinkedIn to easily connect with and manage your business contacts.
Discussion of apps like Contacts and LinkedIn for easy contact management
In addition to the built-in Contacts app, LinkedIn is a great tool for managing your business contacts. You can easily sync your contacts with LinkedIn and connect with people in your network.
The Ultimate Scanning App Showdown: Which iPhone App Comes Out on Top?
Comparison of features of popular scanning apps
In this section, we will compare the features of popular scanning apps like CamScanner, Scanner Pro, and Adobe Scan. Some features to consider include OCR, cloud storage integration, and editing tools.
Pros and cons of each app
CamScanner offers OCR and cloud storage integration but requires a subscription to access some advanced features. Scanner Pro offers powerful editing tools but is a bit more expensive than other apps. Adobe Scan offers reliable scanning and editing tools but may have limited cloud storage options.
Recommendations for different types of documents or use cases
Depending on your specific needs, different scanning apps may be better suited for you. For business-related scans, CamScanner or Scanner Pro may be the best choice. For personal use, Adobe Scan or the built-in Notes or Files app may suffice.
Conclusion
In this article, we have covered everything you need to know about scanning with your iPhone, from scanning documents to digitizing old photos to scanning business cards. With the tips and tools provided, you can now make your scanning experience stress-free and easy. So go ahead and give it a try.