Introduction
Rolling a joint is a rite of passage for many cannabis enthusiasts. It’s a fun, creative, and social activity that allows you to enjoy the benefits of smoking weed while also showing off your rolling skills to your friends. In this article, we’ll provide a step-by-step guide on how to roll a joint, highlight common mistakes to avoid, explore the different types of rolling papers available, and delve into the art and creativity of rolling a joint. Whether you’re a seasoned pro or a beginner, we hope that this guide will help you perfect your joint rolling skills.
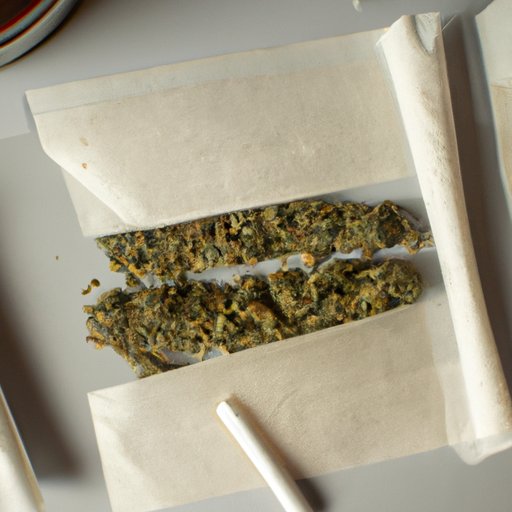
Step-by-Step Guide
Rolling a joint starts with preparing the weed. You’ll need to break up the cannabis buds into small pieces that can fit into the rolling paper. You can do this with your fingers, but it’s recommended to use a grinder to ensure the weed is evenly ground. Once the weed is ready, follow these steps:
- Select a rolling paper
- Add the weed to the paper
- Roll the paper between your fingers
- Tuck the paper under the weed and roll the joint back and forth to pack it in tightly
- Use a filter tip to shape the joint, place it at one end of the paper, and roll the paper around the tip
- Lick the adhesive strip on the rolling paper and seal the joint
- Twist the end of the joint to keep the weed from falling out
Dos and Don’ts
Even experienced joint rollers make mistakes from time to time. Here are some important dos and don’ts to keep in mind when rolling your joint:
- Do use fresh weed – old or dry weed can affect the flavor and burning quality of the joint
- Do use the right amount of weed – overpacking or underpacking the joint can cause it to burn unevenly or not at all
- Do use the right rolling paper – different papers have different sizes, flavors, and materials that can affect the smoking experience
- Don’t roll the joint too tightly – this can restrict airflow and make it difficult to smoke
- Don’t roll the joint too loosely – this can cause the weed to fall out or not burn properly
- Don’t forget to use a filter tip – this helps to shape the joint, keep it from falling apart, and prevent weed from getting into your mouth
The Different Types of Rolling Papers
There are many different types of rolling papers available on the market, each with their own unique features and advantages. Here are some of the most popular options:
- Hemp papers – made from all-natural hemp fibers, these papers are thin, slow-burning, and eco-friendly
- Rice papers – made from rice straw, these papers are ultra-thin and burn slowly with little to no ash
- Flavored papers – infused with flavors like strawberry, grape, and chocolate, these papers add a sweet twist to your smoking experience
- King-sized papers – larger than regular papers, these are perfect for rolling big joints or blunts
- Transparent papers – made from cellulose, these papers are completely transparent and burn slowly with a smooth taste
When choosing a rolling paper, consider the size, flavor, burning speed, and material. For example, hemp papers are a great choice if you’re looking for a slow-burning, eco-friendly paper, while flavored papers are good if you want to add a sweet taste to your joint.
The Art of Rolling
Rolling a joint is not just a skill – it’s an artform. There are many different rolling techniques and styles that you can experiment with to create the perfect joint. Here are some examples:
- The Tulip – roll a small, conical joint and insert it into the end of a larger joint, then wrap the larger joint around the smaller one to create a tulip-shaped joint
- The Cross – fold the paper in half to create a crease, then roll the joint over the crease to create a cross-shaped joint
- The Cone – roll the joint with more weed at one end to create a cone shape that burns evenly
Rolling a joint is not just about getting high – it’s also about expressing your creativity and style. Try experimenting with different shapes and designs to create a truly unique joint.
Tools of the Trade
Rolling a joint requires a few essential tools to make the process easier and more efficient. Here are some of the most important tools to have on hand:
- A grinder – to evenly grind the weed
- A rolling tray – to keep everything organized and prevent messes
- Filter tips – to shape the joint and prevent weed from getting into your mouth
- Storage options – to keep your weed fresh and organized over time
Having the right tools can make a big difference in the quality of your joint rolling experience. Consider investing in some high-quality tools to make the process easier and more enjoyable.
DIY Joint Rolling
Once you’ve mastered the basics of joint rolling, it’s time to get creative. There are many different ways to customize your joint rolling experience, from using different types of herbs to experimenting with unique rolling techniques. Here are some tips for creating your own custom joints:
- Try adding different herbs like chamomile, lavender, or mint to your joint for an extra aroma or flavor
- Experiment with different rolling papers, like gold or flavored papers, for a unique smoking experience
- Use different rolling techniques to create custom shapes, designs, or patterns
Rolling your own joint is all about personalization and creativity. Don’t be afraid to experiment and try new things, you might just discover your own unique style!
Conclusion
Rolling a joint is a popular activity among cannabis enthusiasts. With this step-by-step guide and practical tips on avoiding common mistakes, you can perfect your rolling skills in no time. Remember to experiment with different rolling papers, shapes, and designs to create a truly unique smoking experience.