I. Introduction
Repotting plants can be a simple task that can yield numerous benefits for the health and longevity of your plant. The process of repotting moves your plant to a larger container with fresh soil, allowing the plant to continue to grow and thrive. In this article, we will explore the step-by-step process of repotting a plant, as well as some tips, tricks, and common mistakes to avoid.
II. Step-by-Step Guide: How to Repot a Plant and Why You Should Do It
Before we delve into the process of repotting, let’s discuss why repotting is necessary for the health and growth of your plants. Over time, the soil your plant is in breaks down and becomes less nutritious, and the roots of the plant can become tangled and root-bound. Repotting gives your plant a fresh start with new soil and the opportunity to stretch out its roots.
Here’s what you’ll need to gather before beginning the process:
- Potting soil
- A new pot that’s one size larger than the current pot
- A trowel or small shovel
- A watering can or pitcher
Now that you’ve gathered your supplies, let’s begin the repotting process:
- Choose a work area that’s easy to clean up and has good light.
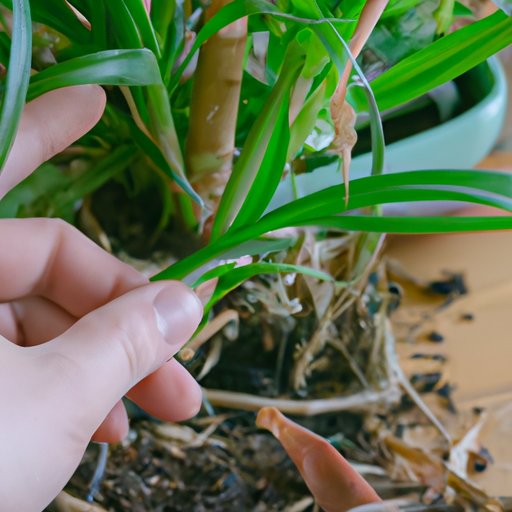
- Remove the plant from its current pot. If the plant is a bit stubborn to remove, you can use a knife to loosen the soil from the side of the pot. Then, gently tip the pot over and slide the plant out.
- Clean the roots. Use your fingers or a small brush to gently remove any excess soil from the roots of the plant so that they are clean and untangled.
- Add fresh soil to the new pot. Fill the pot with enough soil so that the plant can sit at the same level it was in its previous pot.
- Place the plant in the new pot. Spread out the roots evenly into the new soil and add soil around the edges of the plant.
- Add more soil. Gently press soil down around the plant and add soil until the pot is filled and level.
- Water the plant. Water thoroughly and let the excess water drain from the bottom of the pot.
III. Mastering the Art of Repotting: Tips and Tricks for Happy, Healthy Plants
While the steps to repotting can seem straightforward, there are a few additional tips and tricks that can ensure the success of your repotting efforts:
- Choose a pot with drainage holes to prevent water from pooling in the soil and causing root rot.
- Water thoroughly after repotting to settle the soil, and keep the plant in a shady spot for a few days to prevent burning.
- Avoid overwatering your plant after repotting, as this can lead to waterlogged soil and root rot.
IV. The Top 5 Common Mistakes to Avoid When Repotting Your Plant
Unfortunately, it’s all too easy to make mistakes when repotting your plant. Here are the top 5 common mistakes you need to avoid:
- Choosing the wrong pot size can hinder the growth of your plant and lead to root rot. Be sure to choose a pot that is one size larger than the current pot.
- Not using fresh soil can deprive your plant of necessary nutrients, which can stunt its growth and lead to health problems. Always use fresh soil when repotting.
- Damaging the roots can put unnecessary stress on your plant and make it more susceptible to disease and pests. Always handle the roots with care when repotting.
- Not watering enough after repotting can cause your plant to dry out and slow down its growth. Make sure to water your plant immediately after repotting and keep it hydrated until it adapts to its new pot.
- Overwatering can lead to waterlogged soil and root rot. Always water your repotted plant sparingly and allow the soil to dry out slightly in between watering.
V. DIY Home Gardening: Simple and Easy Steps to Repotting a Plant
Now that we’ve covered the essentials of repotting a plant, let’s take a simplified approach to the process for DIY home gardeners. Here are the supplies you’ll need:
- A new pot
- Potting soil
- A trowel
- A watering can or pitcher
Here are the basic steps you can follow:
- Fill the new pot with soil.
- Remove the plant from its old pot.
- Gently loosen any tangled roots and remove any dead or damaged roots.
- Place the plant in the new pot.
- Fill the pot with additional soil until it is level with the base of the plant.
- Water the plant generously.
VI. From Root to Tip: How to Choose the Right Pot and Soil for Your Plant
Choosing the right pot and soil for your plant is crucial for the health and growth of your plant. Here are some tips to keep in mind:
- Choose a pot that’s one size larger than the current pot to allow for root development and growth.
- Use a pot with drainage holes to prevent root rot and waterlogging.
- Choose the right type of soil for your specific plant, considering the pH level and drainage.
VII. Why Repotting is the Secret to Thriving Houseplants: A Beginner’s Guide
Repotting is a simple but important step in plant care. By repotting your plant, you give it room to grow and thrive in fresh soil. This can lead to healthier and more robust plants that can overcome stress and disease more easily.
Make repotting a regular part of your plant care routine to ensure the health and longevity of your plants.
VIII. Conclusion
By now, you’ve learned the essential steps and tips for repotting your plants. Repotting can seem intimidating at first, but with a bit of practice, you’ll be able to repot plants with ease. Remember to choose the right pot size, use fresh soil, handle the roots with care, and avoid overwatering or underwatering your plants after repotting.