I. Introduction
Removing wallpaper can be a daunting and time-consuming task that requires patience, precision, and the right tools. However, if done correctly, it can completely change the look and feel of a room, allowing for a fresh start and new design. In this article, we will explore a step-by-step guide to removing wallpaper without causing damage to your walls. We will also provide tips for avoiding common mistakes and share creative ways to repurpose old wallpaper.
II. Step-by-Step Guide to Removing Wallpaper
Before starting, it’s important to gather the necessary materials and take safety precautions, such as wearing gloves and goggles. Begin by removing any loose or peeling sections of wallpaper by gently pulling it away. Then, using a scorer tool, create small perforations on the surface of the wallpaper. This will allow any stripping solution or water to penetrate the paper more easily. Apply wallpaper stripping solution or warm, soapy water to the wallpaper and let it soak in for a few minutes. Use a scraper tool to remove the wallpaper, starting at the bottom and working your way up. Be careful not to apply too much pressure and damage the wall underneath. After all wallpaper is removed, rinse the wall with clean water and allow it to dry completely before moving to the preparation phase.
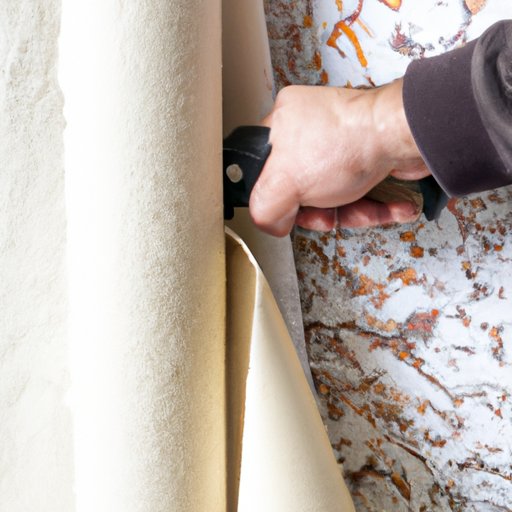
III. Tools and Techniques for Removing Wallpaper
There are several different tools and techniques that can be used to remove wallpaper. Some popular tools include scraper tools, scoring tools, and steamer tools. These tools are often used in tandem with techniques such as wetting and scoring. Wetting involves saturating the wallpaper with a solution or water to allow it to soften the adhesive and make it easier to remove. Scoring involves creating small punctures on the surface of the wallpaper to allow the solution or water to better penetrate the paper. Depending on the type of wallpaper and the state of the wall, different tools and techniques may be more effective than others.
IV. Five Mistakes to Avoid When Removing Wallpaper
When removing wallpaper, there are several mistakes that are commonly made. These mistakes include not scoring the wallpaper enough before attempting to remove it, using too much force and causing damage to the wall underneath, not stripping the backing paper, using the wrong tools, and not taking the necessary safety precautions. To avoid these mistakes, it’s important to prepare the wall properly, use the right tools and techniques, and take safety precautions. Avoiding these mistakes will ensure a successful wallpaper removal process and prevent costly mistakes down the road.
V. Pros and Cons of Using a Steamer versus a Chemical Stripper
When removing wallpaper, two popular methods are using a steamer or a chemical stripper. Both methods have their pros and cons, depending on the type of wallpaper and the condition of the surface underneath. Steaming is a more environmentally friendly option and does not involve the use of harsh chemicals. However, it can be a slower process, and the steam can cause burns if not used properly. Chemical strippers are faster and more effective in some cases, but they can release toxic fumes and require the use of protective gear.
VI. Creative Ways to Repurpose Old Wallpaper
Once the wallpaper is removed, rather than throwing it away, consider repurposing it in creative ways. Old wallpaper can be used to cover notebooks, create unique gift wrap, or create a customized photo frame. By reusing old wallpaper, you not only reduce waste but also add a personalized touch to your belongings.
VII. Preparing Walls for New Wallpaper
Before applying new wallpaper, it’s important to properly prepare the wall to ensure a smooth surface. This involves removing any adhesive residue left from the old wallpaper removal process, as well as sanding any bumps or rough spots. It’s also important to apply a coat of primer to the surface to create a barrier between the wall and the new wallpaper. Failure to properly prepare the wall can result in an uneven and bumpy wallpaper application.
VIII. Expert Tips for Removing Tough Wallpaper in High-Moisture Areas
Removing wallpaper in areas prone to moisture, such as bathrooms and kitchens, can be challenging due to the high humidity. To prevent damage to the walls and potential mold growth, it’s important to take special precautions. This includes using a fan to ventilate the area, applying a mold-inhibiting solution, and consider using a steamer to minimize damage to the wall. Proper preparation and technique are critical when removing wallpaper in these areas.
IX. Conclusion
Removing wallpaper can be a daunting task, but following the right steps and using the correct tools and techniques can make the process much easier. Be sure to prepare the area beforehand, take safety precautions, and choose the right method for your particular situation. By avoiding common mistakes, repurposing old wallpaper, and properly preparing the wall for new wallpaper, you’ll be well on your way to a successful DIY project.