Introduction
Stitches are commonly used to close up wounds and help them heal. If you’ve had a surgical procedure or an accident that required stitches, it’s important to know how to remove them properly. When stitches are ready to be removed, it means the skin has healed enough to hold itself together without the support of the thread. Removing stitches too early can cause the wound to reopen, while waiting too long can lead to scarring. Knowing how to remove stitches at home can save you time and money, but you should always consult a doctor or nurse if you have any concerns or questions.
Step-by-step guide
Removing stitches at home requires some preparation, but it’s a relatively straightforward process. Here are the basic steps to follow:
1. Preparing materials and tools needed to remove stitches
Before you get started, make sure you have all the necessary tools and materials. You will need:
– Sterilized scissors or tweezers
– Alcohol or hydrogen peroxide
– Sterile gauze or bandages
– Clean water
– Trash can or biohazard container
2. Identifying the type of stitch and the correct way to remove them
There are several kinds of stitches, and the way you remove them will depend on the type of stitch you have. Generally, there are two types of stitches:
– Sutures, which are tied tightly and need to be cut with scissors
– Staples, which are removed with a special tool
Talk to your doctor or nurse to determine the type of stitch you have, and they’ll give you specific instructions on the best way to remove them.
3. Sterilizing tools and cleaning the wound
Before removing any stitches, you want to make sure that your tools are clean and sterile. Use alcohol or hydrogen peroxide to clean your scissors or tweezers. Then, wash your hands thoroughly with soap and water, and put on clean gloves if possible.
Next, clean the area around the stitches with soap and water or hydrogen peroxide. Gently pat the area dry with a sterile gauze or bandage.
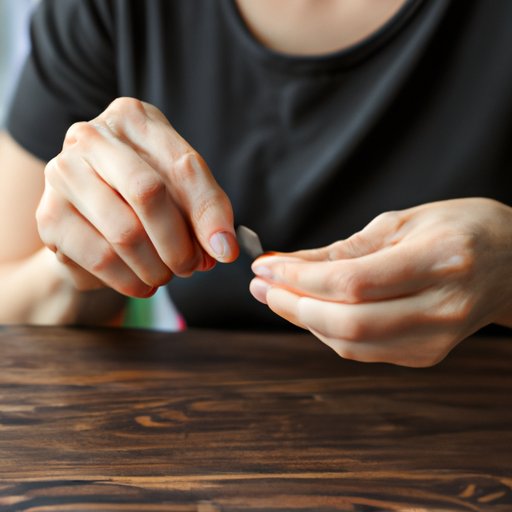
4. Gently removing stitches, one by one
Using your scissors or tweezers, gently lift the knot at the top of the stitch. Cut the thread just beneath the knot and pull gently. It’s essential to be very gentle, so you don’t damage the skin or cause any pain. Avoid pulling too hard or too quickly, as this can cause the thread to break and make it harder to remove.
Repeat this process with each stitch until all of them have been removed.
5. Caring for the wound after stitches are removed
Once all the stitches are removed, clean the wound with soap and water. If there is any bleeding, apply gentle pressure with a sterile gauze or bandage until it stops.
Cover the wound with a sterile bandage and keep it dry for the next 24 hours. Avoid strenuous activities that could cause irritation or tearing. If you notice any signs of infection, such as redness, swelling, or discharge, contact your doctor immediately.
Video tutorial
If you prefer a visual guide on how to remove stitches, check out this video tutorial:
[Embed video tutorial here]
This video will show you each step in real-time, making it easier to follow along.
Tips and tricks
Here are some tips and tricks to make the stitch removal process as smooth and safe as possible:
– Use clean, appropriate materials and tools. Make sure everything you use is sterile to avoid infection and other complications.
– Keep the wound clean and avoid infection. Follow good hygiene practices, such as washing your hands and cleaning the wound regularly, to avoid infection.
– When and how to seek medical attention. If you feel uncertain about removing stitches at home, or if you notice any signs of infection, contact your doctor or nurse immediately.
Common mistakes to avoid
Avoid these common mistakes when removing stitches at home:
– Using the wrong tools or materials. Nonsterile or inappropriate tools can cause infections or reopen wounds.
– Hurrying and being rough while removing stitches. Being too forceful or removing stitches too quickly can cause pain or harm to the skin.
– Neglecting aftercare, leading to infected or reopened wounds. Proper wound care is essential for healing and preventing infections.
Personal experience
One of the best ways to learn about removing stitches is through personal experience. Here’s a personal story that highlights the importance of proper stitch removal, and tips and advice based on personal experience and lessons learned.
[Insert personal story here]
Q&A format
Here are some common questions readers may have about removing stitches:
Q: When should stitches be removed?
A: Stitches should be removed when the wound has healed enough to stay closed on its own, but not too long that it starts to cause scarring. Your doctor or nurse will tell you when it’s time to have your stitches removed.
Q: Is it safe to remove stitches at home?
A: Removing stitches is generally safe, but it’s essential to follow the proper protocol and have the right tools and materials to do it correctly. If you have any doubts, contact your doctor or nurse.
Q: How can I tell if I need professional medical attention instead of removing stitches at home?
A: If you are unsure about removing stitches, you notice signs of infection in the wound, or you have any questions or concerns, contact your doctor or nurse immediately.
Alternatives to home removal
If you’re not comfortable removing stitches at home, or if you notice signs of infection, your doctor may recommend alternative methods. Some alternatives to home stitch removal include the following:
– Seeing a doctor or nurse to have stitches removed
– Using dissolvable stitches, which are absorbed by the body over time
– Using adhesive strips or glue to close the wound
Your doctor or nurse can advise you on which option is best for your specific situation.
Conclusion
Removing stitches at home can save you time and money, but it’s important to know how to do it safely and correctly. Follow the steps outlined in this article, and be sure to follow proper wound care techniques to prevent infections and complications. If you have any concerns, contact your doctor or nurse immediately.