Introduction
Apple Music is a highly popular music service, offering millions of songs for streaming and download. However, one downside is that it doesn’t allow users to save songs for offline listening or record them for later use. This can be frustrating if you want to create a playlist or simply enjoy music when offline. Fortunately, there are several ways to record Apple Music, which we will explore in this article.
Third-party audio recording tools
Using a third-party audio recording tool is one of the easiest and most reliable ways to record Apple Music. These tools allow you to capture audio from any source, including your computer’s sound card, and save it in various formats. Some popular options are Audacity, QuickTime Player, and Ondesoft Audio Recorder.
To use Audacity, for example, simply download and install the software, open it, and select your audio source (in this case, your computer’s sound card). Then hit the Record button and start playing your music. When you’re done, hit Stop and save the file in your desired format.
Built-in screen recording feature on iOS
If you’re using an iOS device such as an iPhone or iPad, you can use the built-in screen recording feature to capture audio from Apple Music. This method is free and doesn’t require any additional software, although the sound quality may not be as good as with a dedicated audio recorder.
To enable screen recording on iOS, go to Settings > Control Center > Customize Controls, and add the Screen Recording option. Then swipe up from the bottom of your screen to open the Control Center, tap the Screen Recording button (a circle within a circle), and start playing your music. The recording will stop when you hit the red bar at the top of your screen or end the session from the Control Center.
It’s worth noting that the default microphone for screen recording is your device’s built-in microphone, which may not provide optimal sound quality. To improve it, you can use an external microphone or earphone with a built-in mic, as we will discuss in the following sections.
Specialized recording apps for iPhone/iPad
Another option for iOS users is to download a specialized recording app that is designed to capture audio from Apple Music or other streaming services. These apps often offer advanced features such as editing, tagging, and album artwork, as well as higher quality audio recording.
Some popular apps for recording from Apple Music are Just Press Record, iRecorder Pro, and Voice Memos. To use Just Press Record, for example, simply download and install the app, launch it, and allow access to your microphone. Then hit the Record button and start playing your music. The app will save your recording in its library, where you can play, edit, or share it as needed.
Desktop audio recorders
If you prefer to record from your computer rather than your mobile device, you can use a desktop audio recorder that supports Apple Music. These recorders work similarly to their mobile counterparts, allowing you to capture audio from any source and save it in various formats.
Some popular options for desktop recording are Audacity (which we mentioned earlier), Soundflower, and Apowersoft Audio Recorder for Mac/Windows. To use Apowersoft, for example, simply download and install the software, open it, select your audio source and output format, hit the Record button, and start playing your music. The software will save your recording in the specified folder.
Digital audio recorders
If you want to achieve the highest quality audio recording from Apple Music, you may consider using a digital audio recorder. These devices are designed specifically for capturing sound, and often offer features such as high bitrates, noise reduction, and external mic support.
Some popular digital audio recorders are Zoom H1n, Tascam DR-40X, and Sony ICD-UX570. To record from Apple Music using a digital recorder, simply connect the recorder to your computer or mobile device using a USB cable or memory card, select the appropriate audio source (usually Line In or External Mic), and hit the Record button. When you’re done, save the file to your computer or transfer it to your device as needed.
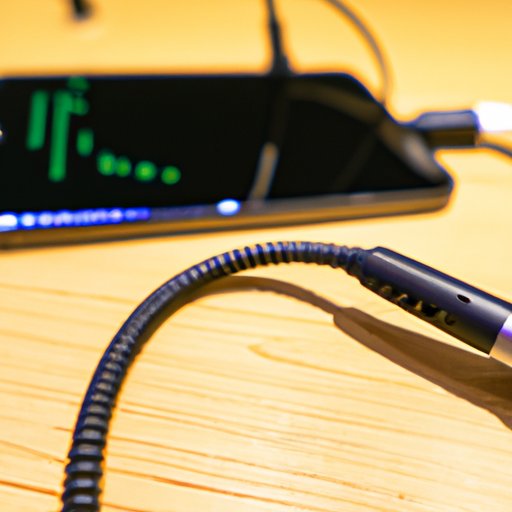
External microphones
As we mentioned earlier, using an external microphone or earphone with a built-in mic can significantly improve the sound quality of your Apple Music recordings. These devices can be connected to your mobile device or computer using a 3.5mm jack, Lightning connector, or USB cable, depending on their type.
Some popular microphones for recording audio from Apple Music are Rode VideoMic Me-L, Shure MV88, and Blue Yeti. To use a microphone for recording, simply connect it to your device’s audio input/output jack, launch your recording software or app, select the appropriate audio source, and start playing your music. The software will capture the audio input from your microphone, resulting in a cleaner and richer sound.
Headphone splitter method
Finally, if you don’t have access to any of the above solutions, you can use a simple headphone splitter to record Apple Music. This method involves plugging one end of the splitter into your device’s audio output and the other end into your recording device’s audio input, such as a microphone or another mobile device.
To use a headphone splitter, simply connect it to your devices, launch your recording software or app on the receiving device, and start playing your music on the source device. The recording device will capture the audio input from the splitter, resulting in a stereo recording of your Apple Music.
Conclusion
Recording from Apple Music is not always straightforward, but with the right tools and knowledge, it can be achieved easily and effectively. Whether you prefer to use a third-party software, a built-in feature, a specialized app, a desktop recorder, a digital recorder, an external microphone, or a headphone splitter, there is a solution for every situation and need.
When choosing the best recording method for your specific case, consider factors such as sound quality, convenience, cost, and available features. With a bit of experimentation and practice, you can create your own collection of high-quality Apple Music recordings and enjoy them anytime, anywhere.