Introduction
A measuring tape is a versatile tool that is used to measure length, width, and height of different objects, furniture, or materials. Whether you are working on DIY projects at home or professionally, knowing how to read a measuring tape is an essential skill to have. In this article, we will guide you through the different types of measurement scales, how to interpret the markings, and the most common mistakes to avoid.
The Beginner’s Guide to Reading a Measuring Tape: Easy Tips and Tricks for Accurate Measurements
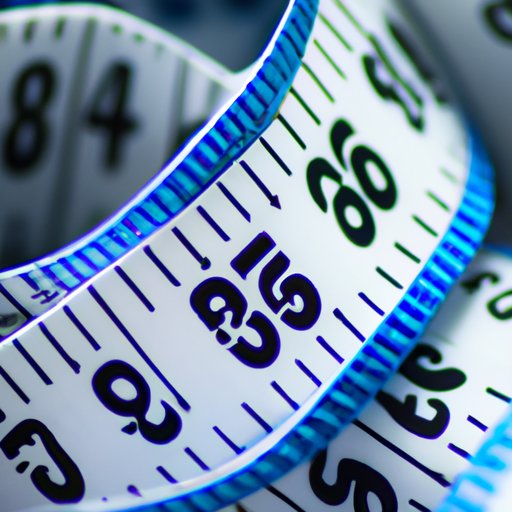
The first step in learning how to read a measuring tape is to familiarize yourself with the tool’s basic parts. A standard measuring tape is made up of a long, flat blade with a hook on the end that anchors the tape onto the object being measured. The blade is marked with a scale that is typically displayed in inches or centimeters, sometimes with additional markings for fractions or studs.
To read the inch scale, locate the longest line on the tape, which represents one inch. Each subsequent shorter line represents 1/2 inch, 1/4 inch, 1/8 inch, and 1/16 inch, respectively. When measuring, align the end of the object with the zero mark on the tape, and then read the scale at the opposite end of the object to get the correct length.
Some measuring tapes also feature markings for common building measurements, such as studs. These markings are usually red or black and occur every 16 or 24 inches, making it easy to locate a stud when framing walls. Holding the measuring tape on an angle over the wall can help you determine the location of the studs and other measurements.
Mastering the Art of Reading a Measuring Tape: A Comprehensive Step-by-Step Guide
Once you have mastered the basics, it’s time to dive deeper into the advanced measurement techniques. The metric scale is the primary method in use around the world and is an ideal option when working on international projects. To read the metric scale, locate the zero mark, which is where the metric scale begins. Every subsequent line signifies one centimeter, and the numbers at each centimeter mark represent every ten centimeters.
To find the center point of an object, you will need to measure the distance between its two ends and then divide it by two. Regularly locating the center point can help you identify the hanging position for picture frames, fixtures, and other items.
For rafter lengths, some measuring tapes indicate the length of common roof rafters at angles of 22.5, 45, and 67.5 degrees. To use this marking, align the measuring tape’s first line with the base of the rafter, then measure up or down to read the rafter length.
A measuring tape can also be used to measure areas and volumes in addition to length. To get the area of an object, measure its length and width, then multiply the two. To determine the volume, multiply length, width, and height.
Quick and Simple: How to Read a Measuring Tape in 5 Minutes or Less
Even if you only have a few minutes to measure an object, you can still get accurate results by following the right steps. First, ensure that the measuring tape is stretched out straight so that it is not curved or slack. Then, find the zero mark and place it at the end of the object. Finally, read the tape measure at the other end closest to you for the correct length.
When measuring for quick projects, it’s crucial to hold the measuring tape steady and keep it at the same level as the object being measured. Use a ruler or other straight-edged tools to keep the end of the tape measure in place.
From Inches to Centimeters: Understanding and Using Different Measuring Tape Units
Measuring tapes offer different units of measurements, from imperial to metric. Imperial measurements are popular in the United States, and metric measurements are used worldwide. To convert between the two, multiply the length in inches by 2.54 to get the equivalent in centimeters. Or divide the length in centimeters by 2.54 to convert it to inches.
When deciding which unit to use, consider the project’s requirements and the precision needed. Some projects may require more detailed measurements, and others may require broader measurements.
Measuring Tape Hacks: Creative Ways to Use a Tape Measure for Everyday DIY Projects
Measuring tapes are designed primarily for measuring length, but they can also come in handy for other DIY projects. For instance, a measuring tape can help you determine the width of a board, the depth of a cabinet, and the area of a wall that needs painting. It can also be used to mark straight lines, act as a straight edge when drawing, and even serve as a makeshift level.
Avoiding Measuring Tape Mistakes: Common Errors and How to Correct Them for Precise Results
Common measuring tape mistakes can lead to inaccurate measurements and incorrect cuts. One of the most common mistakes is pulling the tape too hard or too loosely, which can distort the measurement. Another error is holding the tape measure at an angle, resulting in incorrect readings.
To avoid these mistakes, use a measuring tape that is in good condition and keep it taut while taking measurements. Check that the tape is parallel to the object being measured, and hold it steady to avoid wobbling.
Conclusion
Learning how to read a measuring tape requires practice and patience, but with the right tips and tricks, anyone can master this skill. Whether you are a DIY enthusiast or a professional, measuring accurately can make a huge difference in the success of your project. So, take the time to learn the different scales, markings, and common mistakes and ways to avoid them. With consistent practice, you will be able to read a measuring tape with ease and precision.