Introduction
Cherries are one of the joys of summer, with their bright colors and juicy flavors. But if you’ve ever tried to remove the pits from cherries, you know how frustrating it can be. Fortunately, there are many different ways to pit cherries, from traditional methods like cherry pitters and knives to innovative hacks using paper clips, hairpins, and even straws or bottles. In this article, we’ll share some of the most effective and user-friendly ways to pit cherries, along with tips to help you get the best possible results.
The Traditional Way
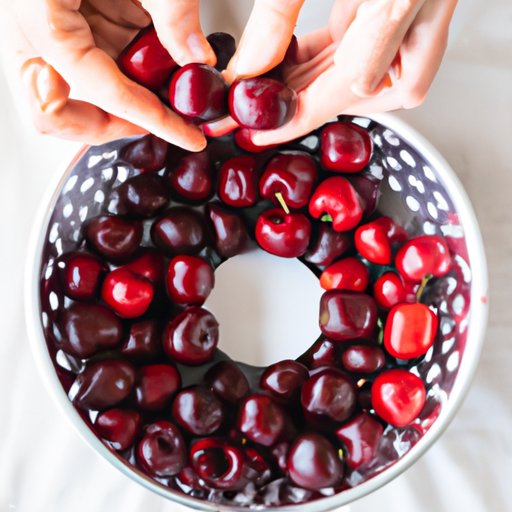
One of the most common ways to pit cherries is with a cherry pitter or a simple knife. The advantage of using a cherry pitter is that it can remove the pit quickly and cleanly, without damaging the cherries. However, knife-based methods can be more versatile and require fewer special tools. Here are some general steps for using both methods:
Using a cherry pitter:
- Insert the cherry into the pitter, with the stem side facing up.
- Squeeze the handles of the pitter together to push the pit out through the bottom.
- Discard the pit and repeat with the remaining cherries.
Using a knife:
- Hold the cherry steady on a cutting board with one hand.
- Use a sharp paring knife or other small-bladed knife to make a shallow incision around the cherry, cutting about a quarter of the way through the fruit.
- Gently twist the two halves of the cherry apart, using the stem as a pivot point.
- Use your fingers, a spoon or a knife to remove the pit from the half without a stem.
Note that some cherries are easier to pit than others; particularly small or soft cherries may be more challenging to work with using these tools. If you’re having trouble, try chilling the cherries in the fridge for 15-30 minutes before pitting them to firm them up a bit.
The Paper Clip Method
An easy and cheap way to pit cherries is by using a standard paper clip. Here’s how to do it:
- Straighten out the paper clip, leaving one end bent at a 90-degree angle to form a small hook.
- Insert the hook into the stem end of the cherry, where the pit is located.
- Gently pull the hook out of the cherry, bringing the pit with it.
- Repeat with the remaining cherries.
This method can be a bit messier than using a cherry pitter, but it is also very effective and easy to do on the go or in a pinch. Just be sure to keep the paper clip away from small children and dispose of it safely when you’re done.
The Hairpin Method
If you don’t have a paper clip on hand, a hairpin can work just as well for pitting cherries. Here’s how to use this tool:
- Bend the hairpin slightly to create a hook at one end.
- Insert the hook into the stem end of the cherry.
- Gently twist the hairpin around to loosen the pit and pull it out of the cherry.
- Repeat with the other cherries.
Like the paper clip method, this approach requires a bit of dexterity and may create some mess, so be prepared for a slightly sticky process.
The Straw Method
If you’re looking for a more kid-friendly way to pit cherries, the straw method can be a fun and effective option. Here’s what to do:
- Insert a drinking straw into the stem end of the cherry, pushing it through until it emerges from the bottom.
- Use your fingers, a knife or a chopstick to push the pit out of the cherry and through the straw.
- Repeat with the other cherries.
This method can be a bit tricky with larger cherries, and it does require a bit more force to push the pit out than some of the other methods. However, it can be a great way to keep kids entertained and engaged during a fruit-focused cooking or baking project.
The Bottle Method
Believe it or not, an empty bottle can make a surprisingly effective cherry pitting tool. Here’s how to use one:
- Place the cherry on the mouth of the bottle, with the stem sticking out.
- Use a chopstick or other thin utensil to push the pit from the cherry and into the bottle.
- Repeat with the other cherries.
This method can be a bit messy, as the pits may bounce around inside the bottle and create a bit of juice splatter. However, it can also be a fun way to upcycle a disposable item and achieve some satisfaction from a successful experiment.
The Fork Method
Finally, if you don’t mind risking a bit of damage to your forks, you can also use this utensil to pit cherries. Here’s how:
- Place the cherry on a cutting board or other firm surface.
- Use the tines of a fork to press down just above the stem, where the pit is located.
- Gently twist the fork to loosen the pit and remove it from the cherry.
- Repeat with the other cherries.
Be careful not to apply too much force to the fork or you may break it. You can also use a duller fork to reduce the risk of damage; in this case, you may need to wiggle the fork a bit more to remove the pit.
The Freezing Method
If you’re in a rush or just want to enjoy fresh cherries later, you can also freeze them and then remove the pits. Here’s how:
- Wash and dry the cherries thoroughly.
- Place the cherries in a single layer on a baking sheet or other flat surface.
- Transfer the sheet to the freezer and let the cherries freeze for at least a few hours, or overnight.
- Remove the cherries from the freezer and use a knife, your fingers or other tools to pry the pits out.
This method can be a bit more time-consuming than some of the other methods, and it may change the texture of the cherries slightly. However, it can also be a great way to enjoy fresh cherries later in the season, and it can help reduce waste if you have a surplus of fruit.
Conclusion
With so many different cherry-pitting methods to choose from, there’s no excuse not to include this delicious fruit in your summer menu. Whether you prefer traditional tools like cherry pitters or knives, low-tech options like paper clips or hairpins, or even quirky tools like bottles or forks, there’s a method out there that can work for you. The key is to experiment, practice, and find the technique that yields the best results for your preferences and kitchen style.
Whether you’re making cocktails, pastries, jams, or just snacking on pitted cherries, we hope these tips and tricks have helped you make the most of this beloved summer fruit.