I. Introduction
Are you a fan of breakfast foods? Do you enjoy a classic sunny side up egg but your attempts have ended in disaster? Fear not! In this article, we’ll provide you with a comprehensive guide on how to make perfect sunny side up eggs every time. Whether you’re an experienced chef or a beginner cook, this guide will offer you some valuable tips and tricks to make your breakfasts a success.
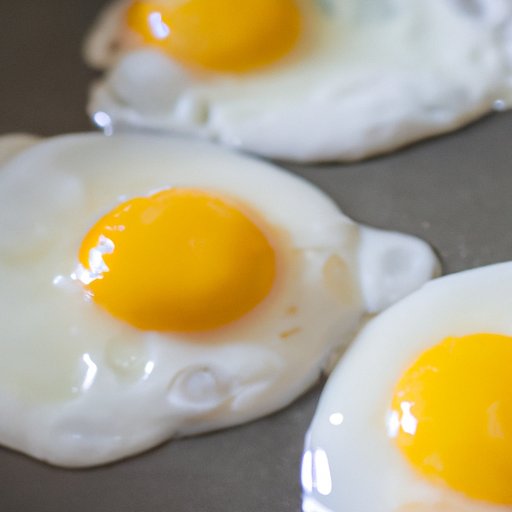
II. Step-by-Step Guide
The key to making perfect sunny side up eggs is patience and attention to detail. Here are the steps to follow:
- Heat a non-stick pan on medium heat for 30 seconds.
- Add a small amount of cooking oil or butter to the pan.
- Crack one or two eggs (depending on the size of the pan) into the pan and let them settle for a few seconds.
- Lower the heat to low and cover the pan.
- Cook for 2-4 minutes or until the whites are fully set and the edges are crispy. For a runnier yolk, cook for a shorter time.
- Remove from heat and let the eggs rest for a minute to set the yolks.
- Season with salt and pepper to taste.
Note: If you don’t have a lid, you can also place a plate over the pan to cover it and cook the eggs.
III. Short and Sweet Recipe
Ingredients:
- 1-2 eggs
- Cooking oil or butter
- Salt and pepper to taste
Instructions:
- Heat a non-stick pan on medium heat for 30 seconds.
- Add a small amount of cooking oil or butter to the pan.
- Crack one or two eggs (depending on the size of the pan) into the pan and let them settle for a few seconds.
- Lower the heat to low and cover the pan.
- Cook for 2-4 minutes or until the whites are fully set and the edges are crispy. For a runnier yolk, cook for a shorter time.
- Remove from heat and let the eggs rest for a minute to set the yolks.
- Season with salt and pepper to taste.
IV. Tips and Tricks
Follow these tips and tricks to elevate your sunny side up egg cooking game:
- Use room temperature eggs to avoid cracking and breaking in the pan.
- Don’t try to flip the egg, as this will ruin the yolk.
- Cook the egg on low heat to ensure even cooking and prevent overcooking.
- Use a non-stick pan to prevent sticking and ease cleaning.
- For a healthier option, swap out cooking oil for spray or use an air fryer instead of a pan.
V. Health Benefits
Eggs are a great source of protein and can provide essential nutrients like vitamin D and vitamin B12. Sunny side up eggs can be a healthy breakfast option when cooked correctly and paired with nutritious foods. You can also add extra vegetables or swap out cooking oil for a healthier alternative.
VI. Serving Suggestions
Looking for inspiration on how to serve your sunny side up eggs? Try these ideas:
- Pair them with whole wheat toast and avocado for a balanced breakfast
- Add them on top of a salad for a protein boost
- Use them as a topping in a breakfast burrito or a breakfast sandwich
- Serve them with smoked salmon or prosciutto for an elegant brunch dish
VII. Regional Variations
Sunny side up eggs are a classic breakfast dish, but did you know that there are different regional variations? Here are some unique twists to try:
- In Italy, try sunny side up eggs with Parmesan cheese and truffle oil.
- In Mexico, huevos rancheros are sunny side up eggs served on a tortilla with salsa and beans.
- In Japan, tamago kake gohan is a breakfast bowl with rice, soy sauce, and a raw egg yolk on top.
- In Iran, shakshuka is a dish with eggs cooked in a tomato-based sauce with spices like cumin and paprika.
VIII. Accompaniments
Want to add some extra flavor to your sunny side up eggs? Here are some side dishes and items that would complement them well:
- Crispy bacon
- Pan-fried mushrooms
- Grilled tomatoes
- Baked beans
- Roasted sweet potatoes
IX. Conclusion
Cooking sunny side up eggs can seem intimidating, but with the right technique and tips, it can be an easy and delicious breakfast option. Remember to take your time, use fresh ingredients, and experiment with different variations and ingredients.