I. Introduction
Unwanted hair can be a real problem for some people, especially if you don’t want to rely on synthetic or chemical products. That’s where homemade sugar wax comes in, offering a natural and affordable alternative to commercial waxing products. In this guide, we’ll take you step-by-step through the process of making sugar wax, provide different recipes for different skin types, and give you tips and tricks for before and aftercare.
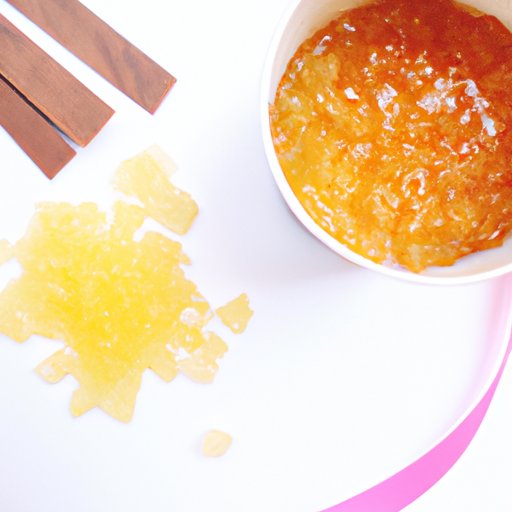
II. Step-by-Step Guide to Making Sugar Wax
Making sugar wax at home is easier than you might think, and you only need a handful of ingredients and equipment to get started. To begin, you’ll need:
- 2 cups of sugar
- 1/4 cup of lemon juice or apple cider vinegar
- 1/4 cup of water
- A candy thermometer
- A medium-sized pot
- A wooden spoon
Now that you have everything you need, it’s time to start mixing all of your ingredients together in the pot. Heat over medium-high heat, stirring constantly, until the mixture reaches a temperature of 250°F. Remove from heat and allow to cool until it’s the consistency of taffy. Your sugar wax is now ready to use!
III. Comparison with Other Hair Removal Methods
So, how does sugar wax compare to other hair removal methods? Here are some pros and cons to keep in mind:
- Commercial waxing products: Pros – easy to find, professional-quality results; Cons – can contain harsh chemicals, expensive over time.
- Shaving: Pros – quick and easy, affordable; Cons – regrowth can be prickly, and you risk razor burn or cuts.
- Epilation: Pros – long-lasting results, relatively affordable; Cons – can be painful, may cause ingrown hairs.
- Laser hair removal: Pros – permanent results, no more shaving or waxing; Cons – expensive, may not be suitable for all skin types, can be painful.
Sugar waxing represents a happy medium between all of these options: it’s affordable, long-lasting, and natural, but without the pain and cost of laser hair removal. It’s also less likely to cause irritation or ingrown hairs than shaving or epilation, thanks to the all-natural ingredients.
IV. DIY Options for Making Sugar Wax
If you’re looking to make sugar wax from scratch, we’ve got you covered. This easy-to-follow tutorial will walk you through the process step-by-step:
- Combine 2 cups of sugar, 1/4 cup of fresh lemon juice, and 1/4 cup of water in a medium pot.
- Cook over medium heat until the mixture reaches 250°F, stirring constantly with a wooden spoon.
- Remove from heat and allow to cool until it’s tacky to the touch, like taffy.
- Spoon a small amount of the wax onto a wax strip or cloth, then press onto the skin and quickly remove it in the opposite direction of hair growth.
- Repeat until you’ve waxed all the areas you want to treat, then clean up any leftover residue with warm water and soap.
And there you have it! Your very own homemade sugar wax, ready to use whenever you want. You can make larger or smaller batches depending on how often you need to wax, but be sure to store it in an airtight container in a cool, dry place for best results.
V. Sugar Wax Recipes
There are many different recipes for sugar wax out there, and choosing the right one for your unique hair type or skin needs can make all the difference. Here are some of our favorites:
- Coconut oil-based sugar wax: ideal for people with dry or sensitive skin, as the added coconut oil will moisturize and soothe any irritation. Simply add 1/4 cup of melted coconut oil to your basic sugar wax recipe before cooking.
- Honey-based sugar wax: if you want to add a touch of sweetness to your wax, try adding 1/4 cup of honey to the mix before heating. This recipe is great for people with curlier or thicker hair, as the honey will help the wax adhere better to your hair.
- Lemon-based sugar wax: perfect for oily or acne-prone skin, since lemon juice is an astringent that helps remove excess oil and dirt from the skin. Use lemon juice instead of vinegar in your basic sugar wax recipe.
Experimenting with different types of sugar wax can be a fun and rewarding way to find the perfect formula for your hair removal needs. Just be sure to test a small patch of skin before applying the wax to larger areas, to make sure you’re not allergic to any of the ingredients.
VI. All-Natural Ingredients
At the heart of sugar waxing is the use of all-natural ingredients, which makes it a much safer and healthier alternative to commercial hair removal products. Synthetic ingredients like parabens or fragrances can cause irritation, inflammation, or even long-term side effects like cancer or hormonal imbalance. When you make sugar wax at home, you’re in complete control of what goes into it, and you can customize the recipe to suit your needs.
There are also environmental benefits to using all-natural ingredients in your beauty routine. Many commercial beauty products are packaged in non-recyclable or non-biodegradable materials, which can contribute to landfill waste or ocean pollution. By using homemade sugar wax, you can reduce your carbon footprint and enjoy a sustainable beauty regimen.
VII. Before and After Care
If you want to get the most out of your sugar waxing experience, it’s important to take care of your skin before and after you wax. Here are some tips to keep in mind:
- Exfoliate your skin a day or two before waxing, to remove any dead skin cells and make the hair easier to remove.
- Cleanse your skin thoroughly before applying the wax, to remove any dirt, oil, or sweat that can interfere with the waxing process.
- Apply a soothing lotion or oil to your skin after waxing, to help calm any irritation and keep the skin moisturized.
- Wear loose-fitting clothing and avoid sweating or swimming for 24-48 hours after waxing, to help the skin heal and avoid ingrown hairs.
VIII. Troubleshooting Common Issues
Even with the best ingredients and techniques, sugar waxing can sometimes cause problems like skin irritation, difficulty removing hair, or a too-thick consistency that’s hard to work with. Here are some tips for overcoming these issues:
- If the wax is too thick, add a small amount of water and cook it again until it reaches the right consistency.
- If the wax is too runny, add more sugar and cook it again until it thickens.
- If the wax is too hot or sticky, allow it to cool or add more lemon juice to balance the pH levels.
- If you experience skin irritation or redness, apply a cool compress or aloe vera gel to soothe the area.
- If you have trouble removing hair, try trimming it closer to the skin or applying a thin layer of baby powder to absorb any excess moisture.
IX. Conclusion
There you have it – a complete guide to making sugar wax at home, including different recipes, before-and-after care, and troubleshooting tips. While it might take a little practice to get the perfect consistency or find the right recipe for your skin type, the benefits of all-natural hair removal are well worth the effort.