Introduction
If you’re a bread enthusiast, you’ve likely heard of sourdough starter. Sourdough bread is known for its distinct flavor, chewy texture, and long shelf life – all thanks to the starter. Sourdough starter is a mixture of flour, water, and naturally occurring wild yeast and bacteria. It’s used as a leavening agent in bread recipes instead of commercial yeast. Making sourdough starter from scratch may seem daunting, but it’s actually quite simple. In this article, we’ll walk you through everything you need to know to make your own sourdough starter, even if you’re a total beginner.
Beginner’s Guide to Making Sourdough Starter
Before we dive into the nitty-gritty details of making sourdough starter, let’s first talk about what it is and why it’s important. Sourdough starter is important for two main reasons: First, it provides a leavening agent for bread, which means it helps the bread dough rise. Second, it adds flavor and texture to the bread that’s unique to sourdough.
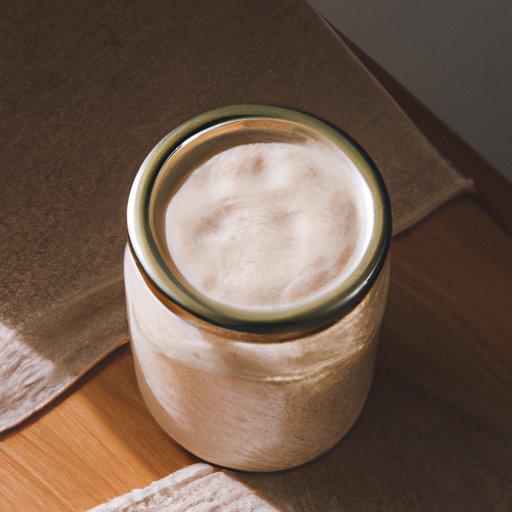
Making sourdough starter from scratch involves just a few simple steps. First, you’ll mix equal parts flour and water in a jar. Then, you’ll “feed” the starter daily by removing half of the mixture and adding more flour and water. After a few days, the mixture will start to bubble, indicating the presence of wild yeast and bacteria.
To create a successful sourdough starter, you’ll need to pay attention to a few key factors. For example, temperature and humidity can play a big role in how quickly your starter develops. Additionally, using the right kind of flour and water is crucial for the health of your starter. But don’t worry – we’ll cover all of this in more detail in the next sections.
DIY Sourdough Starter: Easy Tips and Tricks for Success
When it comes to making sourdough starter, there are a few key ingredients you’ll need: flour, water, and time. You can use any kind of flour to make sourdough starter, but many bakers prefer to use unbleached all-purpose flour, wheat flour, or rye flour. The water you use should be room temperature or slightly warm – hot water can kill the natural yeast and bacteria you need to make your starter.
To ensure that your starter is healthy and happy, you’ll also need to pay attention to the conditions it’s kept in. For example, the temperature of the room should ideally be between 70°F and 85°F (21°C- 29°C) for optimal fermentation. A warm and humid environment is ideal in the early stages of starter cultivation. However, too much moisture can cause mold to develop on the surface of the starter, leading to a sour smell or off flavour.
Feeding your sourdough starter daily will ensure that it remains healthy. To feed your starter, simply remove half of the mixture, and add an equal amount of flour and water back into the jar. Feeding every 12 hours results in a quicker fermentation and stronger acidity of the starter. For intermediate bakers, they can minimize the feeding frequency to 1-2 times per week by storing the starter in the fridge.
Sourdough Starter 101: Everything You Need to Know to Get Started
There are different methods for making sourdough starter, but the basic premise is the same: mix together flour and water and let it sit at room temperature until it begins to ferment. One popular method is the pineapple juice method, where you add pineapple juice to the flour and water mixture. The added pineapple juice helps to lower the pH of the mixture, creating an environment that’s favorable to the growth of wild yeast and bacteria.
Using a “mature” starter can also help to ensure a successful loaf of bread. A mature starter is one that has been fed regularly for several days, and it’s strong enough to leaven bread dough. While you can use a new starter to make bread, it may not be as strong as a mature starter, and it may not produce the same level of sourdough flavor.
When it comes to using your sourdough starter in bread recipes, you’ll need to plan ahead. Using sourdough starter requires a longer fermentation process than using commercial yeast, which can mean a longer rise time for your bread dough. However, the end result is worth it – a delicious loaf of homemade sourdough bread with a unique flavor and texture.
How to Make Homemade Sourdough Starter: A Simple Step-by-Step Guide
Now that you understand the basics of sourdough starter, let’s dive into the step-by-step process of making your own. Follow these instructions, and you’ll have a thriving sourdough starter in just a few days:
1. In a large jar or container, mix equal parts flour and water until smooth. For example, use 100g of flour and 100g of water.
2. Cover the jar with cheesecloth, a lid with a loosened cap, or any container that lets air pass through.
3. Keep the jar at room temperature for at least 12 hours, ideally in a warm and humid place. It is ideal to look for a warm place between 70-85°F (21°C-29°C).
4. After 24 hours, transfer half of the mixture into a new jar, and add equal parts flour and water (100g of each).
5. Continue to feed the mixture daily, discarding half of the portion before feeding the remaining portion. If you see bubbles and its volume increase in less than 12 hours, the starter is actively alive and ready to leaven the bread.
The Art of Making Sourdough Starter: Best Practices and Common Mistakes to Avoid
While making sourdough starter isn’t difficult, there are a few things to keep in mind to ensure success. For example, it’s important not to overfeed your starter, as this can result in an overly sour flavor or even a dead starter.
Another common mistake is neglecting to “discard” a portion of the starter before feeding it. Discarding a portion of the mixture helps to ensure that the starter stays healthy and doesn’t become too acidic.
Keeping your starter in the fridge when you’re not using it can also help to extend its life. However, it’s important to remember that you’ll need to feed it regularly even when it’s refrigerated – otherwise, it may become inactive and eventually die.
Mastering the Art of Sourdough: Perfecting Your Homemade Sourdough Starter
Once you’ve mastered the basics of sourdough starter, there are a few ways to take your bread to the next level. For example, using different kinds of flour can affect the flavor and texture of your bread. Many bakers enjoy experimenting with different types of flour, such as rye, whole wheat, and spelt flour, to create unique bread recipes.
You can also experiment with the fermentation time of your bread dough. Longer fermentation times can create a more complex flavor profile and a chewier texture. Additionally, adding ingredients such as seeds, nuts, or dried fruit can add even more flavor and texture to your sourdough.
Conclusion
Making sourdough starter from scratch may seem intimidating, but it’s actually quite simple. With just a few ingredients and some patience, you can create your own sourdough starter and take your bread-baking skills to the next level. Be patient, pay attention to the conditions your starter is kept in, and don’t be afraid to experiment – the end result will be a delicious loaf of homemade sourdough bread with your unique signature. Remember to enjoy the process and have fun.