How to Make Slime with Glue: A Complete Step-by-Step Guide
Slime-making has received a lot of attention lately, with its uniquely satisfying texture and the endless possibilities for customization. Making slime with glue is one of the easiest and most popular ways to create this gooey substance. In this article, we will guide you through the process of making slime, provide tips for customizing and troubleshooting, and even offer a science experiment that explores the chemical reaction behind the slime-making process. Let’s get started!
Step-by-Step Guide
Necessary Ingredients and Tools
First, we will begin by discussing the necessary ingredients and tools for making slime with glue. Here’s what you will need:
- 1 bottle of glue (preferably white glue)
- 1/2 cup of water
- 1/2 teaspoon of baking soda
- 1 tablespoon of saline solution (containing sodium borate)
- Optional: food coloring, glitter, or any other desired add-ins
- A mixing bowl and spoon or spatula
Step-by-Step Instructions
1. Start by pouring the entire bottle of glue into the mixing bowl.
2. Next, add 1/2 cup of water to the glue and mix thoroughly using your spoon or spatula.
3. Once the glue and water are fully combined, add 1/2 teaspoon of baking soda to the mixture and continue to stir until it’s evenly distributed.
4. At this point, you can add in food coloring or any other desired add-ins, such as glitter, beads, or sequins. Stir gently until all the add-ins are mixed into the glue.
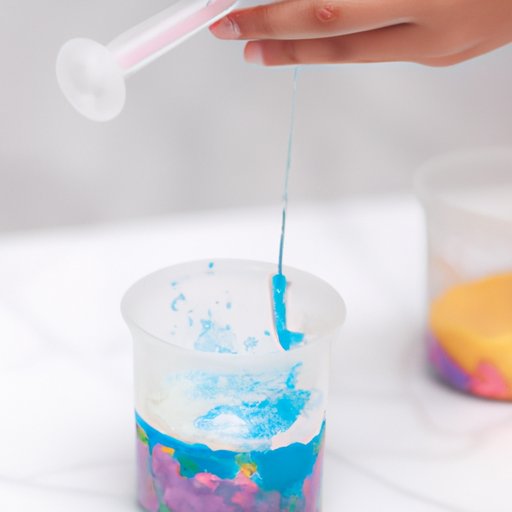
5. Finally, it’s time to activate the slime mixture. Add 1 tablespoon of saline solution to the mixture and stir. You should start to notice the slime forming almost immediately.
6. Continue to stir the mixture until the slime has fully formed and is no longer sticking to the sides of the bowl. If your slime is still too liquidy, add a few drops of saline solution until you reach the desired consistency.
Tips for Customizing Your Slime
One of the best things about making slime with glue is the ability to customize it to your heart’s content. Here are a few tips for creating different variations of slime:
- For a more fluffy and stretchy slime, add shaving cream or foaming hand soap to the mixture before adding the saline solution.
- Add food coloring or various glitter colors to your slime to make it truly your own.
- You can add different textures to your slime by mixing in beads, pearls, or small foam balls.
- Experiment with different amounts of saline solution to create varying levels of “stretchiness” in your slime.
Video Tutorial
If you’re a visual learner, be sure to check out our video tutorial on making slime with glue. You’ll be able to see the process step-by-step and get a better idea of what your mixture should look like at each stage of the process.
Here is the link to our video tutorial: [insert hyperlink here].
Why watch a video tutorial? For one, it’s a great way to ensure that you’re following the step-by-step process correctly. Additionally, it will help you to visualize the consistency and texture of the slime mixture at each stage of the process.
Science Experiment
If you’re interested in learning more about the science behind slime, we’ve got a fun experiment for you to try! Not only will this teach you about the science of slime, but it will be a fun activity for kids as well.
Here’s what you’ll need:
- 1 bottle of glue
- Borax powder
- 1/2 cup of water
- Food coloring
Instructions:
- Start by mixing 1/2 cup of water with 1/2 teaspoon of borax powder in a small container. Stir until the borax is fully dissolved.
- In a separate container, mix 1/2 cup of glue with a few drops of food coloring.
- Slowly pour the borax mixture into the glue mixture, stirring constantly.
- Continue to stir until the mixture is fully combined and the slime has formed.
Why does this work? When you mix the borax solution with the glue, it creates a chemical reaction that causes the glue molecules to stick together and form the stretchy, gooey substance known as slime.
Safety Guidelines
When making slime, it’s important to take safety precautions to minimize the risk of irritation or injury. Here are a few safety guidelines to keep in mind:
- Always use white glue instead of clear glue, as clear glue can contain harmful chemicals.
- Wear gloves and a protective cover while making the slime to avoid any accidental contact with the slime or its ingredients.
- If you happen to get slime in your eyes, rinse with water for a few minutes and seek medical attention if any irritation persists.
- If you accidentally ingest the slime or any of its ingredients, seek immediate medical attention and bring the container of slime with you to the emergency room.
Troubleshooting Tips
While making slime is a simple and enjoyable activity, there can be some common problems or issues that arise. Here are a few tips for troubleshooting:
- If the slime is too sticky, add a few drops of saline solution until you reach the desired consistency.
- If the slime is too runny, try adding a small amount of baking soda to the mixture and stir.
- If your slime has been sitting out and has become hard or rubbery, try adding a small amount of warm water and knead the slime with your hands to revive it.
- To store your slime, place it in an airtight container or plastic bag and keep it in the refrigerator.
Conclusion
Congratulations! You now know how to make your own slime with glue. Whether you’re looking for a fun sensory activity or want to explore the science behind slime-making, this easy and customizable process can provide hours of entertainment. Remember to always take safety precautions when making your slime and have fun experimenting with different colors, textures, and add-ins.