Introduction
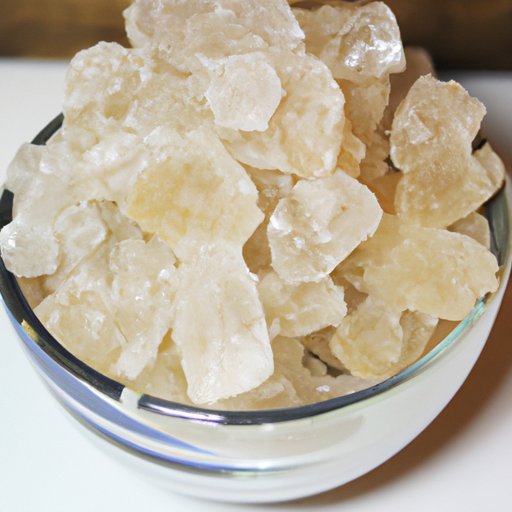
If you’re a fan of sweet treats, you may have come across rock candy at some point. It’s a simple yet delightful treat that can be flavored in a variety of ways and has a unique texture that makes it stand out from regular candy. But did you know that rock candy is one of the easiest types of candy to make at home? In this article, we’ll show you how to make rock candy from scratch with a step-by-step guide, recipes, and tips for success.
Step-by-Step Guide
Before we dive into the particulars of making rock candy, let’s take a moment to understand the basic process. Rock candy is made by dissolving sugar in hot water, then allowing the solution to cool slowly. As it cools, sugar crystals grow on a “seed” crystal or string, creating the unique texture of rock candy.
Here are the step-by-step instructions to make rock candy:
Sugar Solution Preparation
The first step in making rock candy is to create a sugar solution. Measure out 2 cups of granulated sugar and 1 cup of water and place them in a saucepan over medium-low heat. Stir occasionally until the sugar dissolves completely. This should take about 5-7 minutes. Avoid boiling the solution as it can burn and change the flavor of the candy.
Adding Flavors and Colors
Once the sugar solution has cooled down a bit, it’s time to add any desired flavors or colors. You can use extract flavors such as vanilla, peppermint, lemon, or artificial flavors. You can also use food colorings if you want to give your candy a festive touch. Mix the chosen flavour and colour into the sugar solution.
Seeding the Sugar Crystals
To make rock candy, you need a “seed” crystal. You can use a string, a wooden skewer, or a piece of cotton candy on a stick as a seed crystal. Dip it in the sugar solution and roll it in granulated sugar to create a small sugar coating on it. Secure the seed crystal to a pencil or knife and suspend it in a glass jar.
Growing the Sugar Crystals
Place the jar in a cool, dry place where it won’t be disturbed for several days to two weeks. Over time, sugar crystals will grow on the seed crystal, creating rock candy. The longer you leave the seed in the solution, the thicker and larger your candy will become.
Harvesting and Drying the Rock Candy
Once the candy has grown to the desired size, gently remove it from the jar and rinse it under warm water to dissolve any small sugar crystals that have not adhered to the main crystal. Let the candy dry for 24 hours on a wire rack or a parchment sheet before serving.
Photos and Illustrations for Each Step
To help you visualize each step of the process, we’ve included photos and illustrations that demonstrate how to make rock candy.
Recipes and Variations
While you can make classic rock candy by just following the recipe above, there are endless possibilities for flavor variations that you can experiment with. Here are a few ideas for customizing your rock candy recipe:
Classic Rock Candy Recipe
Ingredients:
- 2 cups granulated sugar
- 1 cup water
- Flavoring and food coloring (optional)
Instructions
- In a saucepan, stir sugar and water until sugar dissolves.
- Boil the mixture for 5-7 minutes, then take it off the heat and add flavoring and food coloring.
- Affix the seed crystal to a string or skewer that is long enough to reach the bottom of the glass. Roll in granulated sugar.
- Suspend the seed crystal in a clean glass jar.
- Wait for three to five days for sugar crystals to develop around the seed crystal.
- Carefully take out the rock candy, wash it in warm water and let it dry for a day.
- Enjoy your homemade rock candy!
Chocolate Flavored Rock Candy Recipe
If you want to give your rock candy a different flavor than the classic one, chocolate is a good choice.
Ingredients:
- 2 cups granulated sugar
- 1 cup water
- 2 ounces of unsweetened bakers chocolate, chopped
- 1/4 tsp. cream of tartar
Instructions
- In a saucepan, stir sugar, water, chocolate, and cream of tartar until sugar and chocolate have dissolved.
- Bring it to a boil, then take it off the heat and let it cool down a bit.
- Affix the seed crystal to a string or skewer that is long enough to reach the bottom of the glass. Roll in granulated sugar.
- Suspend the seed crystal in a clean glass jar.
- Wait for three to five days for sugar crystals to develop around the seed crystal.
- Carefully take out the rock candy, wash it in warm water and let it dry for a day.
- Enjoy your homemade chocolate rock candy!
Fruit-Flavored Rock Candy Recipe
If you want to give your rock candy a fruity kick, try using a fruit extract instead of the classic flavourings. Here’s how:
Ingredients:
- 2 cups granulated sugar
- 1 cup water
- 1 tsp. of your favorite fruit extract or a few drops of fruit-flavored oil
- Food coloring (optional)
Instructions
- In a saucepan, stir sugar and water until sugar dissolves.
- Boil the mixture for 5-7 minutes, then take it off the heat and add your chosen fruit flavoring and food coloring.
- Affix the seed crystal to a string or skewer that is long enough to reach the bottom of the glass. Roll in granulated sugar.
- Suspend the seed crystal in a clean glass jar.
- Wait for three to five days for sugar crystals to develop around the seed crystal.
- Carefully take out the rock candy, wash it in warm water and let it dry for a day.
- Enjoy your homemade fruit-flavored rock candy!
Explanation of How Different Ingredients Affect the Final Product
The different flavors or extracts do not impact forming sugar crystals because they do not interfere in the process chemically. It is only the amount of flavor that should be added so as not to affect the sugar solution. Chocolate-flavored candy can be trickier to make because bakers’ chocolate can be tricky to melt.
Tips and Tricks
To make the perfect rock candy, here are some tips to follow:
Avoiding Common Mistakes
One of the main mistakes people make when making rock candy is to move the jar or disturb the candy during the cooling process. You should also avoid using dirty jars or contaminated seed crystals. Keep them clean because contamination can affect the formation of sugar crystals.
Choosing the Right Ingredients and Brands
The quality of your ingredients counts in making rock candy. Always use clean jars, fresh sugar, and filtered water. Avoid using tap water, which may have added minerals that can interfere with the sugar crystallization process. The kind of granulated sugar you use can change the size and texture of the candy. Using caster or superfine sugar can create finer crystals, while regular granulated sugar will create larger, less-defined crystals.
Storing Rock Candy for Optimal Freshness
After the candy has dried for 24 hours, store it in an airtight container. Make sure to put a small amount of sugar in the container as well to prevent humidity build-up that could cause the candy to dissolve and harden.
Science and Chemistry
To understand why rock candy grows, it is essential to know some chemistry. As the water cools, the sugar becomes more concentrated, and a supersaturated solution is created. When the water contains too much sugar, the crystals form around the seed crystal, moving toward it as the water tries to lower the sugar concentration.
The size, shape, and texture of the rock candy will be affected by the temperature and concentration of the sugar solution. If you boil the mixture too long, it will become too concentrated and not form crystals. Similarly, if the solution is too diluted, the crystals will not grow properly or become too tiny.
DIY Rock Candy Kits
If you want to try making rock candy at home, you can choose between making your own kit or buying one. Here is a list of supplies you’ll need:
- Granulated sugar
- Water
- Flavoring and food coloring (optional)
- Seed crystal (string, wooden skewer, or a piece of cotton candy on a stick)
- Clean glass jar
Here are the simple steps to prepare your own DIY rock candy kit:
- Gather up all the supplies listed above.
- Place them in a decorative box or bag.
- You can also add an instruction booklet with recipes, photos and illustrations.
- Decorate the box or bag and give it as a gift or keep it as a family activity.
Conclusion
Rock candy is a simple yet addictive treat that you can easily make at home with a few simple ingredients and some patience. By following the step-by-step instructions and tips in this article, you’ll be making delicious homemade rock candy in no time. Grab your DIY kit, choose a recipe or make your own, and experiment with different flavors to create a unique treat that’s sure to impress.
Lastly, keep in mind that making candy is a science project-slash-baking endeavor. Give it time, don’t rush it, and enjoy the process.