Introduction
If you’re looking for a fun and versatile crafting skill to add to your repertoire, look no further than making pom poms! These fluffy balls of yarn can be used for a wide variety of projects, from home decor to fashion accessories to party decorations. Plus, making pom poms is a relatively easy and inexpensive technique that can yield impressive results. In this article, we’ll take you through the basics of making pom poms and show you some creative ways to use them. Let’s get started!
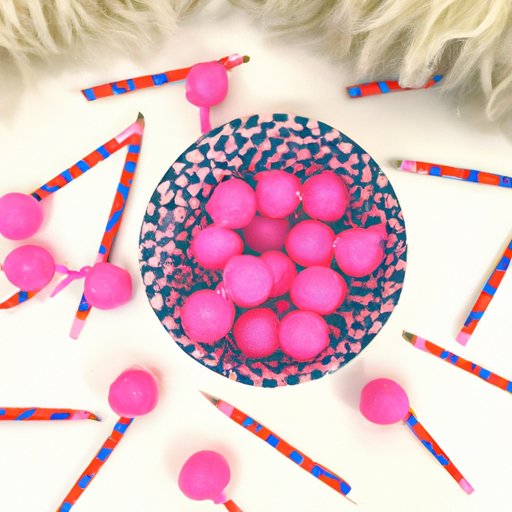
Step-by-Step Guide to Making Pom Poms: From Start to Finish
The process of making pom poms involves a few basic steps:
- Wrap yarn around a template, such as cardboard or a pom pom maker.
- Tie a piece of yarn tightly around the center of the loops, making sure it’s secure.
- Cut the loops on the opposite side of the template and fluff up the pom pom.
- Trim the pom pom to shape it and remove any stray yarn.
Here’s a more detailed breakdown of each step:
- Choose the size of your pom pom and find a suitable template. You can use cardboard, a pom pom maker, or even your own hand. Cut out two identical shapes of your template and hold them together.
- Begin wrapping your yarn around the template. Make sure to keep the tension even and wrap the yarn around enough times to get a full pom pom. For larger pom poms, you may need to wrap around 100 times, while smaller ones may only require 20-30 wraps.
- Carefully remove the yarn from the template and lay it flat. Cut a separate piece of yarn and tie it tightly around the center of the yarn bundle. Make sure to knot it several times to keep the yarn in place.
- Use scissors to cut through the loops on both sides of the tie, creating a ball of yarn. Gently shake and fluff up the pom pom to make sure all the pieces are even and none are sticking out.
- Trim the pom pom to give it a rounded shape. You can also use a comb to fluff up the pom pom even more and make it look fuller.
There are many variations of this basic method, and you can experiment with different types of yarn, templates, and cutting techniques to achieve different results. To make the process even easier, there are also many pom pom makers available on the market that can streamline the wrapping and tying steps.
Cheap and Easy Pom Pom Tutorial: Perfect for Beginners
If you’re new to pom pom making, or just looking for a quick and budget-friendly project, there are a few simple materials you can use to get started. Here are some options:
- Cardboard templates: cut out two identical circles or rectangles from a cereal box or similar material, and use them as your wrapping template.
- Acrylic yarn: choose a cheap and durable yarn that comes in many colors. You can find it at most craft stores or online retailers. Avoid using wool or other natural fibers, as they may not hold up as well or be as easy to shape.
- Scissors: make sure to use sharp scissors that can cut through multiple layers of yarn.
Once you have your materials, follow the basic steps outlined above to make your pom poms. You can experiment with different colors, sizes, and shapes to create a variety of projects. Here are a few tips to keep in mind:
- Use a ruler or measuring tape to make sure your template is the right size for your desired pom pom.
- Don’t cut the tie yarn too short, or your pom pom may fall apart or look lopsided.
- If your pom pom is too fluffy or sparse, you can trim or add more yarn as needed.
DIY Pom Poms: Using Regular Household Items
Believe it or not, you don’t even need to invest in any specialized templates or tools to make pom poms. Here are some household items you can use to create your own unique pom poms:
- Fork: wrap yarn around the tines of a fork, then tie it off and cut the loops. Use the same method as above to shape and trim the pom pom.
- Toilet paper roll: wrap yarn around the roll, then tie and cut it as above. Use scissors to cut the pom pom into a halo shape and trim as desired.
- Comb: hold a few strands of yarn together, then weave them through the teeth of a comb. Tie and cut as above, then pull the pom pom off the comb and trim as needed.
These methods may require a bit more patience and dexterity, but they can produce some cute and quirky pom poms that you won’t find anywhere else. Plus, you’re repurposing items that would otherwise be thrown away, which is a win-win.
5 Creative Ways to Use Pom Poms in Your Home Decor
Now that you have your pom poms, it’s time to put them to use! Here are five fun and easy ways to incorporate pom poms into your home decor:
- Pom pom garland: string several pom poms on a piece of twine or ribbon to make a colorful and festive garland. Hang it above a doorway, on a mantel, or across a window.
- Pom pom rug: glue or sew pom poms onto a plain or patterned rug to add some texture and whimsy. You can choose a monochromatic or rainbow-colored scheme.
- Pom pom flowers: glue pom poms to stems of fake flowers and arrange them in a vase or pot. This is an ideal solution for those who love the look of flowers but don’t want the maintenance.
- Pom pom pillow: sew or glue pom poms onto a plain or patterned pillow to create a cozy and playful accent. You can use matching or contrasting colors to enhance the pattern.
- Pom pom curtain: attach pom poms of various sizes to the edges of a plain or sheer curtain. This will give your windows a charming and eye-catching detail.
These are just a few ideas to get you started – don’t be afraid to experiment and come up with your own unique projects!
Pom Pom Garlands: A Fun DIY Project for Parties and Events
If you’re hosting a special occasion, such as a birthday party or wedding, pom pom garlands are a great way to add some festive flair. Here’s how to make your own:
- Choose the colors and sizes of your pom poms. You can use a variety of shades for a more eclectic vibe, or stick to a specific palette for a cohesive look.
- String the pom poms onto a piece of twine or ribbon. Leave some space between each pom pom, but not too much so that they don’t look disconnected.
- Secure the pom poms in place with knots or glue, depending on the weight and size of the pom poms. Make sure the garland is sturdy and won’t fall apart.
- Hang the garland where desired, using command hooks or tape to ensure it stays up.
You can customize your garland further by adding tassels, beads, or other embellishments. You can also use different textures or fabrics for the string, such as ribbon or jute. The possibilities are endless!
Pom Pom Fashion: Styling and Decorating Your Clothes and Accessories
If you’d like to take your pom pom obsession to the next level, you can incorporate them into your wardrobe and accessories. Here are some ideas:
- Attach a pom pom to your keychain, purse, or backpack for a cute and colorful accent.
- Make a pom pom hat by gluing or sewing pom poms onto a plain beanie or knit hat. This will keep you warm and stylish in the winter.
- Decorate your shoes or sandals with pom poms for a bohemian or beachy look. Use hot glue or thread to attach them securely.
- Sew pom poms onto the hem or sleeves of a simple shirt or dress for a pop of color and texture. You can use contrasting or matching colors to complement the fabric.
- Create a pom pom necklace or bracelet by stringing them onto a chain or cord. You can mix and match sizes and colors for a playful and versatile accessory.
Remember to balance out the pom poms with other elements in your outfit, such as solid colors or simple patterns. You don’t want to look like you’re wearing a costume or distract from the rest of your ensemble.
Conclusion
We hope this article has inspired you to try your hand at making pom poms and incorporating them into your life. Whether you’re a beginner or a seasoned crafter, there’s always something new to discover and create. If you have any questions or feedback, feel free to reach out to us.