I. Introduction
If you’re looking for a fun and creative way to decorate your home or give a homemade gift, making paper roses is a great option. Paper roses are relatively easy to create, and they are perfect for all kinds of occasions, from weddings and anniversaries to Valentine’s Day and Mother’s Day.
In this article, we will provide a step-by-step guide on how to make paper roses, as well as offer tips for creating realistic-looking petals and leaves. We will also introduce a video tutorial to supplement the written instructions, showcase an inspirational gallery of various paper rose designs, and provide creative variations that will help you achieve unique shapes and sizes of paper roses. Lastly, we will suggest materials and templates for creating themed paper roses, list common mistakes to avoid, and provide a detailed list of recommended tools and materials.
II. Step-by-Step Guide
Before we dive into the steps for making paper roses, let’s first go over the materials you’ll need:
- Colored paper or tissue paper
- Scissors
- Glue
- Green floral tape or green crepe paper
Now that you have your materials, here are the basic step-by-step instructions on how to make paper roses:
- Start by cutting out a circle from your colored paper or tissue paper. The size of the circle will determine the size of your paper rose, so don’t be afraid to experiment with different sizes.
- Cut a spiral into the circle, starting from the outside and working your way in. The spiral should be about 1½ to 2 inches wide. Be sure to leave a small circle in the center of your spiral.
- Once you have cut your spiral, use your fingers to gently roll up the spiral from the outer edge to the center. This will form the center of your paper rose.
- Next, cut out five petals from your colored paper or tissue paper. The shape of the petals can vary, but we suggest making them teardrop-shaped for a more realistic look.
- Glue the petals to the center of your spiral, arranging them in a circular pattern around the center. Be sure to overlap each petal slightly to create depth.
- After you have glued all the petals to the center, use your fingers to gently curl the edges of the petals upward to give them a more realistic look.
- To create the stem and leaves, cut a strip of green floral tape or green crepe paper. Cover the stem and shape the leaves as desired.
- Finally, use a dot of glue to attach the stem and leaves to the bottom of your paper rose. And voila- your paper rose is complete!
Please note that there are a variety of ways to create paper roses, and these steps should be seen as a starting point. Don’t be afraid to experiment with different materials and methods to create the perfect paper rose for your needs.
III. Video Tutorial
If you prefer a more visual tutorial, we have included a video that will walk you through the steps of making a paper rose.
In addition to the video tutorial, we want to provide additional information to complement the video, such as detailed descriptions and tips. For example, while the video shows how to make roses using tissue paper, you can also use other types of paper such as crepe paper, book pages, scrapbook paper, etc. Just keep in mind that heavier paper will be harder to fold and maneuver.
IV. Inspirational Gallery
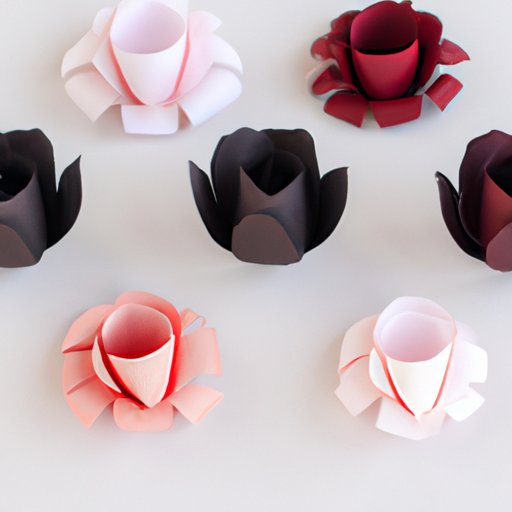
Looking for some inspiration? Look no further than this gallery of paper rose designs made by DIY artists.


Each paper rose design uses different materials and techniques to create unique looks, such as ombre colors, glitter accents, and texture. You can experiment using these designs as inspiration to create your own custom paper roses.
V. Creative Variations
If you’re looking to achieve different shapes and sizes of paper roses, here are some creative variations to try:
- Create a different petal shape: Try a heart-shaped or circular petal shape to create a completely different look.
- Use different materials: Instead of paper, try using fabric or ribbon to create a more dimensional look.
- Make a giant paper rose: Use large sheets of paper and create a larger spiral to make a statement piece.
VI. Themed Paper Roses
If you’re looking to make paper roses for a specific occasion, here are some themed paper roses to try:
- Holiday paper roses: Create paper roses in holiday colors, such as red and green for Christmas or pastel colors for Easter.
- Seasonal paper roses: Use colors and textures that represent the season, such as orange and yellow for fall or pastel colors for spring.
- Event paper roses: Create paper roses in colors that represent a specific event, such as blue and pink for a baby shower or white and gold for a wedding.
When making themed paper roses, don’t be afraid to incorporate different materials, such as glitter, ribbon, or sequins, to enhance the look and feel of your paper roses even further.
VII. Common Mistakes to Avoid
While making paper roses is relatively simple, it’s also possible to make some common mistakes.
- Using too much glue: Using too much glue can leave visible glue lines that will detract from the overall look of your rose. Instead, use small dots of glue to prevent this from happening.
- Tearing the paper: When rolling up the spiral, it’s easy to tear the paper if you’re not careful. Be sure to handle the paper gently and avoid pulling too hard as you roll it up.
- Not overlapping petals: Overlapping petals is essential to give your paper rose depth and dimension. Be sure to overlap each petal slightly as you glue them to the center.
By keeping these common mistakes in mind and practicing patience and care when crafting, you’ll be able to create stunning paper roses in no time.
VIII. Recommended Tools
While making paper roses doesn’t require many tools, having the right supplies can make the process even easier. Here is a list of recommended tools and materials:
- Scissors
- Colored paper or tissue paper
- Glue
- Green floral tape or green crepe paper
- Wire cutters
- Floral wire
- Small paintbrush
- Paper cutter
If you’re on a budget or aren’t interested in investing in a lot of crafting supplies, you can always find budget-friendly alternatives to achieve similar results. For example, you can use regular household scissors instead of wire cutters or substitute floral tape with green masking tape.
IX. Conclusion
In conclusion, making paper roses is a fun and rewarding craft that can be enjoyed by people of all ages. With the step-by-step guide, video tutorial, and creative variations provided in this article, you should have everything you need to get started on your own paper rose creations. Remember to have fun and experiment with different materials and techniques to create unique looks that fit your personality and style.