I. Introduction
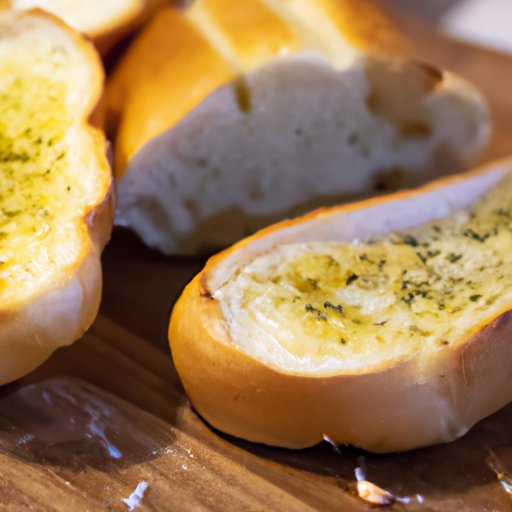
Garlic bread is a staple at any dinner table. It’s savory, buttery, and perfect for sopping up sauce or soup. But for many, making garlic bread from scratch can be intimidating. From the right loaf to the perfect amount of garlic, there are many factors to consider. That’s where this article comes in. We’re here to guide you through the process and provide helpful tips and tricks to make garlic bread making a breeze.
II. Why Garlic Bread is a Must-Have
Not only is garlic bread delicious, it also has health benefits. Garlic contains allicin, which has antimicrobial properties that can help boost your immune system. Eating garlic also helps lower blood pressure and cholesterol levels. And let’s be honest, we all need a little comfort food in our lives. Garlic bread is the ultimate comfort food, and it’s worth the effort to learn how to make it.
III. Garlic Bread 101: The Ultimate Guide to Making the Perfect Loaf
Before we dive into the process, let’s make sure you have everything you need. For a classic garlic bread recipe, you’ll need:
- 1 loaf of Italian or French bread
- 1/2 cup of unsalted butter
- 4 cloves of garlic
- 2 tablespoons of parsley
- 1/4 teaspoon of salt
For tools, you’ll need:
- A serrated knife
- A mixing bowl
- A baking sheet
- A silicone brush
Now that you’re equipped, let’s dive into the process.
1. Preheat your oven to 400°F.
2. Melt the butter in a microwave-safe bowl. Finely chop the garlic and add it to the butter, along with the parsley and salt. Mix well.
3. Cut the bread into even slices, but don’t cut all the way through. Leave about 1/4-inch at the bottom.
4. Use a silicone brush to spread the garlic butter mixture on each slice of bread. Make sure to get the butter in between the slices as well.
5. Wrap the loaf in aluminum foil and place it on a baking sheet. Bake for 20-25 minutes, or until the bread is crispy and the butter is melted.
6. Remove from the oven and let cool for a few minutes before serving.
And voila! You have a delicious, homemade garlic bread to impress your dinner guests.
If you’re a visual learner, there are many helpful videos online that break down the process even further. Don’t be afraid to check them out!
IV. 4 Simple Steps to Making Mouthwatering Garlic Bread
Here’s a brief overview of the step-by-step process, along with some tips and tricks to make the process smoother and more successful:
1. Choose the right bread. Italian or French bread works best for garlic bread, but you can experiment with other types as well. Just make sure the bread is fresh and crusty.
2. Don’t skimp on the butter. The butter is what gives garlic bread its rich, buttery flavor. Make sure to use high-quality butter, and don’t be afraid to use a generous amount.
3. Add extra flavor. While garlic and butter are the stars of the show, you can also experiment with other ingredients like cheese, herbs, or even pesto.
4. Don’t overdo it. Too much garlic can be overwhelming, so make sure to use the right amount. And be careful not to burn the garlic when you’re cooking it with the butter.
V. How to Make Garlic Bread from Scratch in Under 30 Minutes
If you don’t have the time or patience for the classic garlic bread recipe, there’s a quicker alternative. Here’s a recipe for garlic bread from scratch in under 30 minutes:
- 1 loaf of French bread
- 1/4 cup of unsalted butter
- 3 cloves of garlic, minced
- 1/2 teaspoon of dried basil
- 1/2 teaspoon of dried oregano
- 1/2 teaspoon of garlic powder
- 1/2 cup of grated Parmesan cheese
1. Preheat your oven to 350°F.
2. Melt the butter in a microwave-safe bowl. Add the garlic, basil, oregano, and garlic powder, and mix well.
3. Cut the bread into even slices.
4. Use a silicone brush to spread the garlic butter mixture on each slice of bread. Sprinkle Parmesan cheese on top.
5. Place the slices of bread on a baking sheet and bake for 10-12 minutes, or until the cheese is melted and bubbly.
And there you have it! A quick and easy garlic bread recipe that’s perfect for busy weeknights.
VI. The Perfect Garlic Bread Recipe: A Step-by-Step Guide
If you want to perfect your garlic bread recipe even further, here’s a more detailed recipe:
- 1 loaf of Italian bread
- 1/2 cup of unsalted butter, softened
- 3 cloves of garlic, minced
- 2 tablespoons of chopped fresh parsley
1. Preheat your oven to 375°F.
2. Cut the bread into even slices, without cutting all the way through. Leave about 1/4-inch at the bottom.
3. Mix the butter, minced garlic, and parsley in a bowl until well combined.
4. Use a butter knife to spread the garlic butter mixture inside each slice of bread. Make sure to get the butter in between the slices as well.
5. Wrap the loaf in aluminum foil and bake for 15-20 minutes, or until the bread is crispy and the butter is melted.
6. Remove from the oven and let cool for a few minutes before serving.
If you want to switch things up, you can also add cheese, herbs, or other seasonings to the butter mixture. And if you’re feeling adventurous, you can even try making your own homemade bread.
VII. A Foolproof Guide to Making Delicious Garlic Bread Every Time
Here are some additional tips and tricks to ensure your garlic bread turns out perfectly every time:
- Make sure the bread is fresh and crusty. Stale bread won’t hold up as well and won’t be as flavorful.
- Don’t forget to preheat your oven. This ensures even cooking and a crispy exterior.
- Experiment with different types of bread. Italian and French bread are classic choices, but you can also try sourdough, ciabatta, or even focaccia.
- Use high-quality butter and fresh garlic. The ingredients you use make all the difference in the flavor of your garlic bread.
- Don’t skimp on the garlic. While too much garlic can be overwhelming, you also want to make sure you’re using enough to get that delicious garlicky flavor.
If you encounter any problems along the way, don’t panic. Here are some common issues and how to troubleshoot them:
- Bread is too dry: Brush a little olive oil on the bread before adding the garlic butter mixture.
- Bread is too soggy: Make sure you’re using the right amount of butter. If the bread is too moist, it won’t crisp up properly in the oven.
- Bread is burnt: Check the oven temperature and make sure your bread isn’t too close to the heating element. You can also cover the bread with aluminum foil to prevent burning.
- Butter is separating: Make sure the butter is at room temperature before mixing in the garlic and other ingredients. If the butter is too cold, it won’t mix well.
VIII. Making Garlic Bread Like a Pro: Tips and Tricks
If you want to take your garlic bread game to the next level, here are some pro tips:
- Add other seasonings: While garlic is the star of the show, you can add other seasonings like rosemary, thyme, or red pepper flakes for a personalized touch.
- Toast the bread first: For an extra crispy exterior, toast the bread in the oven for a few minutes before adding the garlic butter.
- Grill the bread: If you’re feeling adventurous, you can grill the bread instead of baking it. Just make sure to keep an eye on it so it doesn’t burn.
- Make garlic knots: If you want to switch things up, try making garlic knots instead of traditional garlic bread. Cut the bread dough into small pieces, tie them into a knot, and brush with garlic butter before baking.
- Use different cheeses: Parmesan is a classic choice for garlic bread, but you can also try other types of cheese like mozzarella, cheddar, or feta.
IX. Mastering the Art of Garlic Bread: A Beginner’s Guide
By now, you should be well on your way to becoming a garlic bread making pro. To recap:
- Choose the right bread
- Don’t skimp on the butter and garlic
- Experiment with different seasonings and cheeses
- Don’t be afraid to troubleshoot any problems that arise
- And most importantly, have fun!
Garlic bread is a delicious and comforting addition to any meal. With a little practice and some helpful tips, you’ll be making mouthwatering garlic bread in no time.
X. Conclusion
Making your own garlic bread from scratch may seem intimidating at first, but it’s worth the effort. Not only is it a delicious addition to any meal, it also has health benefits. And with the help of this article, you now have all the tools and tips you need to make the perfect loaf of garlic bread every time.
Don’t be afraid to experiment with different breads, seasonings, and cheeses to make your garlic bread truly your own. And if you have any personal anecdotes or stories about your garlic bread making journey, feel free to share them in the comments below.