Introduction
If you love baking, then you know that fondant is an important ingredient for creating beautiful and elegant cakes. However, making fondant can be a daunting task for beginners. The good news is that with a step-by-step guide, recipe, video tutorials, case study, and FAQ article, learning to make fondant is easier than you think. This article has put together all the necessary resources to help you make fondant like a pro.
A Step-by-Step Guide
If you’re ready to dive in and make fondant from scratch, there are certain ingredients and tools you’ll need to have on hand. Before you get started, gather up the following:
- 4 cups sifted confectioner’s sugar
- 1/4 cup of cold water
- 1 tablespoon unflavored gelatin
- 1/2 cup corn syrup
- Food coloring (optional)
- Flavor extract (optional)
- Vegetable shortening
- Cornstarch
- Rolling pin
- Fondant smoother
Now that you have everything you need to make fondant, it’s time to get started. Follow these steps:
- In a small mixing bowl, add the cold water and unflavored gelatin, then stir to combine. Allow the gelatin to sit and absorb the water for a few minutes.
- In a large mixing bowl, add the sifted confectioner’s sugar and corn syrup. Mix until the ingredients are well combined.
- Add the gelatin mixture to the bowl and mix until fully incorporated. If the mixture is too dry, add more corn syrup, one tablespoon at a time. Similarly, if it’s too sticky, add more confectioner’s sugar, one tablespoon at a time.
- Sift a small amount of cornstarch onto a flat surface. Place the fondant mixture on top of the cornstarch. Using a rolling pin, roll out the fondant to your desired thickness. Sprinkle cornstarch as needed to help prevent the fondant from sticking.
- Once the fondant is rolled out, use the rolling pin to lift the fondant from the surface. Gently drape the fondant over the cake, using your hands to smooth out any creases or wrinkles.
- Use the fondant smoother to smooth out the surface of the fondant and remove any air bubbles. Trim away any excess fondant from the bottom of the cake. You can now decorate the fondant as desired!
Remember, making fondant can be a bit of a tricky process. Here are some additional tips and tricks to help you along the way:
- When mixing the fondant, use a stand mixer if available. Otherwise, a hand mixer will work just fine.
- Be sure to measure the ingredients accurately to ensure the best results.
- If you’re having trouble getting the consistency just right, try adjusting the amount of corn syrup or confectioner’s sugar until it’s just right.
- Use vegetable shortening on your hands and rolling pin to prevent sticking. Cornstarch also works well.
Recipe Article
For those who want a more detailed recipe for making fondant, here’s everything you need to know:
Ingredients:
- 4 cups sifted confectioner’s sugar
- 1/4 cup of cold water
- 1 tablespoon unflavored gelatin
- 1/2 cup corn syrup
- Food coloring (optional)
- Flavor extract (optional)
- Vegetable shortening
- Cornstarch
Instructions:
- In a small mixing bowl, add the cold water and unflavored gelatin, then stir to combine. Allow the gelatin to sit and absorb the water for a few minutes.
- In a large mixing bowl, add the sifted confectioner’s sugar and corn syrup. Mix until the ingredients are well combined.
- Add the gelatin mixture to the bowl and mix until fully incorporated. If the mixture is too dry, add more corn syrup one tablespoon at a time. Similarly, if it’s too sticky, add more confectioner’s sugar, one tablespoon at a time.
- Add food coloring or flavor extract, if desired, and mix until evenly distributed.
- Sift a small amount of cornstarch onto a flat surface. Place the fondant mixture on top of the cornstarch. Using a rolling pin, roll out the fondant to your desired thickness. Sprinkle cornstarch as needed to help prevent the fondant from sticking.
- Once the fondant is rolled out, use the rolling pin to lift the fondant from the surface. Gently drape the fondant over the cake, using your hands to smooth out any creases or wrinkles.
- Use the fondant smoother to smooth out the surface of the fondant and remove any air bubbles. Trim away any excess fondant from the bottom of the cake.
- You can now use the fondant to create any decorations you like by shaping it and cutting it to the desired shapes and sizes.
You can also experiment with different flavors and colors of fondant to create fun and unique decorations for your cakes. Try adding a teaspoon of vanilla extract, almond extract, or lemon zest to the fondant before mixing. You can also add food coloring to create any color you like.
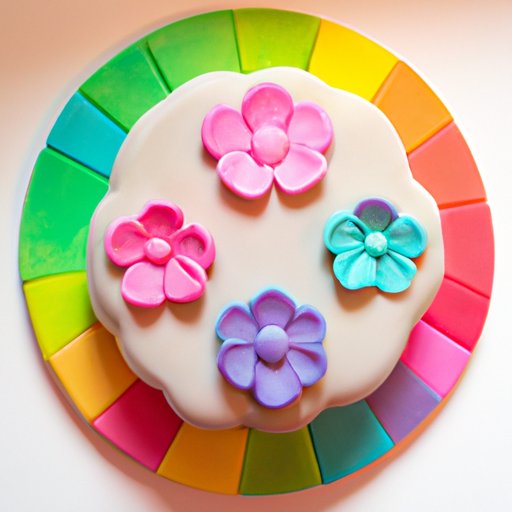
Finally, try using fondant to create fun cake toppers, flowers, and other decorations. With a little bit of practice, you’ll be able to make perfect fondant decorations every time.
Short Video Tutorials
If you’re more of a visual learner, watch these tutorial videos that show each step of making fondant, from mixing the ingredients to decorating the cake:
- How to Make Fondant from Scratch: Mixing the Ingredients
- How to Make Fondant from Scratch: Kneading the Dough
- How to Make Fondant from Scratch: Rolling Out the Fondant
- How to Make Fondant from Scratch: Decorating the Cake
These videos provide helpful visual cues and demonstrations to ensure that you understand each step of the process. They also include captions or voiceover to help explain each step.
Case Study Article
Meet Samantha, a home baker who was intimidated by the thought of making fondant from scratch.
For a long time, Samantha had been interested in learning to make fondant. She had seen so many beautiful cakes decorated with fondant, and she wanted to try it out for herself. However, she was worried that making fondant would be too difficult.
Finally, Samantha decided to take the plunge and try making fondant at home. She used the recipe and step-by-step guide provided in this article and was thrilled with the results. Samantha found that the most challenging part of making fondant was getting the consistency just right, but with some practice, she was able to master it.
Now, Samantha loves making fondant and has even started her own cake decorating business. She has found that fondant allows her to create unique and beautiful cakes that her customers love. Her favorite part of making fondant is trying out different flavors and colors to create fun and exciting decorations.
If Samantha can do it, so can you.
FAQ Article
Here are some of the most frequently asked questions about making fondant:
Q: Is making fondant difficult?
A: Making fondant can be a bit tricky, but with the right recipe and step-by-step guide, it is definitely doable. The most challenging part is getting the consistency just right, but with some practice, you’ll be able to master it.
Q: Can I make fondant without a stand mixer?
A: Yes, you can make fondant without a stand mixer. A hand mixer will work just fine, or you can mix the ingredients by hand. The key is to mix the ingredients thoroughly until they are well combined.
Q: How long does fondant last?
A: Fondant generally lasts for several weeks if stored correctly. Wrap it in plastic wrap and keep it in an airtight container at room temperature. You can also store fondant in the fridge for up to a month, but allow it to come to room temperature before using it.
Q: Can I use fondant to cover cupcakes?
A: Yes! Fondant is a great way to add unique decorations to cupcakes. Roll out the fondant and cut it into small circles or shapes. Gently drape the fondant over the cupcake and smooth it out with your fingertips or a fondant smoother.
Q: Can I color fondant with gel food coloring?
A: Yes, gel food coloring works well for coloring fondant. Simply add a small amount of gel food coloring to the fondant and knead it until the color is evenly distributed.
For more information about making fondant, check out these resources:
Conclusion
Learning to make fondant is an excellent skill to have as a baker. With a little bit of practice and patience, anyone can master the art of making fondant. This article has provided a comprehensive guide, recipe, video tutorials, case study, and FAQ article to help you make fondant like a pro. So, grab your ingredients and tools and get started today!
Remember, making fondant takes practice, but it’s well worth the effort. After all, there’s nothing more satisfying than creating a beautiful and delicious cake decorated with your very own handmade fondant creations.