Introduction
Palm crosses carry a lot of symbolism and significance, especially for those who celebrate religious holidays. These crosses are usually made out of palm leaves, which represent the palm branches that were laid on the ground to welcome Jesus during His entry into Jerusalem. Making a palm cross can be simple, yet rewarding, task to do alone or with friends and family. This article provides step-by-step instructions and creative customization ideas to make your own unique palm cross.
Step-by-Step Tutorial
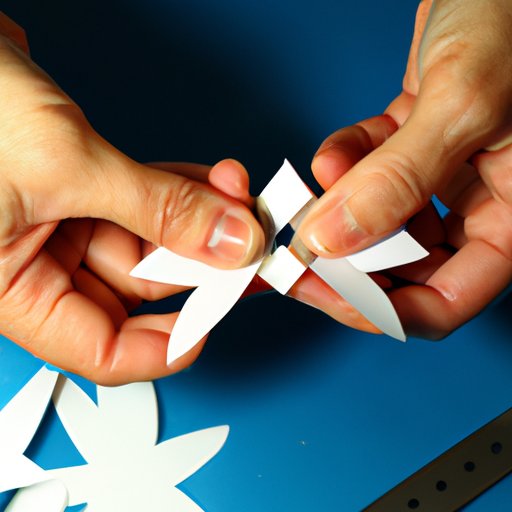
The materials you will need to make a palm cross include palm leaves, scissors, and a ruler. Start by cutting two pieces of palms, one about twice the length of the other. Follow these steps:
1. Take the longer palm and fold it in half.
2. Bend the top of the palm down to make the first arm of the cross.
3. About halfway down the palm, twist the palm around to form the base of the cross.
4. Bend the shorter piece of palm in the middle to make the second arm of the cross.
5. Place the shorter palm on top of the longer one, wrapping the end of the shorter palm around the longer palm.
6. Weave the end the shorter piece under the base of the cross.
7. Fold the palm down and under the base of the cross to lock it in place.
Follow this simple tutorial to create a beautiful, traditional palm cross.
Origami-Inspired Design
Origami is the art of paper folding that generates intricate designs. Acknowledging the intricate design elements, follow these steps to create an origami-inspired palm cross:
1. Start with two palm leaves, as before, but this time tape them together at the top, so that the longer leaf lies over the shorter leaf.
2. Bend the leaves at the intersection, forming the first arm of the cross.
3. Keeping the center intact, bring the longest part of the leaves downwards, then tuck it beneath the crosses’ intersection.
4. Bend the leaves on either side to form the other arm of the cross.
5. Weave the tips under the woven strand and push them up through the hollow center.
6. Fold down the piece at the top and press that to form a third arm extending in the opposite direction.
7. Tuck the ends of the palm under the woven area and form the upper part of the cross’s base.
This technique requires a bit more effort and patience, but the result is spectacular.
Palm Crosses Around the World
Palm crosses are not just an essential part of religious celebrations. In various regions worldwide, different cultures also create their own unique crosses, with varying techniques and designs.
In Latin America, for instance, palm crosses incorporate flowers or vibrant ribbons. The traditional technique involves braiding three pieces of palm leaves that join at the center of the cross.
In Europe, particularly in Scandinavian countries, the palm cross-making technique is intricate and complex. Dyed palm or straw plaiting is done in various patterns, creating an intricate design.
In Asia, such as the Philippines, palm leaves woven into crosses are immersed in holy water to be blessed.
Follow these links for a step-by-step guide:
a. Latin American Palm Cross
b. Norwegian Palm Cross
c. Filipino Palm Cross
Video Tutorial
If you find the instructions too daunting, follow through with this step-by-step Palm Cross video tutorial.
Customization Ideas
Once you’ve mastered the art of basic palm crosses, try customizing them by including beads, bows, or ribbons to add personality and flair. A simple bow added to the center, or perhaps adding those unique decorative elements, will turn a plain palm cross into a unique and personal design.
Conclusion
Making a palm cross can be a simple and rewarding experience, especially during a holiday season. They double as strong religious pieces and fabulous decorative pieces. From basic techniques to intricate origami designs, there is a palm cross style that would suit any skill level, regardless of the occasion. Remember to add your own special touch to your palm cross to make it more personal and memorable.