Introduction
Cornhole has become a favorite pastime for many people. It is a simple game that can be played by people of all ages and skill levels. All you need is a set of cornhole boards and some bean bags, and you are ready to play. Unfortunately, it can be challenging to find high-quality cornhole boards at a reasonable price. That is why many people choose to make their own. This article provides a complete guide to building your own cornhole boards from scratch.
DIY Guide to Building Cornhole Boards from Scratch
When we say “building cornhole boards from scratch,” we mean starting with a pile of lumber and turning it into a set of finished cornhole boards. While this may sound daunting, it is a relatively simple process that can be accomplished by anyone with a few basic woodworking tools and some patience.
There are several advantages to building your own cornhole boards instead of buying pre-made ones. First, you have complete control over the quality of the materials used, which means you can build a set of boards that will last for years. Second, you can save money by purchasing the materials and building the boards yourself. Third, there is a sense of satisfaction that comes from completing a DIY project like this.
Here are the tools and materials you will need to build your own cornhole boards:
- Two 2-foot by 4-foot sheets of 1/2-inch plywood
- Four 8-foot 2x4s
- A circular saw or a miter saw
- A jigsaw or a hole saw
- A drill with a 1/2-inch drill bit and a screwdriver bit
- A tape measure
- A pencil
- Sandpaper
- Wood glue
- 2 1/2-inch wood screws
- Exterior paint (optional)
Step-by-Step Instructions on Crafting Your Own Cornhole Game Set
Building cornhole boards from scratch is a straightforward process that involves cutting and assembling pieces of plywood and lumber. Here are the step-by-step instructions:
- Begin by cutting the plywood sheets in half so that you have four pieces that are each 2 feet by 2 feet.
- Lay one of the plywood pieces flat on a work surface.
- Cut the 2x4s into four 21-inch pieces and four 15-inch pieces.
- Attach the 21-inch pieces to the edges of the plywood square with wood glue and two 2 1/2-inch wood screws per corner.
- Attach the 15-inch pieces to the corners with wood glue and two 2 1/2-inch wood screws per corner. Make sure the corners are square.
- Flip the platform over and sand the edges and corners until they are smooth.
- Repeat steps 2-6 to build the second platform.
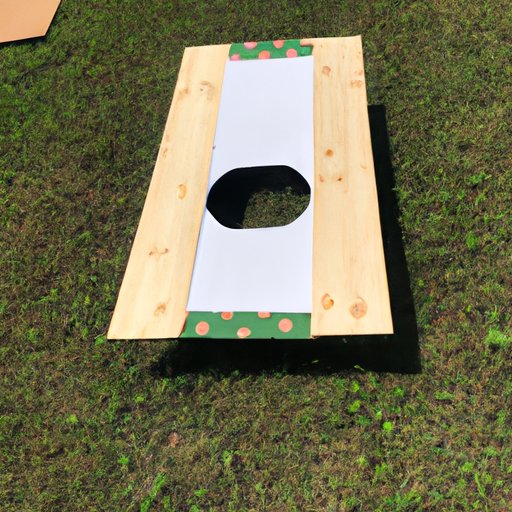
- Measure and mark the center of each platform 9 inches from the top edge and 12 inches from the sides.
- Use a hole saw or a jigsaw to cut a 6-inch diameter hole at each center point.
- Sand the holes until they are smooth.
- Paint or stain the boards if desired.
That’s it! Once the paint or stain is dry, your cornhole boards are ready to use.
A Beginner’s Guide to Making Your Own Cornhole Boards
If you are new to woodworking, building cornhole boards from scratch may seem like an intimidating project. However, it is a relatively simple process that can be broken down into smaller steps. Here are some tips for beginners:
- Invest in good tools. While you do not need the most expensive tools, having tools that are in good working condition can make a big difference in the quality of your finished project.
- Take your time. Rushing through the process can lead to mistakes that can be difficult to correct.
- Choose high-quality materials. Using good materials can help ensure that your cornhole boards last for years.
Here are some specific tools and materials recommended for beginners:
- A circular saw or a miter saw
- A cordless drill
- A set of hole saws or a jigsaw
- 1/2-inch plywood
- 2x4s
- Exterior wood screws
- Sandpaper
- Wood glue
- Exterior paint (optional)
How to Build Custom Cornhole Boards for Tailgating and Backyard Fun
If you are looking to take your cornhole game to the next level, consider building custom cornhole boards. Custom boards allow you to add personal touches that make the game more enjoyable. Here are some ideas for customizations:
- Paint the boards with your favorite team’s colors.
- Add your team’s logo to the boards.
- Install LED lights around the edges of the boards for nighttime play.
- Install cup holders on each platform.
When building custom cornhole boards, it is important to use high-quality materials and take your time with the process to ensure that the finished product is both durable and aesthetically pleasing.
Spend a Weekend Making Your Own Cornhole Boards with These Easy Steps
If you are looking to complete the cornhole board building project in a weekend, here are some tips for working efficiently without sacrificing quality:
- Set up a workspace that is free of clutter and has adequate lighting.
- Work in batches. Cut all of the wood pieces at once, then assemble them in batches.
- Involve friends or family. Building cornhole boards can be a fun group activity.
With these tips, you should be able to complete the project in a weekend and be ready to play cornhole in no time.
From Plywood to Perfect: Creating Your Own Cornhole Boards at Home
Building cornhole boards from scratch is a fun and satisfying DIY project that anyone can do, regardless of experience level. With some basic tools and materials, you can turn a pile of lumber into a set of high-quality cornhole boards that will provide years of entertainment. Plus, once you have completed this project, you may be inspired to try building other things from scratch.
Conclusion
Having a high-quality set of cornhole boards is essential for a good game. While it can be challenging to find good boards at a reasonable price, building your own is a viable option that is both fun and rewarding. Whether you are a beginner or an experienced woodworker, building cornhole boards from scratch is a fun project that anyone can enjoy.