How to Make Bracelets: A Comprehensive Guide for Beginners
Making bracelets is a fun and fulfilling hobby. Whether you want to create unique pieces of jewelry for yourself or give them as gifts to friends and family, this article will guide you through the process from start to finish.
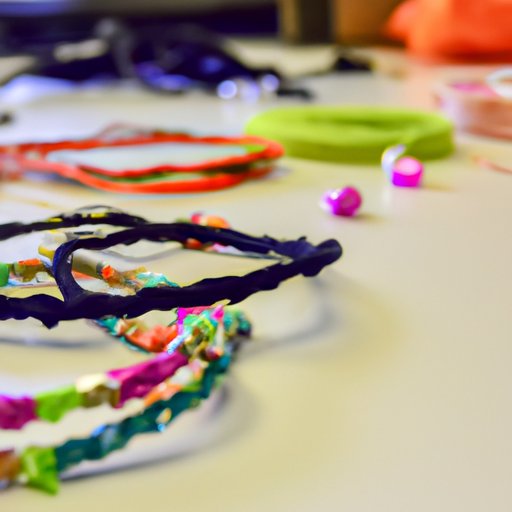
Materials and Tools
Before you begin making bracelets, you need to have the right materials and tools. Some of the essential items you will need include:
- Beads – There are many types of beads available, such as glass, crystal, plastic, and wood. Choose beads that match the style and color scheme you want to achieve.
- Cords and wires – You can use different cords and wires, such as stretch elastic, leather, nylon, and memory wire, to string your beads and create different bracelet styles.
- Clasps – Clasps are essential in securing and fastening your bracelets to your wrist. Some common types of closures include lobster clasps, toggle clasps, and magnetic clasps.
- Pliers – You will need a pair of pliers to open and close the jump rings or to crimp the wire used to fasten the clasps.
You can buy these materials from craft stores, bead shops, or online sellers. Be sure to read reviews and check the legitimacy of the seller before making a purchase.
Beginner’s Guide
If you are new to bracelet making, it’s important to choose the right materials that are easy to work with. Stretch elastic cord and plastic beads are excellent options for beginners. Here are some tips to get started:
- Choose beads that are easy to handle, such as small glass or plastic beads in solid colors.
- Pick a simple design, such as stringing the beads onto the stretch cord and securing them with a knot or crimp bead.
- Measure the wrist size before stringing the beads to ensure a proper fit.
- Tie a knot or use crimp beads to secure the stretch cord and attach the clasp.
- If the bracelet stretches out over time, restring the beads onto a new cord.
If you encounter problems while making your bracelet, don’t worry. Common mistakes include using beads that are too large or complex, tying knots too tightly, or choosing the wrong type of cord or wire. Try different techniques and materials until you find what works for you.
Step-by-Step Guide
Now that you have learned the basics, you can move on to more complex designs. Here are step-by-step instructions for making two types of bracelets:
Simple Beaded Bracelet
- Measure the wrist size and cut a length of cord or wire that is 1-2 inches longer than the wrist.
- Pick out the beads you want to use and lay them out in the order you want to string them.
- String the beads onto the cord or wire, leaving about 1/2 inch of space on each end.
- Attach the clasp using pliers or a knot.
Woven Bracelet
- Cut four strands of cord or wire, each measuring about 12 inches.
- Knot the four strands together at one end and secure the knot to a surface, such as a clipboard or tape, to keep it steady.
- Weave the cords using the 4-strand round braid method by following these steps: Take the cord to the left of the bottom left strand and cross it over the top of that strand to get to the right side. Take the cord to the right of the top right strand and cross it over the top of that strand to get to the left side. Repeat this until you reach the desired length.
- Add beads to the cord or wire while you weave them by placing a bead onto one of the 4 strands before you cross it. Keep alternating sides with each bead.
- When you have reached the end, knot the strands together and attach the clasp using pliers or a knot.
Remember to add your own twist to these designs by choosing unique beads or adding charms and pendants.
Personalization
Adding personalized elements to your bracelet is an excellent way to make them unique. Consider engraving a metal tag with a name or a special date, attaching a charm with a favorite symbol, or adding birthstones or other gems. There are endless possibilities when it comes to personalizing bracelets.
Upcycling
Upcycling is the process of transforming old or discarded objects into new uses. You can upcycle materials, such as shoelaces, fabric scraps, bottle caps, or broken jewelry pieces, to make one-of-a-kind bracelets. Here are some ideas:
- Braid shoelaces or fabric strips to create a colorful and textured bracelet.
- String beads onto a piece of wire from an unused electronic device.
- Break apart old necklaces or bracelets to use the beads and string them onto new cord or wire.
- Create a button bracelet by stringing buttons onto elastic cord and securing it with a knot or crimp bead.
Conclusion
Making bracelets is a fun and rewarding activity that anyone can start. Whether you’re a beginner or an experienced crafter, there are endless design possibilities to explore. Remember to choose the right materials, follow the steps carefully, and add your own creativity to make your bracelet unique.